Showing posts with label Blogging Marathon. Show all posts

Monday, 27 May 2013

Veg Samosas


This is the 3rd post for BM#28 under Samosas with different filling.
This is a very simple Samosa recipe. I have used self raising flour instead of plain flour in this recipe. Self Raising flour made the coating really fluffy. It was very crispy from out & soft/ fluffy inside.  You can add in more vegetables if you want. I just added potatoes & Peas. I am feeling very guilty after eating Samosas for the last 2 days. I now need to swim for longer duration to get rid of all those extra fat that I have put on in the last few days.


Makes: 10 medium size samosas

Ingredients:
For the filling:
  • 2 Potatoes boiled
  • 1/4 cup green peas Boiled
  • 1 onions sliced
  • 1 Tbsp ginger garlic paste
  • 1/4 Tspn turmeric powder
  • 1 Tspn chili powder
  • 1/2 Tspn garam masala
  • 1/4 Tspn chat masala powder
  • Pinch of Amchoor powder
  • salt as per taste
  • Coriander leaves to garnish
  • 1 Tbsp Oil
  • Oil for deep frying
For the dough
  • 3 cups plain flour
  • 1/2 tspn cumin seeds
  • 1/4 tspn Ajwain seeds
  • salt as per taste
  • 2 Tbsp oil
  • 1/4 cup of water
Method:
  1. Make a soft dough (Like Chapathi) with all the ingredients mentioned in the dough list. Cover this at let it rest for 20 mins
  2. In a Pan add a Tbsp of oil, fry ginger garlic, onion until translucent.
  3. To it add in all the masalas & fry for a minute.
  4. Now mix in the boiled potatoes, green peas into the masala & give it a good mix. Also try & mash it a little.
  5. Finally Garnish the stuffing with chopped coriander leaves. Allow the stuffing to cool down
  6. Unwrap the soft dough. Sprinkle little flour and knead again for a minute.
  7. Divide the dough into 6 small balls, Dust it with flour & roll it to flat disc with a help of rolling pin.
  8. Now cut it two equal halves & take one of the sides, make it into a cone shape.
  9. Seal the edges with some water. Fill the cones with the stuffing & seal them again with some water.
  10. Heat oil in a deep frying pan & deep fry these samosas for about 2 - 3 mins. Make sure you deep fry them for 1 minutes on low flame, 1 minute on medium flame & 1 minute on high flame. Keep turning them while they are frying.
 

Check out the Blogging Marathon page for the other Blogging Marathoners doing BM#28


Sunday, 26 May 2013

Samosa with Chola Filling


This is my 2nd post for BM#28 under Samosas with different filling.

I have already mentioned in my previous post that I made 3 different filling samosas in one day. Well for the breakfast it was egg & chola samosa. I had some left over chola masala from previous nights dinner so thought will use these stuffing. Cholas also falls under chats category & we all know that will be definitely go well with the samosa. We had a very filling breakfast with these 2 varieties of samosas. This is how I made it.


Ingredients
Chola masala
  • 2 cup Chola/ Chick peas(Soaked in water overnight)
  • 1 tomatoes chopped
  • 1 onions chopped
  • 1 tbsp ginger garlic paste
  • 1.5 Tbsp Everest chole Masala
  • 1 Tbso oil
  • salt as per taste
  • 1 Tbsp lemon juice
  • Coriander leaves to garnish
For the Samosas
  • 3 cups plain flour
  • 1/2 tspn cumin seeds
  • 1/4 tspn Ajwain seeds
  • salt as per taste
  • 2 Tbsp oil
  • 1/4 cup of water
  • Oil for deep frying
Method:
  1. In a pressure cooker cook the cholas with 2 cups of water until its cooked & is soft. (Around 5- 8 mins)
  2. In a kadai/ pan add oil fry onions, ginger garlic until translucent
  3. Now add in chopped tomatoes, chole masala & fry thill until fat separation or the tomatoes are fully soft
  4. Now add in the cooked cholas (Chick peas) in to this & cook it on low flame until all water is drained off.
  5. Add in the chopped coriander leaves & lemon juice. The chole masala is ready
  6. Make a soft dough (Like Chapathi) with all the ingredients mentioned under samosas. Cover this & let it rest for 20 mins
  7. Unwrap the soft dough. Sprinkle little flour and knead again for a minute.
  8. Divide the dough into 6 small balls, Dust it with flour & roll it to flat disc with a help of rolling pin.
  9. Now cut it two equal halves & take one of the sides, make it into a cone shape.
  10. Seal the edges with some water. Fill the cones with the stuffing & seal them again with some water.
  11. Heat oil in a deep frying pan & deep fry these samosas for about 2 - 3 mins. Make sure you deep fry them for 1 minutes on low flame, 1 minute on medium flame & 1 minute on high flame. Keep turning them while they are frying.
 
Note:
 
Since I made the stuffing with left over chole, I had to fry the cholas again to make sure that I remove any excess moisture from the gravy.
 
 
Check out the Blogging Marathon page for the other Blogging Marathoners doing BM#28

Egg Samosa


This is my first post under Samosas with different filling for BM#28

Tell me who doe snot like Samosas. These little parcels are world famous now. Go to any parties or restaurants you will find these in their Appetiser menus. These days for convenience people just use the phillo pastry sheet to make quick samosas. Mostly Onion Samosas are made with these & phillo pastry sheet really make the samosas crunchy. I mostly avoid making deep fried items at home for us. I mostly do them when I have guests at home. My hubby loves samosas & that's why I though I will take up this theme Samosas with different filling.

when it comes to breakfast its mainly different varieties of Dosas without oil/ ghee, Oats idlis, Bread/egg, Idlis, Chapathi, Puttu, Appams. I rarely make Puris for breakfast & Its made may be once in 2 months or so. I made these Samosas yesterday for breakfast & also for evening Tea. I made 3 different filling samosas in one day. One of My friends also had come home in the evening so thought it will be nice to serve some of these. This is how I made them


Makes: 10 medium size samosas

Ingredients:
For the filling:
  • 2 Boiled eggs
  • 2 Potatoes boiled
  • 1 onions sliced
  • 1 Tbsp ginger garlic paste
  • 1/4 Tspn turmeric powder
  • 1 Tspn chili powder
  • 1/2 Tspn garam masala
  • 1/4 Tspn chat masala powder
  • Pinch of Amchoor powder
  • salt as per taste
  • Coriander leaves to garnish
  • 1 Tbsp Oil
  • Oil for deep frying
For the dough
  • 3 cups plain flour
  • 1/2 tspn cumin seeds
  • 1/4 tspn Ajwain seeds
  • salt as per taste
  • 2 Tbsp oil
  • 1/4 cup of water
Method:
  1. Make a soft dough (Like Chapathi) with all the ingredients mentioned in the dough list. Cover this at let it rest for 20 mins
  2. In a Pan add a Tbsp of oil, fry ginger garlic, onion until translucent.
  3. To it add in all the masalas & fry for a minute.
  4. Chop the eggs into small cubes & set aside.
  5. Now mix in the boiled potatoes into the masala & give it a good mix. Also try & mash it a little.
  6. Now fold in the eggs in this turn off the flame.
  7. Finally Garnish the stuffing with chopped coriander leaves.All the stuffing to cool down
  8. Unwrap the soft dough. Sprinkle little flour and knead again for a minute.
  9. Divide the dough into 6 small balls, Dust it with flour & roll it to flat disc with a help of rolling pin.
  10. Now cut it two equal halves & take one of the sides, make it into a cone shape.
  11. Seal the edges with some water. Fill the cones with the stuffing & seal them again with some water.
  12. Heat oil in a deep frying pan & deep fry these samosas for about 2 - 3 mins. Make sure you deep fry them for 1 minutes on low flame, 1 minute on medium flame & 1 minute on high flame. Keep turning them while they are frying.
 

Check out the Blogging Marathon page for the other Blogging Marathoners doing BM#28

Monday, 13 May 2013

Mango Kulfi


This is my 2nd entry for BM 28 under Mango delight!

I love Kulfi & used to buy them more often while I was in Bangalore. In Singapore we order this for dessert while we are dining out at Indian restaurants. Well I always thought making this might be difficult at home & never bothered to look up the net for the recipe. Accidental I came across a post from "cooking" on Mango Kulfi & the recipe sounded very simple. Since I had all the ingredients, I gave it a shot. My impatient hubby wanted to eat it even before it could set & succeeded in it. He kept coming into the kitchen asking for more & I had to shoo him off every time:) I must say that this tastes good in all forms: hot, chilled & frozen. I chilled some for  my lill zion & he loved it. Well the Kulfis will take at least 4 to 6 hours to set completely. So you need to be really patient:) I did not add the fresh Mango puree as the Mangoes were not very tasty so I used Essence These kulfis are very rich, milky & delicious. This is how I made


Makes around 8 Kulfis
Source: Cooking

Ingredients:
  • 3 cups whole Milk
  • 1 tin condensed Milk
  • 1/4 tspn cardamom powder
  • 1 tspn Mango essence
  • Pinch of salt
  • 1 Tbsp Corn flour
  • 1/4 cup water
  • Fresh Mangoes for garnish

Method:
  1. Boil the milk & condensed milk on low flame for about 15 to 20 mins. The milk has to become thick & reduce in amount. Keep stirring in between.
  2. Now add in cardamom powder, essence & salt.
  3. Dissolve the cornflour in little water & add this mixture to the Milk. Keep stirring & boil this for about a minute. Turn off the flame & let it cool
  4. Once cooled completely, pour this liquid into a kulfi mould or Popsicle mould.Freeze this for about 4 to 6 hours.
  5. Before serving just keep the mould under running water so that the Kulfi releases easily.
  6. Serve chilled with some chopped Mangoes.
Check this step by step picture:


Check out the Blogging Marathon page for the other Blogging Marathoners doing BM#28

Sunday, 12 May 2013

Mango Cheese Cake

 
This is my 1st post under BM 28 under Mango special.

I made this cheese cake almost 2 weeks ago when we had gone to visit one of our friends place for lunch. I am a big fan of no bake cheese cakes & I find these desserts very light & tasty. You can see that I already have a good collection of no bake cheese cake recipes in my blog. Well all these pics were taken at my friends place. I really dint have much time to plate them. Some how managed to click from pics in their balcony. We all loved this cake & my friends hubby was all praises about this dessert. Unfortunately the Mangoes I picked up was not very tasty & that is why I have added some Mango essence for a nice flavour.
This is how I made it.

Ingredients:
  • 250gms Cream Cheese (I used Philadelphia)
  • 100 gms powdered sugar
  • 2 large Mangoes chopped & pureed
  • 1 cups whipped cream soft peaks
  • 1 tspn Mango essence
  • 1.5 Tbsp Gelatin
  • 1/4 cup hot water
  • 8 to 10 digestive biscuits
  • 3 tbsp Butter
  • 1/4 tspn yellow colour
  • 1/4 tspn salt
Method:
  1. Crush the Digestive Biscuits in the Mixer. Add 3 tbsp of butter to this powdered biscuits & make a base in a cake tin (8 or 9 inch square/round mold).
  2. Add 1.5 tbsp Gelatin to 1/4 cup hot water & stir continuously so no lumps are formed. Set  this aside to cool.
  3. Now pop in the 2 chopped Mangoes to the mixer & make a smooth puree.
  4. To it add  cream cheese, sugar, salt, gelatin,  essence & grind for about 1 minute until its smooth
  5. Now fold in the whipped cream mixture into the Mango cream cheese mixture & also add some yellow colour.
  6. Mix it well & pour this into the mold, chill this in the freezer for an hour or in the fridge to set for 5 to 8 hours.
Note:
  • I added Mango essence as the mango did not have much flavour.
  • Colour is optional, since I wanted a rich Alfonso mango colour so added some colour
  • If you don't get cream cheese just hang thick yogurt in a cheese cloth overnight & you will get fresh home made cream cheese.
  • I added color only to half of the cheese cake mixture & made it like 2 different color layer.


In the below picture you can see the biscuit base & the next picture I have poured the cheese cake mixture in the mould & its ready to go into the refrigerator.

 
Check out the Blogging Marathon page for the other Blogging Marathoners doing BM#28

Thursday, 25 April 2013

Jewellery


Creativity is my biggest strength. I love making something innovative be it cooking or crafts. Due to busy schedule I am unable to spend more time on some of the art stuff I am ineterested in. One such thing is Jewellery making. My Ex Manager at RBS makes jewelley, sells it online & I got some inspiration from her to try my hand in this. Here is the 1st post under Arts & crafts for BM#27. I made this long back & I love this ear stud & ring set. I still wear them often with matching clothes. This is how I made them:

I got some material from the Jewellery making shop & just stuck polymer clay rose on the empty ear studd stick & ring. Isnt that easy?


Check out the Blogging Marathon page for the other Blogging Marathoners doing BM#27

Tuesday, 23 April 2013

Ponsa Patholi


This is my last 8th post under seasonal for BM#27. This is a very old picture & I had made this long ago. This dish is called as Ponsa Patholi in Konkani, Kumbalaappam/ Kumbrangaya in Malyalam, HalsinahannuHittu in Kannada. Its a sweet Rice & jackfruit steamed pudding made mainly during raining Jackfruit season. I am not a very big fan of Jackfruit but eveyone at home is crazy about this dish. When my mom used to make these, she used to make in big bacth & we eat this for breakfast evening snack. Since coconut is added to this dish, this needs to be refregerated. Well back in coorg its so cold during rainy season that we never kept this in the fridge. I hope to make this again with better pictures & step by step instructions to show. This is how I made it.

Serves 4
Print this recipe

Ingredients:

  • 5 cups chopped jackfruit pieces
  • 1 cup Boiled rice
  • 2 cup raw rice
  • 1/2 cup grated coconut
  • 1/2 cup powdered Jaggery
  • 1/2 Tspn of slat
  • 1/4 cup chopped coconut pieces
  • 1/2- 1 cup of water for grinding.

  • Method:
    1. Wash and soak rice for 3 hrs, grind rice along with jackfruit, grated coconut & jaggery to a very thick paste. Add more jaggery if the jackfruit is not sweet.
    2. Now add in chopped coconut pieces, salt to this mixture & give it a good mix. (The batter has to be a little thicker than idli batter.
    3. Now place the thick paste on the Banana leaves ,cover from all four side like a parcel and steam for 30 to 45 mins or tooth pick insert comes out clean (Not very very clean)

    Check out the Blogging Marathon page for the other Blogging Marathoners doing BM#27


    Grape Cooler


    This is my 7th post under seasonal for BM#27. Zion was just getting better & by than again he has started coughing. Cherry doesn't seems to understand at all. When he is having his juice, Zion comes running to him & asks for a sip. His Pappa will fall all flat for his cuteness & allows him to sip. All these cute sips has led him to be sick for few more days. Now its been almost 10 days since he went to school. The lill fella is all happy being at home:) These days window shopping never remains as window shopping. The moment we see any toy shops we try & take a deviation in route. Last Sunday we went to an electronic mall & totally ignored to notice if there were any toys shops around. My lill smart fella suddenly noticed a small remote control car shop & started creating a scene. Helplessly we had to take him there & his eyes were all on the bigger toy cars which are for adults. Some how convinced him & settled in for a smaller remote toy car for kids. Since he is less than 2 its not a safe toy for him, but we were helpless but to pick it up. There was full sparkle in his eyes & he loved his car. On the way itself he wanted to play with it & had put it down. Slowly the car had started breaking. He is so possessive of his car that he always took it along with him while going to bed & also for bath:) . Its just been 3 days & the car is already dead & is into almost 10 to 15 pieces:). Now I have hidden this car as its not safe for him & replaced it with his toy Aeroplane.

    Now coming back to the recipe. This is not great or difficult to make. Its again a juice:) Green US Grapes are seasonal here in singapore. They are very fleshy & sweet. I made some juice out of it & it was very refreshing.

    Serves 2 people

    Ingredients.
    • 2 cups of green seedless grapes
    • 2 tbsp sugar
    • 1/2 tspn salt
    • 2 cups of water
    • 1 tspn Lemon juice
    • 5 to 6 ice cubes.
    Method:

    Put all the above ingredients in a blender & blend it for about 2 mins. The juice is ready.


    Check out the Blogging Marathon page for the other Blogging Marathoners doing BM#27

    Monday, 22 April 2013

    Lime Chili Juice


    This is my 6th Post for BM #27.

    These days my I add in green chili's to all the citrus juices that I make. I love the Green chili flavour & the mild kick you get in it. I also try & add in green chili's to the store brought juices as well. I must say that they are really refreshing & a big hit always among guests at home. Well this weekend my Hubby's Classmates had come home for dinner. Since my hubby had not confirmed about the dinner plans I dint prepare anything in advance. All of a sudden at 3 pm my hubby says that his friend are coming around 4ish. I peeped in my fridge & I could find just 1 lemon. I immediately squeezed them & made 3 cups of lime chili juice:) For the starters I made Mushroom Manchurian & Chicken Pakodi. Main course was Chicken fried rice & chicken Manchurian gravy. To end the dinner sweetly, I baked some yummy brownies with ganache topping:) His friends loved the food at my place & we all had a great time.

    Ingredients:
    • 1 Juice of Lemon
    • 3 tbsp Sugar
    • 1.2 Tspn salt
    • 1 inch tail of green chili
    • 3 cups water
    • 5 to 6 ice cubes
    Method:

    Add all the above ingredients in a blender & blend it for 2 mins. The juice is ready to serve

    Check out the Blogging Marathon page for the other Blogging Marathoners doing BM#27

    Bournvita Milk Shake


    This is my 5th post for BM #27  under seasonal.

    This month has been such a busy month. So many things going on at my end. My lill fella fell sick, later me & now my hubby. I feel I haven't done justice to the month long BM:( I had so many recipes & ideas that I wanted to try out. Unfortunately the timing wasn't right for me. In between all this I also had some cake orders from friends.

    While I was scrolling thru my food pics, I found some of my clicks were still not published. Although these are very basic & I feel even kids can make these. However I know there are so many out there who have Zero knowledge of cooking so may be it will be of some help to them:) Summer without Ice cream is incomplete. This milk shake is a blend of ice cream & milk. Since I have used skimmed milk its not too thick & heavy.

    Ingredients:
    • 2 Tbsp of Bournvita
    • 2 tbsp of sugar
    • 1 cup of skimmed milk
    • 1 scoop Vanilla ice cream
    • 4 ice cubes
    • 1 Tspn Borvita to garnish
    Method:

    Mix all the above in the blender/ Mixie except the 1 tspn Bournvita & blend this for about 2 mins. Garnish it with a tspn of Bournvita & the milk shake is ready to serve

    Check out the Blogging Marathon page for the other Blogging Marathoners doing BM#27

    Saturday, 20 April 2013

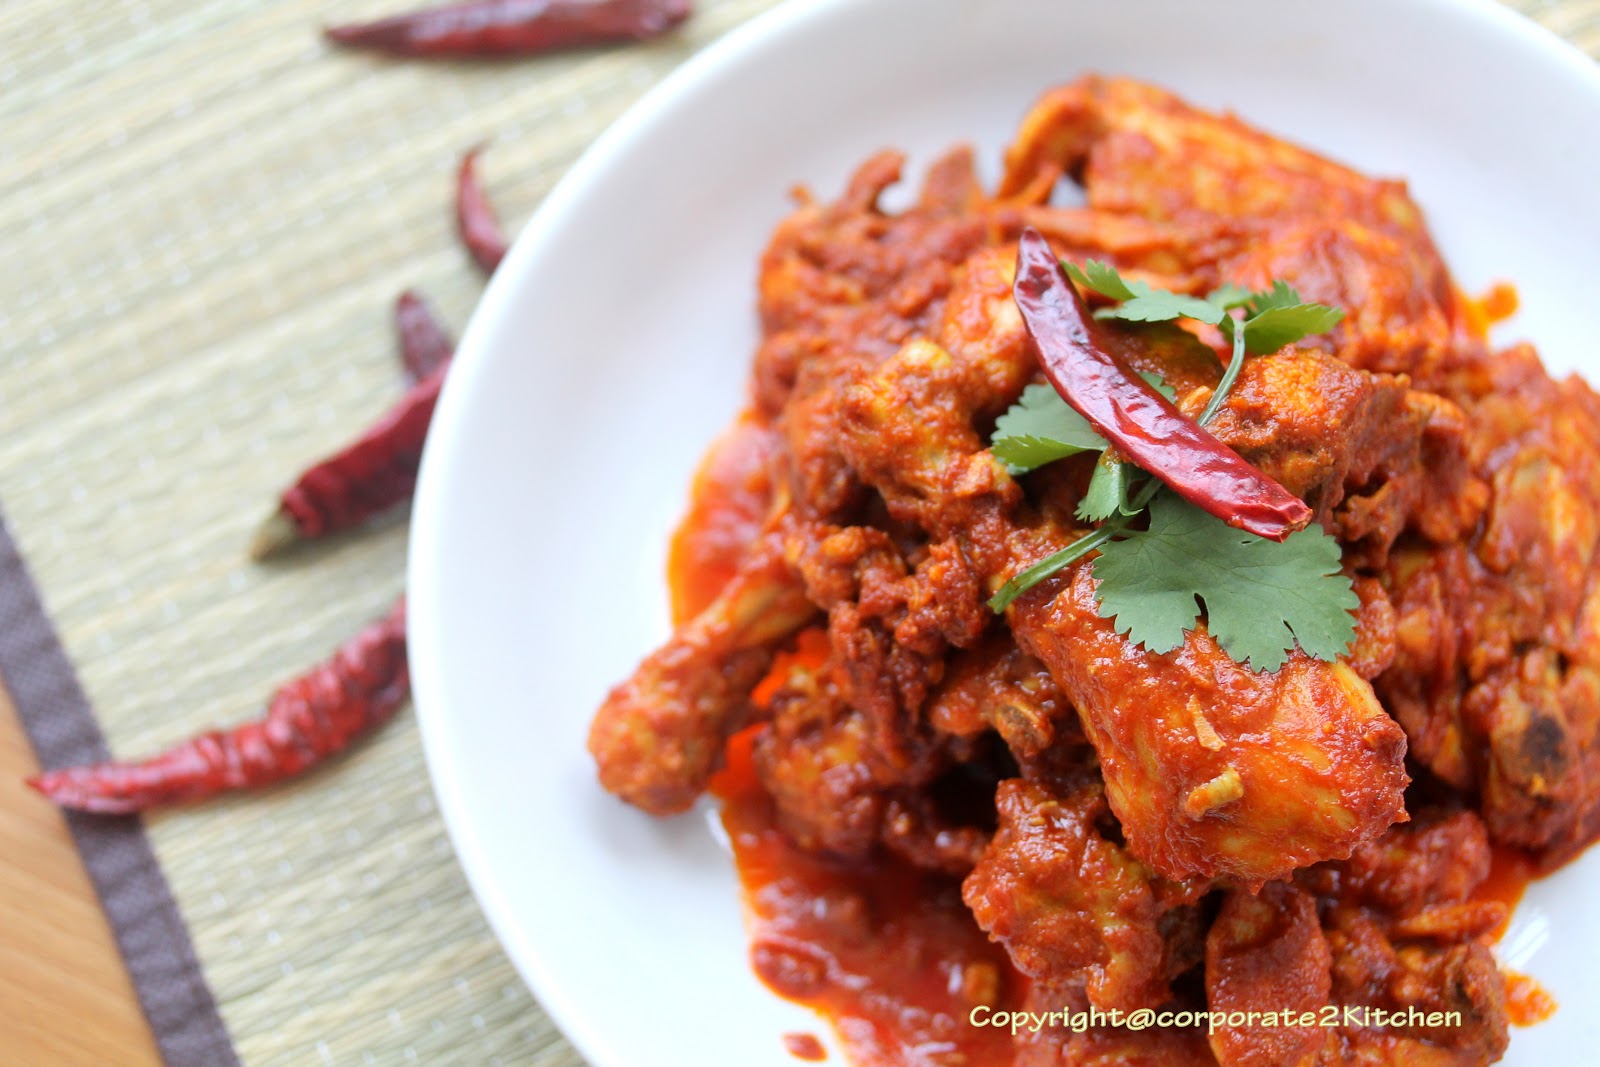
    Chicken Ghee Roast


    This is my 4 th post under BM#27 under seasonal. You must have already seen & tried my Prawn Ghee Roast Recipe. I also have Chicken Ghee roast(Chicken cooked in Clarified butter & chilli paste) recipe in which I have used masala powders & made. Today I made this the traditional way. The recipe is same as Prawn Ghee roast.  Since this is a spicy dish its perfect during winters. I bet you will start sweating while eating this spicy dish & really yummy one. Well this is so tasty that you can have this any day of the year:). Today my hubbys school friends are visiting home & thats why I have made this dish. This is how I made it...


    Serves 5 people
    Print this Recipe

    Ingredients
    1. 1 kg cleaned cut chicken (With bones)
    2. 10 to 15 roasted Long Red Chilly (Byadgi) remove the seeds& boil the red chilis and wash it well to remove the spice.
    3. 1/4 tsp tamarind paste
    4. 1 tsp Coriander powder
    5. 1/4 tsp Cumin Powder
    6. 1 Tspn Garlic & 1 Tspn Ginger
    7. 1/4 Tspn turmeric powder for marinade
    8. 3 Tbsp Ghee
    9. 1 Tbspn Coconut oil
    10. 1 Tbsp cooking oil
    11. Salt as per taste
      Method:
    1. Grind ingredients 2- 6 to a smooth paste.
    2. Marinate the cleaned chicken with some salt & turmeric powder for about an hour.
    3. In a Pan/ Kadai add cooking oil fry the chicken for about 6 to 8 mins untill all water is drained.
    4. In the same Pan add another 3 tbsp of ghee & add the ground masala paste. salt fry this on low flame stiring for about 5 mins or untill fat seperation.
    5. Finally add in the cooked chicken stir well & saute this for about 2 mins.
    6. In the end garnish this dish with 1 Tbspn of coconut oil & mix well


    Check out the Blogging Marathon page for the other Blogging Marathoners doing BM#27

    Friday, 19 April 2013

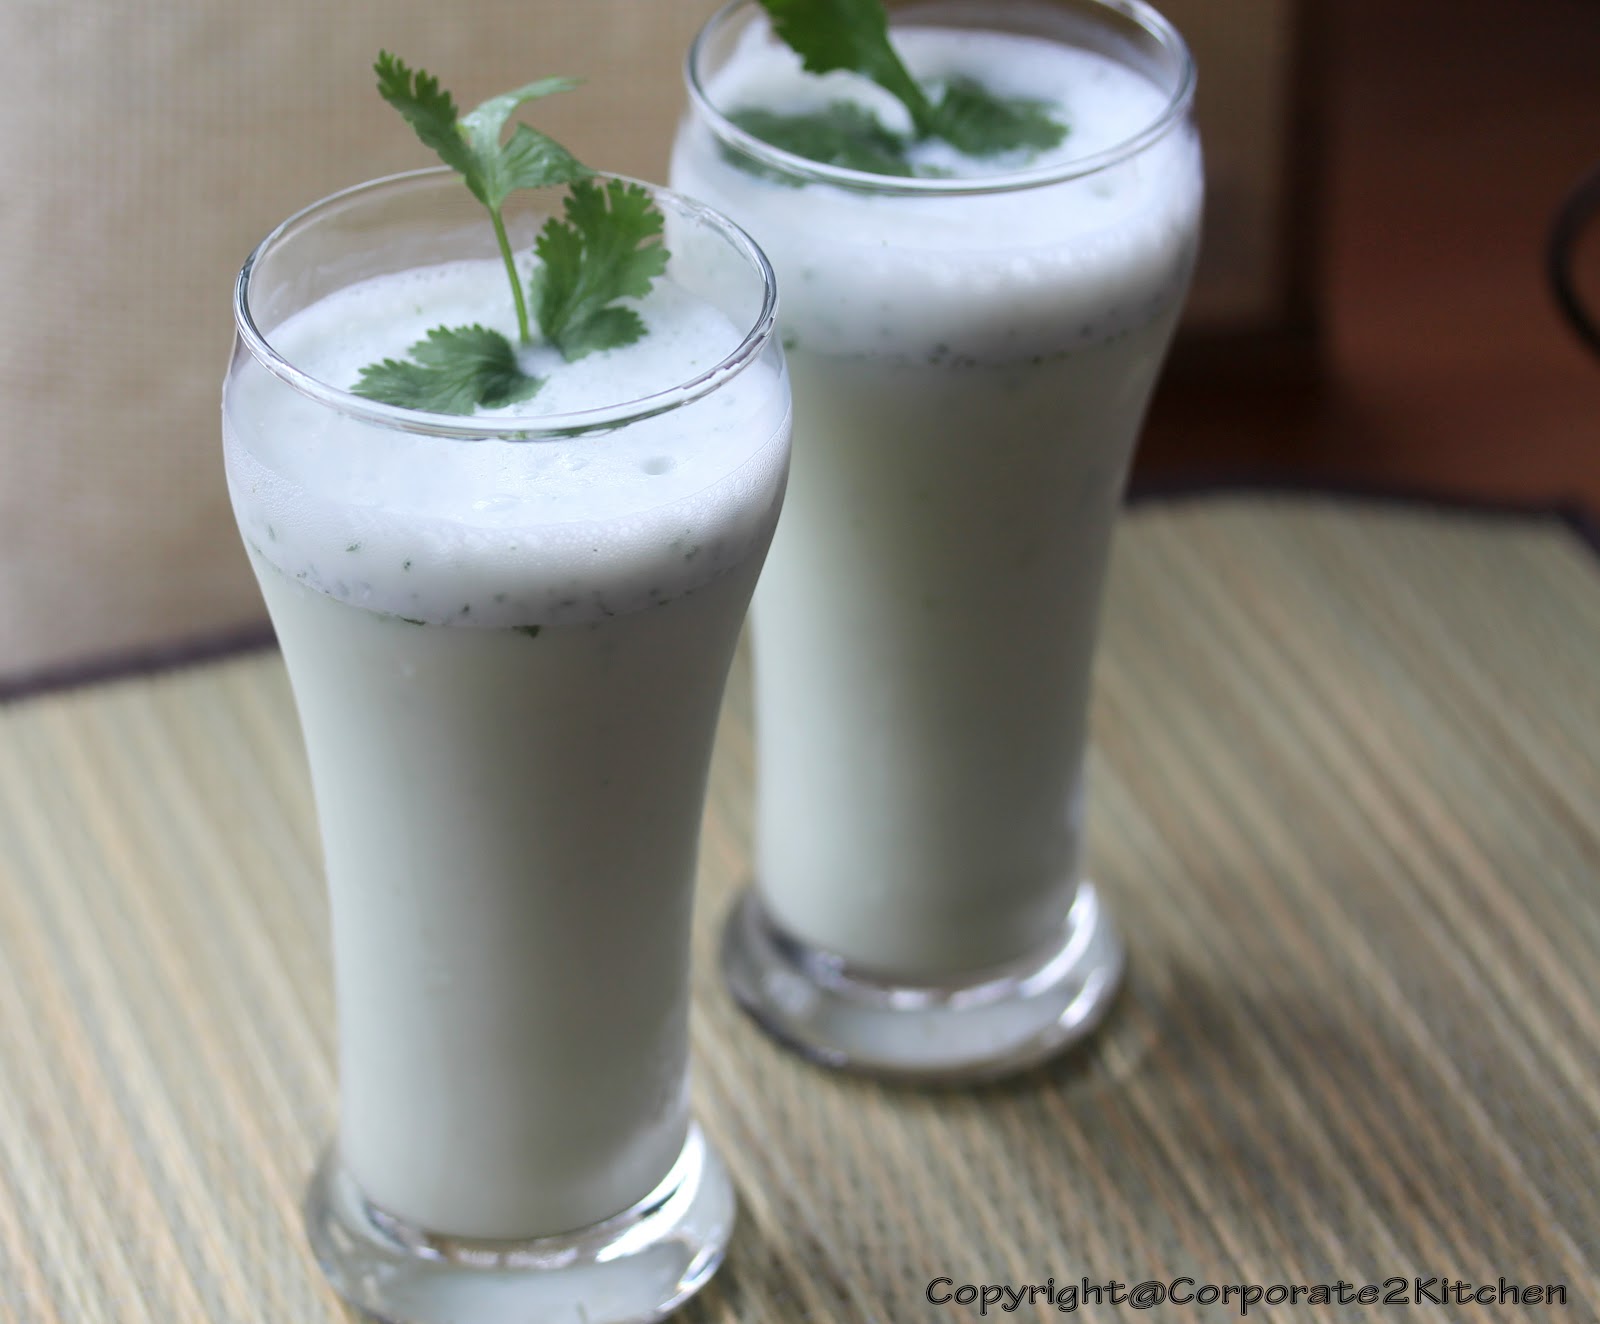
    Spiced Buttermilk


    This is my 3rd post for BM #27 under seasonal. Masala Butter milk, spiced Milk, Majjige, Moru or many more names this simple refreshing drink is called. This drink is a must during hot summers. I still remember people selling this in a clay pot (Madikey) in south Canara region. When we used to go to our Uncles house in Sampaje, we used to have this drink in the town for 1 Rupee. I am talking of some 20 years ago:) I still remember how Much I loved this drink & I still love it. Those days in the clay Pot this drink used to remain so chilled. I made this drink yesterday in the afternoon just after coming back home from out on a hot sunny afternoon. This is truly refreshing & very light on the tummy. This is how I made it.

    Ingredients:
    • 1/2 cup of yogurt
    • 2 cups of water
    • 1 tspn chopped ginger
    • 1 green chili chopped
    • 3 tbspn of chopped coriander leaves
    • 5 to 6 ice cubes
    • Salt as per taste
    Method:

    In a blender mix all the above ingredients & blend it for about 2 mins. Now the drink is ready to serve.


    Check out the Blogging Marathon page for the other Blogging Marathoners doing BM#27

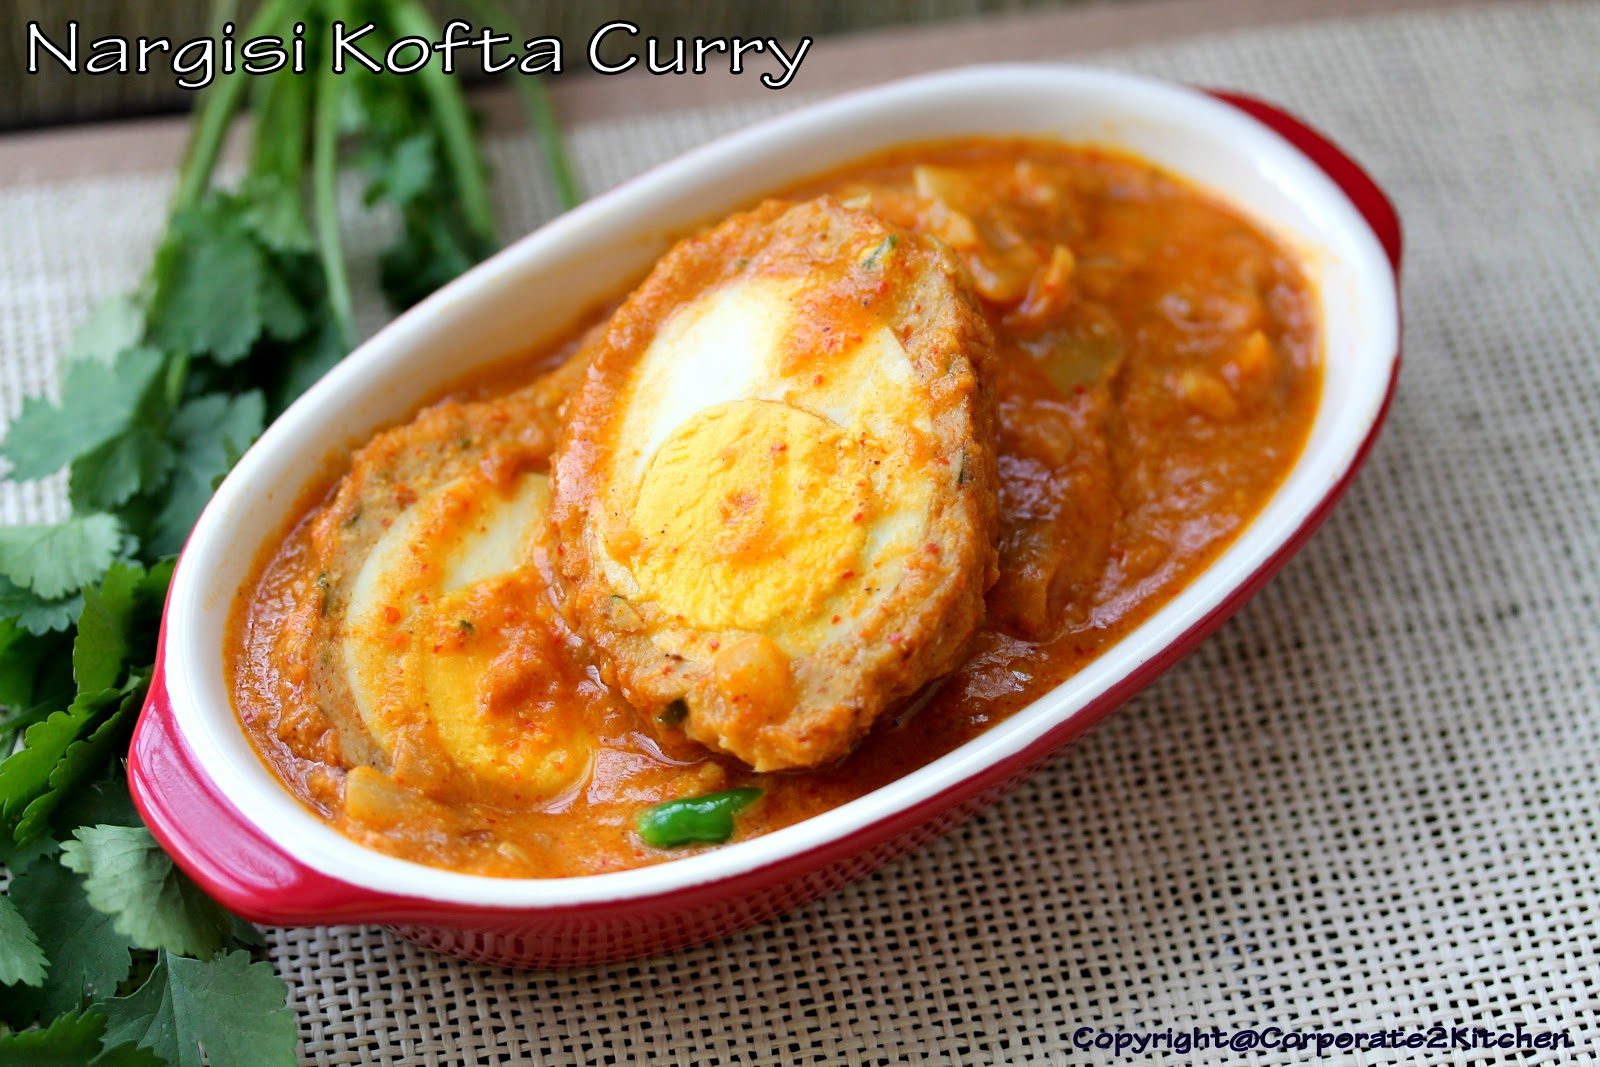
    Nargisi Kofta


    This is my 2nd recipe under seasonal for BM#27. Although this is not very seasonal, since its a heavy dish its made on occasions & especially during winters. This dish will keep your stomach full & not make you feel hungry soon:)

    Zion is feeling better now but unfortunately I am having food poison & my hubby is also unwell. This was few days ago I had a cream puff from a bakery. It was not so good still I eat it & now having bad stomach pain, loss of appetite & lose motion:(. I haven't been cooking as I am having some kind of aversion towards food, like I used to feel when I was pregnant. I made this Kofta curry 3 days ago. It is the recipe, from the ancient Mughlai cuisine. They also say this is a Pakistani recipe & Mostly made in Muslim Houses.  In this classic recipe mince meat are stuffed around boiled eggs and served in delicious curry. Add it to dinner party menu and catch the appreciation. You can either serve this as Appetiser or as main course. I used Home made chicken mince for this recipe. You may add any meat you like. For vegetarians Aloo Paneer will be an ideal option. I also plan to make a vegetarian version sometime soon. Well this dish is very heavy & one piece kind of fills your stomach.


    Serves: 4 - 5 people

    Ingredients:
    For koftas
    • 4 hard boiled eggs
    • 1 Tbsp minced ginger garlic
    • 200 gms minced chicken
    • 1 tspn chili powder
    • 1/4 tspn Cardamom powder
    • 1/4 tspn garam Masala powder
    • 4 tbspn chopped coriander leaves
    • Bread crumbs for coating
    • Salt as per taste
    • Oil for deep frying
    For the Gravy/ Curry
    • 1 medium onion chopped
    • 1 tbso ginger garlic paste
    • 2 tomatoes chopped
    • 6 Cashew nuts
    • 1 Tspn Chili powder
    • 1/4 tspn Turmeric powder
    • 1/4 Tspn cardamom powder
    • 1 tspn Garam Masala powder
    • 1/4 tspn Cumin powder
    • 2 tbsp Yogurt
    • salt as per taste
    • coriander leaves to garnish
    • 2 Inch cinnamon stick,
    • 4 Cloves
    • 4 cardamom pods
    • 1 star aniz
    • 2 tbspn oil
    • 2 chopped green chilis
    • 1.5 cup hot water
    Method:
    1. In a mixie/ Ginger jar add boneless chicken pieces, ginger, garlic, chili powder, cardamom powder, garam masala, salt & mince it in a mixer or blender.
    2. Now take a ball size of minced meat mixture & coat the hard boiled eggs with it. You can use a plastic wrap to easily coat the meat to the eggs.
    3. Now coat this with bread crumbs & deep fry for 3 to 4 mins on all sides. Set this aside (Now if you want you can cut the Koftas into half & have them as appetisers.)
    4. For the Gravy: In a pan add oil, fry cinnamon sticks, cardamom, star aniz, cloves, onions until the onions are translucent.
    5. Now in a mixie jar make a fine paste of Tomatoes, ginger .garlic & cashew nuts
    6. Add this paste to the pan & all add in the Chili powder, turmeric, garam masala, cumin powder, Cardamom powder & mix well. Let this cook until fat separation.
    7. Now add 2 tbsp yogurt, water, salt & bring this to a boil for about 2 mins
    8. Reduce the flame & add in the koftas into the curry. Simmer this for about 3 to 5 mins & garnish them with green chilis, coriander leaves.


    I have tried my best to take step by step pictures:
    This is a first step in making koftas. I made the chicken mince at home with some boneless chicken pieces,

     
     This is how you can coat the eggs with minced meat, This is a very easy method & no mess

     
    If you are nothing going to eat the koftas as appetizers than you can fry just for few minutes & cook it longer in the sauce
     
    This is a simple sauce recipe. Since the Koftas are very rich & heavy I dont add any creamin to the sauce.