Showing posts with label Cakes. Show all posts

Friday, 9 May 2014

Banana Carrot Cake


My laptop is not working well & it has been very very slow. Its been close to 2 months since I blogged. Nevertheless my kitchen has been busy as usual & I have been trying out so many new dishes. I cant tell you how desperate I have been to get back to blogging & share my recipes. However I have been active on facebook & have been replying to all Korporate2kitchen fans:).


Time really flies & I cant believe its already 6 months since we moved here to Austin. We still haven't explored much in this city & we need to start doing that soon. All these while our weekends have been just shopping, taking zion to parks & house parties. You already know how much I love cooking for others. Last Friday we had a great time with our new friends here in Austin. It was our Anniversary last week, so celebrated with friends on Friday at our home. Well the menu was Malai chicken Kebab, Stewed Pork ribs, Chicken Dum Biriyani, Stuffed Mushrooms & Orange cheese cake.


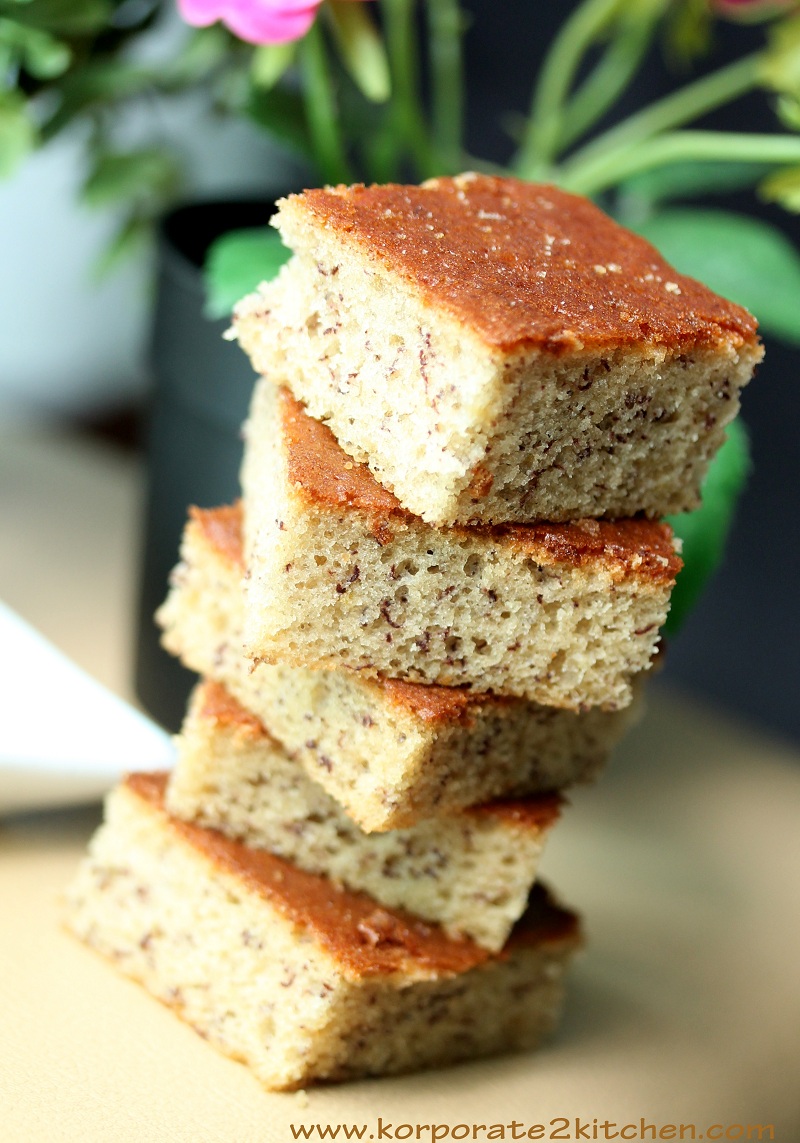
Well today I will be sharing a very healthy & tasty cake recipe. Mom's are always finding ways to incorporate beggies in theirs childs diet & here is the great way to do it. The good news is this is a no butter cake & really tasty moist cake. I am sure you will love it & also your kids will eat them without any fuss. So here you go "Banana  carrot cake"


serves: 25 pieces
Making time: 1 hours
Baking time: 30 mins
13*18 inch rectangular sheet Pan

Ingredients:
  • 4 medium size carrots grated
  • 3 over riped Bananas mashed with a fork
  • 2 cups of all purpose flour
  • 1. 5 cups of powdered sugar
  • 3 eggs
  • 1 tbspn Vanilla extract
  • 1.5 tspb baking powder
  • 1 tspn baking soda
  • 1/2 cup of cooking oil (vegetable/sunflower/ canola)
  • 1 tspn salt
  • 1 tspn Cinnamon powder
  • 1/4 tspn nutmeg powder
  • 3/4th cup heavy whipping cream or milk
Direction:
  1. Pre heat the oven to 180 degree c. Grease a rectangular sheet Pan & line it with parchment paper.
  2. Sift in the dry ingredients & set aside.
  3. In a mixing bowl beat the eggs, oil & sugar for about 5 to 8 minutes, until it looks like pale white Mayonnaise mixture.
  4. Mix in the whipping cream into the wet mixture & add in the dry ingredients little by little wishing in between. Once all the dry ingredients in mixed in, beat it on a electric beater for about a minute until its well mixed.
  5. Finally add in the grated carrots & mashed bananas & give it a good mix with a hand whisk or spoon,
  6. Pour this batter into the sheet pan & bake it for about 30 to 40 minutes or until tooth pick insert comes out clean.
 
Cream cheese frosting recipe

Ingredients:
  • 250 gms cream cheese softened
  • 1 stick butter(120 gms)
  • 1 tsp Vanilla extract
  • 4 cups sifted icing sugar
Direction:
  1. Beat the cream cheese, butter & Vanilla extract together with an electric beater or stand mixer for a minute.
  2. Now start adding icing sugar 1 cup at a time & keep beating until the icing is light & fluffy. This process will take about 5 to 8 minutes.
  3. Now the icing is ready & fill it in a piping bag & decorate the way your want or just spread it on top of the cooled cake with a spatula.


Tuesday, 11 March 2014

Red Velvet cake


I am not sure if I have said this earlier that how sensitive my stomach is! If I eat anything that is stale or bad, I immediately fall sick. After coming to Austin this was the first time I had food Poisoning which happened mainly because of my carelessness, or call it laziness. This was a day before Valentine's day, when I was too lazy to cook a full meal. Since I had some leftover Roti's I decided to make enchiladas. I used some left over Canned tomato Puree that was lying in the fridge. This puree had some blackishness around & I was too lazy to open a new can; so just used it. This caused a very bad stomach pain & diarrhea:( The whole night, I spent in the bathroom & regretted for using that can of tomato puree. The next day went to the doc & I was admitted for 3 hours . I was given IV & some medicines. So my valentines day was a disaster & it was spent in the hospital. 


So I had made this cake on 13th morning & I decided to refrigerate it. Since I was sick & had aversion towards food, I dint want to cook nor eat anything for few days. After 4 days I decided to decorate this cake. I went ahead with a simple decor as I dint wanted too much icing in the cake. Well this was a tall cake & I sent almost 70% of it to my hubby's office. My hubby told me that the cake got over within minutes:) I was very happy that the cake got over fast or else I will end up eating a lot & put on weight:(. This was the easiest & tastiest red velvet cake I have eaten. This cake is very moist & yummy. I got this recipe from Mccormick site. I just copy pasted the recipe & the result was just amazing. This is how I made the cake. 


Serves: 45- 30 people
Making time: 30 minutes
Decoration: 30 minutes
Need 2 9 inch Pan (I used use & throw silver foil pans)
Recipe: mccormick

Ingredients:

  • 2.5 cups Plain flour
  • 1/2 cup unsweetened coco powder
  • 2 cups sugar (powdered)
  • 1 tsp Baking soda
  • 1/2 tsp salt
  • 2 sticks Butter (226 gms)
  • 4 eggs
  • 1 cup sour cream
  • 1/2 cup milk
  • 2 tsp Vanilla extract
  • 1 Tbsp food color Red (I used wilton gel paste)

Directions:


  1. Preheat Oven to 350* F. For the cake, grease & flour 2 (9 inch) round cake pans. 
  2. Sift flour, cocoa powder, baking soda & salt. set aside.
  3. Beat Butter & powdered sugar in a large bowl with an electric mixer on medium speed 5 minutes or until light & fluffy. Beat in eggs one at a time. 
  4. Mix Sour cream, color, milk & vanilla in a separate small bowl. Now add in this mixture into the bowl butter sugar egg mixture. 
  5. Gradually beat in flour mixture on low speed until just blended. Do not over beat. Pour the batter in the prepared Pans.
  6. Bake for about 35 to 45 minutes or until tooth pick inserted in the centre comes out clean. 
  7. Cool in pan for 10 mins, remove from Pan & cool completely on wire rack. 


Vanilla Butter cream:
  • 350 gms salted Butter
  • 8- 10 Cups sifted Icing sugar
  • 6 Tbsp Whipping cream
  • 1 Tspn Vanilla Essence
  • Pinch of salt
  • 10 Strawberries to decorate. 
Directions:

    • Make sure butter is at room temperature & not very soft.
    • In the bowl cream butter until smooth and creamy, 2 to 3 minutes with an electric beater on medium speed.
    • Add 9-10 cups icing sugar one cup at a time. Once the icing sugar is well mixed add whipping cream and vanilla; mix until light and fluffy. This should take about 6 to 8 minutes. If if you feel the frosting consistency is not right, then add in some more icing sugar. 


    Here are the step by step picture collage. 


    If you don't like so many layers, you need not cut the cake into half. You can just have one layer of icing in the middle. I made 3 layers of icing coz it looks good. 


    Notes:

    • It is always better to cut the cake cold. So refrigerate the cake before you ice it. Make sure you bring the cake to room temperature before you eat it.
    • Once you ice the full cake, keep the cake in the fridge. Make sure you have a big cake box.
    • Cut the cake while it is still cold to get the perfect slices.


    Tuesday, 10 December 2013

    French Almond Cakes


    We are spending our last 1 week in Singapore & cant believe that we have been living here for the last 4 years. We have enjoyed every moment here & feels sad to say goodbye to this country. The only bitter feeling that we have is our current Landlords behaviour. He has been mentally harassing us for the last 1 month asking us to pay him 4.5 months of rent as compensation for breaking the rental contract in between. Now this man has been really been a big pain & we are still sorting out on this issue. Because of this we are having a very bad taste:( Hopefully things should resolve in a couple of days. The only bad part about this place is that majority of Land lords are very bad & greedy. They try & bully the tenants. Try to extract as much as money from the tenants:( We have been very unfortunate to get one such bad Landlord. 


    Well coming back to today's post, since we are moving, I have been busy with finishing off the groceries in the pantry. I figured out that I have a big packet of almonds & wanted to put these into use. We all know the good benefits of almonds & hence I made a cake out of these. I got this recipe from Happy home baking site, you can check here beautiful  site here .  I tried to tweak in the recipe a little & the results were fabulous. This cake is very moist & soft. Its like melt in your mouths type. We all loved this cake & here is the recipe.


    Baking time: 45 mins
    total time: 1 hours
    6 inch round pan or 8 inch round pan

    Ingredients:m
    • 150 g butter at room temperature
    • 1 cup of powdered sugar
    • 3 large eggs, lightly beaten
    • 90g ground almonds (almond powder) (almost a cup)
    • 100 gms plain flour (almost 3/4th cup)
    • 1 tspn baking powder
    • 1 tablespoon milk
    • 1 teaspoon pure vanilla extract (optional)
    • 1/4 tspn salt
    Directions:
    1. Pre-heat oven at 180degC. Grease (with butter) and flour the sides of a 6 inch  pan, line the base with parchment paper, set aside.
    2. Cream the butter & sugar for 2 minutes until light & fluffy. 
    3. Add in the eggs into them & beat for another 1 minute.
    4. Now add the almond powder, four, baking powder, vanilla essence, salt & milk. Beat with an electric mixer or whisk. When quite light and fluffy, spoon into the prepared pan and spread the batter evenly.
    5. Bake at 180degC for 40-45mins, or until the sponge just springs back when pressed . (If you are using 8 inch pan then the baking time can be reduced to 30- 35 mins)
    6. Run a thin bladed knife around the sides of the pan to loosen the cake, then turn out onto a wire rack and let cool. 

    How to powder almonds: Just put the whole almonds in the mixer or blender & blend it to a fine powder. I did mine with the skin on.

    Monday, 25 November 2013

    Christmas Fruit Cake


    Finally the day has come to break the news to all my readers. We will be relocating to Texas next month from Singapore & going forward Korporate2kitchen.com will be Texas based blog. Its been 4 years in Singapore & I have become so attached to this country. I have still not completely digested the fact that we will be leaving this country. Lot of mixed feelings & hoping our transition to the new country will be smooth. So this time Christmas will be in Texas!


    I always look forward  to Xmas season as the entire city is lit up & decorated. When it comes to food there are plenty of options to try out for the Xmas home parties. One such thing we love to eat every Xmas season is the Fruit cake/ Plum cake. Kerala is one such place where you will find fruit cake throughout the year in all the bakeries. Well these cakes are very rare in other parts of the state/country. I have been making fruit cake for many years & I have personally not been very satisfied with the outcome. Although my family & guests have always praised that the cake is very good, somewhere I felt this can be better. So after a lot of research, trial & error I have found my perfect Xmas Fruit cake. I baked this cake 3 days ago & its pretty big cake which will last for many days. This time I decided to go liqueur free as I wanted to have a big slice every time:) & my lill one also can enjoy along with me. The cake has turned out perfect & the taste is too good. Personally I would prefer Liqueur free cake :) This is how I made the cake & this recipe is definitely a keep.


    Serves: 20-30 people
    Making time: 2 hours

    Heat the oven to 300°F/150°C/Gas 2 
    The temperature is low as the cake needs a long slow bake. It is packed with sugars, fruits and brandy and if the temperature is any higher the outside of the cake will burn and the inside be under cooked. 

    Ingredients:
    • 250 gms Butter
    • 250 gms All purpose flour
    • 1.5 cup Brown Sugar (Powdered)
    • 3 eggs
    • 1 Tspn Baking powder
    • 1/4 Tspn Salt
    • 1/4 Tspn Cinnamon Powder
    • 1/4 Tspn Nutmeg powder
    • 1/4 Tspn Cumin powder
    • 1/4 Tspn Ginger powder
    • 6 Cloves crushed/powdered with motor pestle
    • 1 cup black raisens
    • 1 cup sultanas
    • 1 cup tutti fruity (mixed color)
    • 1 cup chopped cranberries
    • 1/2 cup preserved orange peel chopped
    • 1 cup chopped Walnuts
    • 1 cup Apple Juice
    • 1/4 cup flour for dusting the dry fruits
    • 2 Tspn Vanilla essence
    • 1/2 cup dark Caramel sauce
    Caramel Sauce
    • 1/2 cup brown sugar
    • 1/4 cup water
    • 1/2 cup extra water
    Direction:
    1. line a 9 inch cake tin with 2 thicknesses of parchment or greaseproof paper.
    2. Make caramel sauce by adding 1/2 cup brown sugar & 1/4 cup of water. Boil this on medium heat until you see dark brown caramel sauce. If required just stir in between with a spoon. This process should take around 5 - 8 mins or longer depending on the vessel. Once the Caramel is dark brown or a little blackish. turn off the heat & add 1/2 cup of water to that sauce pan & allow it to rest for 20 mins
    3. After the sauce is cooled down, you will get a caramel liquid & 1/2 a cup is all that you need to make this cake.
    4. In a large airtight container, add all the dry fruits except walnuts. Now add in the 1/2 cup of Apple juice, mic the fruits well in it. Close the lid tight & leave it at room temperature for about 2 to 3 days. If your apple juice is sour, add some sugar to it. If you are in a hurry then you can soak them overnight too.
    5. In another large bowl cream the butter with the sugar until light and fluffy. Add the beaten egg to the butter mixture a little bit at a time, beating well after each addition - do not try to rush this process as the mixture could curdle. If it does curdle simply add a tbsp of flour and mix again, this should bring the mixture back together. If it doesn't come back together, don't fret, the cake will still be delicious.
    6. Now add in the Vanilla essence, salt & caramel sauce into this batter & mix it well. 
    7. Carefully fold in flour, baking powder all the spices & beat this mixture for a minute until everything is well incorporated. Make sure you don't over beat/mix 
    8.  Now just add 1/4 cup of flour to the dry fruits & lightly mix them with your hands. This process is done, so that the dry fruits don't sink. 
    9. Immediately add the dry fruits into the cake batter in 3 intervals, folding them in the cake batter. 
    10. Spoon the cake mixture into the prepared cake tin making sure there are no air pockets. Once filled smooth the surface with the back of s spoon and make a slight dip in the center (this will rise back up again during cooking and create a smooth surface for icing the cake).
    11. Finally, using a piece of paper towel clean up any smears of cake batter on the greaseproof wrapping, if left on they will burn, and though it won't affect the cake, it doesn't smell too good.
    12. Now bake this cake for about 90 minutes at 150 degree. During the cooking time avoid opening the oven door too often as this may cause the cake to collapse. After 75 mins just do a tooth pick test to check if the cake is done. Some times, depending on the oven you use the baking time might take longer. 
    13. After 90 minutes check if the cake is cooked. The cake should be nicely risen and a deep brown all over. Insert a skewer or fine knife into the centre of the cake. If there is sticky dough on the skewer when you pull it out it needs cooking longer, if it is clean, the cake's done and remove from the oven.
    14. Leave the cake to cool in the tin on a wire rack for an hour, then remove from the tin and leave to cool completely. 
    15. The cake should be stored wrapped in greaseproof or parchment paper/ silver foil in an airtight tin. 
    Note:
    1. If you like to add brandy/Rum You just have to add some into the dry fruits while soaking & again once the cake is cooled prick the surface of the cake with a fine metal skewer and slowly pour over 2 - 3 tbsp brandy. This feeding should be repeated every two weeks up until Christmas. 
    2. I kept this cake at room temperature for 3 days & now the cake is in the fridge. I will again remove the cake from the fridge & get it to room temperature before having or Serving. 
    3. The steps & procedure might seems long but its very easy to make.
    4. If you want more dry fruits add more, I just went with 1 cup each. For the dry nuts, I used only walnuts, you can also add, cashews, almonds or any nuts of your choice. 
    5.  The cake will break off  when you cut it when its in room temperature. To get perfect slices, just freeze the cake & cut them.


    Sunday, 10 November 2013

    Cream Cheese Pound cake


     We are back from India after a long 3 week break. This time we had decided to have a relaxed time in India. In the past every time we visited India, we were busy with some work or the other & we hardly had a relaxed time. The weather is Kerala was very pleasant & in fact cold in the mornings & night. There is a lot of space outside my hubby's house in Kerala & Zion loved running around.There was a dog too which Zion was very fascinated about. We also planned a 3 days road trip to Munnar & we had great fun there. We stayed at Mountain Club resort in Munnar & I will recommend everyone to go there. The property is huge & beautiful. They are very big spacious 2 bedroom cottages & the way it is built is beautiful. One bedroom in the ground floor & the other in 1st. The service is very good & so is the food. When I say food, this resort mostly had a wide spread of south Indian Kerala dishes, which we loved. It seems after sunset you will get to see wild Elephants out side the main gate & around that locality. That sounds scary right? Fortunately we never tried to adventure in the night:)

    Well before travelling to India I had lost 4 kgs doing my high protein diet & In India I was eating like a pig all unhealthy food. Now I have put on weight again & don't know how much:( Definitely see a difference in my waist line. Now its time to get back to healthy eating & loose those extra pounds. 


    Today I will be sharing a Cream cheese Pound cake recipe. I made this cake 2 months ago & this was very very delicious cake. The recipe is very simple & I am sure you will love this cake. I tried this recipe from  thelittleteochew 's blog.


    Serves: 8 people
    Preparation time: 20 mins
    Cooking time: 45 tp 60 mins

    Ingredients:
    • 1.1/4 cup all purpose flour
    • 1/2 tsp baking powder
    • 1/4 tsp baking soda
    • 1/4 tsp salt
    • 150g unsalted butter, room temperature
    • 140g cream cheese, room temperature
    • 200g Castor powdered sugar
    • 3 large eggs, room temperature
    • 1/2 tsp pure vanilla extract
    • Zest of a lemon or orange
    Directions:
    1.  Preheat oven to 175°C and place rack in center of oven. Butter and line an 8-inch round cake tin. 
    2. In a large bowl, sift together the flour, baking powder, baking soda and salt.
    3. In the mixing bowl beat the butter and cream cheese until smooth. Add the sugar, in three additions, beating well after each addition. Continue beating on high speed until light and fluffy. Add the eggs, one at a time, mixing well after each addition. Add the vanilla and lemon zest and beat until incorporated.This should take about 3 mins.
    4. Add the flour mixture and mix just until incorporated. Pour the batter into the prepared pan and smooth the top.
    5. Bake for about 45- 50 mins.
    6. Remove the cake from the oven and place on a wire rack to cool for about 20 minutes. Remove the cake from the pan and cool completely.
    Note:
    1. The cake is cooled in the pan first for about 20 minutes so the cake has time to set. The cake may collapse if you try to remove it from the pan too soon
    2. This cake will keep several days at room temperature and one week when refrigerated. Can also be frozen.
    3. If you want you can add any other flavor to this cake. 

    Sunday, 6 October 2013

    Dates & orange cake


    Its Monday morning here & Mondays are the most boring days for me. The morning times are "me" times as my son is in the school & I get to do whatever I want without any disturbance. Ever since I am on a diet, I laze around in the mornings watching TV or just changing nail paint colours:) To avoid all the yummy food temptation, I stayed away from blogging for some time. But now I think, I have gotten used to my food pattern & I am more determined. You will see me more often blogging & I also love doing it. Well the food that I will be posting are all old ones, as I am not cooking carbs & sweets much.

    We all know the health benefits of dates & orange. I thought of blending these two & making a cake. I made this cake long time ago & this was fantastic. I made a small cake as we dont wanted to end up eating a lot. In my house the cake wont last for more than a day. My loaf pans had some rusting so I had to throw away them. For this one I have used the use & throw silver foil pans. These pans are so handy & are very cheap too. This is how I made the cake.


    Making time: 45 mins
    serves: 5 people
    Pan size: small loaf pan

    Ingredients:
    • 3/4 cup plain flour
    • 10- 12 dates deseeded & chopped
    • 1 egg at room temperature
    • 50 gms butter
    • 3/4 cup powdered sugar
    • Pinch of salt
    • 6 tbspn orange juice (Freshly squeezed)
    • 1.5 tspn Baking powder
    • 1 tspn Vanilla essence
    Direction:
    1. cream the butter & sugar until fluffy
    2. Now add in 1 egg & continue to beat or whisk until smooth & creamy
    3. Add the sifted dry ingredients into this along with Vanilla essence & Orange juice. Mix this well by whisking it for another 1 minute
    4. Dust the dates with some flour & add this in the cake batter.
    5. Now pour the batter in the baking pan & bake it in a preheated oven at 150 degree for about 30- 40 minutes or until the tooth pick inserted comes out clean.


    Thursday, 25 July 2013

    No Butter Banana Cake


    I am back again after a gap & I cant tell you how much I missed cooking, blogging & going through some of my best blogs. Monday was the 1st day at work after a 2 years of gap. My boss was here for 3 days to train the trainers & I was so excited to sit through & also do some part of the trainings. Training is something that I have enjoyed a lot in my career. This profession really gave me so much joy & learning. Now I am so happy that I work as a independent contractor with couple of great training companies. This is the best thing that could happen living in the foreign country. Now I will have a perfect balance of work-family-passion-life.


    My training starts at 9am, so I had to leave home by 8:30am. It was tough for me to be away from Zion for full day. The first day I fooled him by sending him down to the play area with my maid & I slowly sneaked out from the front gate. It seems once he was back home, he was looking for me in all the rooms & was a bit sad for a while. The second day he refused to go down to play & was glued to me where ever I went. He knew that I was going out & kept saying Mamma office mamma office... I was feeling very bad, but some how had to pacify him & send him down. Coz I really don't want to get out of house in front of him. He cried a lot to go down & once he met his friends downstairs he was fine. Yesterday also was the same scene:(  On day 2 my training got over by 4:30, so I decided to go to Zion's school to pick him up. My  maid was already there waiting at his school. I was peeping through the window inside the classroom & saw my lill boy restless & running around. He spotted my maid & was very happy to see her. Once he came out of the class he saw me & I cant express how happy he was. He started climbing on top of my stomach, shoulder & head.. he hugged me tight & was smiling through out. The mother child relationship is the best in the world. I love being a mother & enjoying every precious moment with my Son.


    Now coming back to today's post. This is a simple Banana cake & I have used oil in this recipe. In the past I have always baked my Banana cakes with butter but never knew that oil also tastes very good. This is a healthy recipe & great for kids snacks too. My lill one loved this & it stays moist & soft even after refregerating them. This is how I made them

    Serves: 8 - 12 people
    making time: 45 mins

    Ingredients:
    • 1 cup flour
    • 1/3 cup cooking oil
    • 3/4 cup sugar powdered
    • 2 Eggs
    • 1 tspn Baking powder
    • 1/2 Tspn Baking soda
    • 1/4 tspn salt
    • 1 Tbsp Vanilla essence
    • 2 Large riped Bananas

    Directions:
    1. Mash the Banana's with a fork & set this aside
    2. In a bowl add sugar, mashed Bananas, eggs & mix well with a spoon or a whisk.
    3. Now add in the oil, Vanilla essence, salt, flour, Baking powder, soda & mix well with a spoon or a whisk.
    4. Pour the mixture in the Baking pan 6 inch round or square, 9 inch round or square Pan.
    5. Bake this in a preheated oven for 40 - 45 mins at 180 degree if your are using  6 inch Pan or for about 25- 30 mins if you are using bigger pan.

      Note:
    1. I used a bigger pan 9/9 square pan, coz I wanted small square pieces. If you want a good height for your cake then use the regular 6 or 8 inch round pan.
    2. I sometimes use bigger pans so that the cakes bake every fast.

    Monday, 15 July 2013

    Salted Caramel chocolate cheese cake


    No Bake cheese cakes are the easiest to make & its definitely a crowd pleazer recipe. By being a little creative you can make the cheese cake look very stunning. The main thing is in setting the cheese cake & making it look appealing. The basic no bake cheese cake recipe is very simple & no one can go wrong. 2 weeks ago when my friend was around, I asked her if she has had cheese cakes before? She said no & since i made some cream cheese lying in the fridge for weeks, i thought will make some cheese cake. I have always made just one flavour cheese cakes, so thought this time will mix caramel & chocolate. Since my friend is a die hard fan of chocolate, I decided to go with this flavour.My hubby hates Chocolate cheese cake & he just had a small piece. The cake turned out perfect & it was really a rich cake. The most enjoyed people were my friend & my son:) When I served my friend with a piece, she was like "Waw!" you are totally a professional & this looks like a international standard. As usual I just blushed:)


    I made a small quantity of caramel sauce as I had only 1/2 cup of whipped cream left in the fridge. The cake was well balanced & tasted yumm. This is a must try for all chocolate lovers. This is how I made it.

    Ingredients:
    • 250gms Cream Cheese (I used local Cream Cheese )
    • 1 cup powdered sugar
    • 1 cup melted semi sweet chocolate
    • 1 cup Milk
    • 100 gms Agar agar powder or 1.5 Tbsp gelatine
    • 1/2 cup warm water
    • 10- 15 digestive biscuits
    • 50 gms Butter
     
    Method:
    1. Crush the Digestive Biscuits in the Mixer. Add 50 gms of butter to this powdered biscuits & make a base in a cake tin 8 0r 9 inch (square/round mold or spring form pan). I made a high base till it reaches half way of the tin. You can choose to make a short base.
    2. In an electric beater beat the cream cheese, sugar, melted chocolate & milk to a smooth mixture.
    3. Add 100 gms of agar agar to 1/2 cup hot water & stir continuously so no lumps are formed. Now microwave this mixture for 30 seconds & mix it well to remove any lumps from them. Set this aside to cool down.
    4. Once cooled, Pour in this mixture to the cream cheese mixture & mix well. Pour this into the mold & chill this in the freezer for an hour or in the fridge to set for 5 to 8 hours.
    5. After an hour remove the cheese cake mixture & pour the caramel sauce on top of the cake evenly. Now put this back in the freezer for about 15 to 20 mins to set.
    6. After its set a little, remove the cake out & top it up with the thick rich chocolate ganache. Now put it back in the fridge & not freezer this time. Cover the cake with a silver foil or cling wrap & refrigerate it for at least 2 hours to set well.
    7. Now the cheese cake is ready to serve.


    (My cake piece did not come out clean coz I cut it immediately once it was out from freezer. Please wait for the cake to stay in room temperature for some time & only then cut it to get clean pieces.)


    Caramel Sauce:
    • 1 cups granulated sugar
    • 2 Tbspn unsalted butter
    • 1/2 cup heavy whipping cream
    • 1/4 tspn salt
    Directions:

    1. First, make sure you have all of the ingredients ready. Once you start the caramel sauce you have to pay close attention so you don't burn it.
    2. Heat the sugar over medium high-heat in the saucepan. When the sugar starts to melt, start whisking the sugar. The sugar will clump up, but keep whisking. It will continue to melt. When the sugar is melted, stop whisking. You can swirl the pan to move the sugar around.Continue cooking the sugar until it reaches a deep amber colour. Make sure you watch the pan very closely. This is where it is easy to burn the caramel.
    3. As soon as the sugar reaches the dark amber colour, carefully add the butter & salt. Whisk until butter is melted.
    4. Remove the pan from the heat and slowly pour in the heavy cream. Whisk until cream is incorporated and caramel is smooth.
    5.  Let the caramel sauce cool  &once cooled, Pour the caramel into a air tight box and refrigerate it. You can store the salted caramel sauce in the refrigerator for about a month.

    Thick Chocolate ganache
    • 1 cup dark chocolate chips
    • 1/4 cup heavy cream
    • 3 Tbspn of sugar
    • Pinch of salt.
    Directions:
    1. Bring the cream to a boil along with sugar & salt. Now add in the chocolate chips into the hot cream & wait until all the chocolate is melted. Once it is cooled a little, use it on the cake immediately. If you allow it to cool down completely the chocolate will become hard & crumbly.