Showing posts with label Breakfast food. Show all posts

Saturday, 21 March 2015

Creamy Egg scramble


Its a start of spring here in Austin & I cant tell you how happy I am. The sun is up,  its so bright & nice... I love this time of season the most. I have already done my Patio cleaning for the spring & waiting to decorate it this week. I have also been so busy this & last month with so many cake orders. I am also catering my desserts to a catering company that delivers to offices across Austin. Now that is a super good news for me. So my weeks are very unpredictable, I can get a order any time & I need to be ready to take it. I am loving the way my life is going as I am totally occupied & doing something that I am passionate about. However I will definitely find some time out of my busy schedule to blog once in a while.


Today I am sharing one of my favorite Breakfast egg recipes. This recipe is super simple & not many know about this. I remember as a child when we visited Bangalore, my parents used to take us to a cafe in MG road. I really don't know the name of the cafe nor the dish. But I remember that we used to order this dish. You all know that I am from a foodie family. My parents have this habit of asking the restaurant people for recipe & fortunately they shared the recipe:) This is how I made it...

Making time: 5mins
Serves: 1 person
1 Non stick Pan for cooking

Ingredients:
  • 1 whole egg
  • 1/2 cup milk
  • salt to taste
  • Black pepper for garnish
  • 1 tspn Oil
  • 1 Large toasted Bread
Method:
  1. Lightly beat the egg, milk & salt in a bowl
  2. Heat the non stick pan on low flame, add oil & egg mixture into the pan. Now start scrambling the eggs with a wooden spatula until it all comes together, This should take less than a minute. When you see the milk separating you know the eggs are done.
  3. Now take it out & pour it on top of the toasted bread. Garnish the eggs with Black pepper powder
Note:
  1. The pan should not be very hot, the flame should be on low heat. In case you feel the pan is very hot, turn off the heat. 
  2. Do not over cook the eggs. The egg texture should be soft, creamy & you will see the milk slowly starting to separate. 

Friday, 12 July 2013

Goli Baje/ Mangalore Bajji


Mangalooru Bajji or Goli Baje is another fried snack that is very famous in the Mangalore region. These are also available in most of the udupi restaurants in Bangalore.  This was also one of the snacks my mom used to make for us. The best Goli baje's I have had is in coorg. There used to be a small canteen by name Kumar Vilas & my Pappa used to parcel some from there & get it. These were so delicious that my sister & I used to fight for major share. Back in Mangalore during our college days along with Buns, we used to order this one too. Hot baje's were served with coconut chutney & these were like KFC burgers to us.  These are easy simple to make & a very good evening snack with some filter coffee. This is how I made them:


Ingredients:
  • 1 Cup All Purpose Flour/Maida
  • 1/4 cup Chickpea Flour
  • 1/2 cup yogurt
  • 1.5 Tbspn Coconut (chopped)
  • 1 Tspn Cumin/Jeera Seeds
  • 1 Tbsp Ginger (finely chopped)
  • 1 Tbspn Green Chili (finely chopped)
  • 6 to 8 curry leaves chopped
  • Sugar - 1 tsp
  • Baking Soda - 1/4 tsp
  • Oil for frying

Directions:
  1. Make a batter with all the above ingredients. The batter consistency should be as thick as cake batter.
  2. Let the batter rest for at least 20 minutes
  3. Now take 1 Tbspn of batter & drop them in the medium hot oil. Fry these for 2 to 3 minutes until they are golden brown. These Baje's will increase in size while frying. Goli Baje has a crisp crust outside and a soft spongy interior. 
Note:
  • You can wet your hands & drop a small portion of batter in the oil to get those perfect round shapes.
  • Zion was in my hand while I was making these, so could use my hands.
 

Wednesday, 10 July 2013

Mangalore Buns

I am sure every Manglorean loves this dish "Mangalore Buns" These are available in almost all restaurants, canteens in Mangalore region. My mom used to make them at least 1 once a week during our school days in coorg. We used to eat them almost every other day in our Agnes college canteen.. I love them a little sweeter & mostly this is made semi sweet. Its served with chutney or Sambar in the hotels. I love to eat them as it is. This recipe is already posted in my blog & then I dint have a canon, so most of my old post pictures are taken from my phone camera. I thought of clicking some pictures & revisting this post.

For the recipe click here


Thursday, 4 July 2013

Poori Masala


Poori is a fried flat bread & a very famous Indian breakfast. This is famous all over India be it south or north. However there are also some different version of pooris in different states like the stuffed pooris. This one is a simple one & tastes great. Since this is deep fried, I rarely make pooris for breakfast at home. This is my hubby's fav & when made he will have at least 8 to 10:). He loves to eat with mixed fruit jam after he is done with curry. I was not too sure to post this recipe or not coz this is very very simple. Since I wanted to have a good options for breakfast in my recipe index, I am posting this.
 
Ingredients
  • 2 cup wheat flour
  • 1/4 tsp salt (or as needed for taste)
  • 1/2 cup water (as needed to make a pliable dough)
Directions:
  1. In a mixing bowl mix in wheat flout & salt.
  2. Now add in water as required & make a soft dough kneading it continuously for about 2 to 3 minutes.
  3. Make small balls out of it. You can decide don the size of pooris depending on the size of your pan.
  4. Now with a rolling pin, roll the small dough thin & flat. Sprinkle some flour on top so that it doesn't stick. Now remove any access flour & drop it in the hot oil.
  5. Once you drop it in oil, make sure you keep pouring the hot oil on top of these pooris so that they puff up. Just 30 seconds is all that you need to get these cooked & puffed.
  6. Now they are ready to eat.
Note:
  • Make sure you make many flat pooris so that you can fry them faster back to back.
  • Do not let the rolled pooris sit long outside as they will get hard & crack.
  • You have to fry them in hot oil like we do for Papads
  • These are best with Potatoes Peas curry.


Sunday, 30 June 2013

Bread sticks


Every kid loves to munch on chips & so is my little one. Zion just loves chips & can finish off the entire packet. We all know that the store brought chips is not a healthy one. The seasoning used in them is definitely not good for kids & also adults. Since zion loves something crispy tasty, I made this buttery bread sticks. These were really crisp, lightly sweet & also very tasty. He loved having these & asked for more. These are very easy to make & the recipe is very similar to the pie crust. This is how I made these cute little yummy sticks.

Ingredients:
  • 2 cups all purpose flour
  • 1 Tspn baking powder
  • 80 gms cold salted butter
  • 1/2 cup of powdered sugar
  • 1/4 cup of cold milk
  • Pinch of salt
Directions:
  1. In a bowl mix in the dry ingredients & rub the cold butter to the dry ingredients. Make this mixture like a bread crumb consistency. Just your finger tips are enough to get to a right consistency,
  2. Now add in a little milk to bring this mixture together to form a soft dough.
  3. Use a rolling pin & roll the dough on a flat surface & cut them into long sticks or any shape for that matter.
  4. Pre heat the oven to 250 degrees & bake them for about 15-20 mins or until they are crisp & done.

Note:
  • These can be had with some dips like mayonnaise, cheese sauce, ketchup of just like that.
  • Store them in a air tight container so that they remain fresh & crispy.
 

Thursday, 30 May 2013

Home made Bread


Making Bread at home is such an easy thing. You can customise it the way you want. & also add in some stuffing of your choice. Sometimes I feel lazy & I just pick up bread from the store. The store brought bread are very cheaper compared to the one made at home. But definitely the one made at home tastes better & free from any preservatives. You can also enjoy it hot.

Hot Bread reminds me of my childhood days. My Pappa used to buy fresh hot bread from Cosmos Bakery in Madikeri. Since its hot the bread would not be sliced. Once Pappas gets it home, me & my sister start digging into the centre & will make a big well in the bread:) Well in the bread also reminds me of my hostel days. Every Sunday's we used to get bread for breakfast. The Bread again used to be unsliced ones. So we would see everyone just eating the centre part & the outside will remain like an empty box:) Now coming back to the recipe, I made this more like a sub then a Loaf. I also made some small dinner rolls around 4 out of this. We had these hot bread with fried egg, Butter & Jam. Hot Bread & butter is an amazing combination:) My lill 2 year old also loved this for breakfast with butter. This is how I made them


Ingredients:
  • 500 gms Bread flour or All purpose flour
  • 1 Tbsp sugar
  • 1/4 cup lukewarm water
  • Salt- 1 1/2 tsp
  • 1 cup Water
  • 1.5 Tbspn Instant dry yeast
  • 2 Tbsp Oil- 4 tbsp
Method:
  1. Mix the yeast in the lukewarm water along with the sugar. Do not stir in, Just let it rest for about 2 mins. Now slowly stir in & rest it again until it gets very foamy.
  2. Now mix all the above ingredients to a sticky dough.
  3. You may need to add a few spoons of flour or water to achieve the right texture. Knead this well for about 5 to 8 mins.
  4. Let the dough rise for an hour in a warm place. keep it covered with a kitchen towel.
  5. Gently press the dough to release the air and divide the dough into two.
  6. Shape it into two 8 - 10 inch sub & let it rest again for another 20 mins in the baking tray. Cover with a cling wrap.
  7. Preheat the oven to 180 deg C and bake for 30- 35 minutes.
  8. Make sure you cool it first before slicing or just dig in & have like I did:)


Wednesday, 8 May 2013

Omelette


Zion's food habits is like Singapore Weather. I don't know when it changes. Some times he loves rice & sometimes just locks his mouth. For the past 2 days my boy has been refusing rice & not even having Chapati or paratas. He is a big chicken fan, can eat only chicken the whole day & survive kinds:) Every Mommy knows how difficult it is to feed the little ones. But we Mommy's are very good at trick feeding. Since last evening I have been thinking of something nutritious & delicious dish for zion. Should look different at the same time should have a combination of carbohydrates, fats, protein & vitamins. Since he likes eggs thought of adding in some veggies & making it a power pact lunch for him.

This is nothing extraordinary but the combination, presentation & flavour is excellent. BTW this is just not a toddler food, even Adults can have it too. Since Zion likes curry flavour, I gave added a pinch of curry powder (Garam Masala or chicken curry powder) . Well you can add any vegetables to this.I  He loved his lunch & was excited to see something very different. This is how I made it


Serves 1
Cooking time: 30 mins

Ingredients:
  • 1 Egg beaten
  • 1 Potato grated
  • 1/2 carrots grated
  • Pinch of Ginger
  • 1 Tbsp of Parmesan Cheese
  • 2 Tbsp cooked Rice
  • salt as per taste
  • Pinch of curry powder (Chicken curry powder)
  • few coriander leaves
  • 1 Tbsp Butter
Method:
  1. Boil the grated Potato, Carrots for about 8 to 10 mins, until its done. Drain water & set aside
  2. Now add in half portion of boiled vegetables to the egg mixture & also add in cooked rice, ginger, cheese, coriander leaves, curry powder, salt. Mix this well
  3. Now pour it on a heated buttered pan & cook it closed for about a minute.
  4. Roll it & cook on both sides until done


Here is a step by step picture

Note:
I added only half of boiled vegeteable for this dish. The rest I will use it for making another set at night.

Tuesday, 7 May 2013

Coriander Adai


Yesterday I was just thinking on what to make for Breakfast. Suddenly I happened to see a post from my fellow Blogging Marathoner "Srivalli" Her Dosa recipe was very inviting & totally new to me. I was curious to know more about it & wanted to make it for Breakfast this morning. The best part of this recipe is that its a instant dosa. There is absolutely no much waiting time like the regular dosa. The Dosa came out perfect & it was very delicious. My hubby was  non verbal praises about this dosa. Nonverbal! yes, coz he was in a conference call this morning & I served his breakfast in his office room. This is definitely a keep & share recipe. I am going to call my mum today & pass on this beautiful easy recipe. Thx Srivalli for the recipe:) You can find her recipe here

Makes around 10 Dosas

Ingredients:
  • 1 cup Dosa Rice
  • 1/4 cup Urad Dal
  • 1/4 Cup Toor Dal
  • 1/4 Cup Channa Dal
  • 1/2 tspn Methi seeds
  • 1 Tspn minced Ginger
  • Handful of coriander leaves
  • salt as per taste
  • Ghee for garnishing
  • 1/2 cup water
Method:
  1. Wash all the lentils (Dal) & rice. Soak this for minimum of 2 hours or overnight
  2. Grind the soaked lentil rice along with chopped coriander leaves, ginger & water to a dosa consistency batter
  3. Heat the flat non stick Pan (Tawa) spread a ladle full of batter on the heated pan & cook for a minute or until done. Garnish the dosas with few drops of ghee. The dosa is ready.
Note:
  • In Vallis original recipe she has added green chilis & navratna dal. I skipped chilis coz I wanted to feed my lill boy.
  • Since I dint have navaratna dal I skipped this.
  • I like my dosas thin & crisp hence I have made thin ones. You can make thicker dosas & flip of both sides while cooking.
I had these Dosas with some Curry leaf Chutney.

Wednesday, 20 March 2013

Methi Paneer Burji


This recipe is same as egg burji or masala scrambled egg. Burji in Indian term means scrambled. In Indian egg burji, Paneer burjis are very common & are also considered as street food. I have used methi leaves but you can use any greens for this recipe. Most of the times I use Spinach (Palak). Very easy to make & goes well with Roti, Rice & also for sandwich. I also make this for my lill toddler to go along with rice or Roti. This is a perfect wholesome breakfast. This is how I made this.

Ingredients:

1 Cup crumbled Paneer.
1 cup chopped Methi Leaves (Fenugreek leaves) or spinach
1 medium onions chopped
1 large tomatoes chopped
1/2 tspn red chili powder
1/4 Tspn Turmeric powder
Salt as per taste
1/4 Tspn Sugar
1 Tbsp Lemon juice
1 Tbsp oil

Method:

In a Pan add oil fry the onions & tomatoes until soft. Now add in all the masalas(Spice powders)  mentioned above. Now add in the Methi leaves or spinach & cook this for about 2 mins. Finally add the Paneer (cottage cheese), sugar, lemon juice in it & give it a good mix. Turn off the flame in a minute & Your Methi Paneer Burji is ready.


Note:
Methi leaves are a little bitter so you can add more sugar in this recipe if you want.

Tuesday, 12 March 2013

Oats Burger


Now that I have decided to incorporate more & more healthy food in my diet. Wanted to try out making veggie patties with oats. I had made this for brekfast last week & they turned out so good. The oats in the patty really binds up the ingredients well & adds in that extra flavour. I found this burger very tasty, healthy & filling. This is how I made it & note down the ingredinets

Serves- 5,  Cooking time- 20 mins

Ingredients:

To pressure cook:
  • 1 cup Potatoes
  • 1/2 cup carrots & green beans
  • 1/4 cup green peas
  • 1/2 cup dry roasted oats
  • 1/4 Tspn Turmeric powder
  • 1/3 Tspn Chili powder
  • 1/2 tspn garam masala powder
  • 1/4 tspn amchoor powder or juice of lemon
  • 1/2 tspn Chaat masala
  • 1/4 cup of chopped coriander leaves
  • 1 medium chopped onions
  • 1 tbsp ginger garlic pieces
  • 1 Tbsp Oil
Method

  1. In a pressure cooker boil all the vegetables mentioned above until 1 whistle. Once cooked drain off all the excess water & refrigerate this for about an hour.
  2. In a Pan add in oil, fry the ginger & garlic pieces for about a minute
  3. Add the chopped onions & fry them untill they are translucent
  4. Add boiled French beans, carrots, green peas and mix. Add salt and continue to sauté for two minutes.
  5. Add in the toasted oats, mashed potatoes, all the masalas, mix well & cook for about 3 to 4 minutess
  6. Finally add in the coriander leaves & slat as per your taste. turn off the heat.
  7. Heat sufficient oil in another pan. Take a portion of the mixture, shape into a ball and roll in corn flour. Press lightly and place the cutlet in the pan.
  8. Shallow fry till both the sides are evenly golden. Similarly prepare more cutlets. Drain and place on an absorbent paper and serve hot between the burger buns
Assembling the burger
Cut the bun into half, place around 3 slice of plums followed by veggie oats Patty, again some slices of plums & low fat cheese. The burger is ready to eat.


Oats Upma


Well this was one of the breakfast recipes that I had bookmarked to make under the Oats category. I never knew that oats are so versatile! I am so impressed with the way these oats recipes have turned up. I really loved the taste of this Upma. I generally hate Upma & very very rarely make them. But these with Oats tasted really nice. A healthy & filling breakfast. The best part is you can add in any veggies you want in it. Here is the recipe & happy cooking/eating:)


Oats Upma Recipe
Serves: 4 Cooking Time: 25 mins

Ingredients
  • Quick cooking Oats - 1 cup (Dry roast this for about 5 mins)
  • Water - 1.5 cup
  • Onion - 1 medium sized chopped finely
  • Turmeric powder - a generous pinch
  • 1/2 Cup Carrots chopped to small pieces
  • 1/2 cup green peas
  • Pinch of Asefotida
  • Coriander leaves - 2 tsp
  • 1 Tspn lemon juice
  • 1 Tbsp sugar
  • Salt - to taste
  • Oil - 2 tsp
  • Mustard seeds - 3/4 tsp
  • Urad dal - 1/2 tsp
  • Green Chillies - 1
  • Curry leaves - few
Method:
  1. Add 2 Tbsp of oil in a Pan/ Kadai. once the oil is hot add in mustard seeds
  2. Once they splutter, add onions, curry leaves, green chili's, asifotida & fry until onions are translucent.
  3. Add in carrots, green peas, turmeric powder & fry this for 2 mins.
  4. Now add in 1.5 cups of water, salt, sugar & bring this to a boil for about 1 minute.
  5. Now add in the oats & keep stirring until everything is well mixed. Add in lemon juice, coriander leaves.
  6. Close the lid & cook this on low flame for about 3 to 4 mins. Open the lid, give it a good mix, check if its cooked & the water is drained off.


Wednesday, 6 March 2013

Oats Idli


Weight Loss has always been there in my mind. Every time I start my exercise regime, my very new friend "Back Pain" stops me from going any further:(. When it comes to food, I can never compromise on the taste. Food has been given the NO1 priority at home since my childhood. My mom was & has been making very tasty rich food. However I always make tasty food but avoid the richness in my everyday food. I know there are many of you like me who cannot compromise on good food. Hence I have decided to come up with super healthy tasty recipes that will fill your tummy, taste buds & also help you stay healthy. I am going to try this diet which I will post it once I achieve some results.

Well I plan my menu a day before. Last night I asked my maid to make sambar in the morning & told her for breakfast we will make oats & have it with sambar. Although I was not very keen on having it, but still for the weight loss sake decided will have it. As usual my hubby's day starts very early in the morning. His meetings starts mostly by 6am , back to back & goes on till 10 or even 11am. I had my usual morning cup of coffee & was waiting for my hubby to have breakfast together. It was half past 9 & I was very hungry. My hunger was signally me that oats & sambar is not going to satisfy you. Sheela please think of something else healthy & tasty. I quickly thought of Oats Idli & made it the way I make Rava Idli. I must say that this was really tasty & definitely healthy. Its very simple to make & can make it within20 mins. This is a must try recipe & Anybody can cook this.

Ingredients:
  • 1 Cup Oats
  • 1/4 Cup Rava (Semolina)
  • 1/2 Cup Curd
  • 1.5 Tspn Eno
  • 2 Tspn Lemon juice
  • 1 Carrot grated (You can use any vegetable you want)
  • 1 Tspn chopped Ginger
  • 1 Tbsp Moong dal
  • 1 Tspn mustard seeds
  • 6 to 8 curry leaves
  • Pinch of Hing (Optional)
  • 1 Tbsp Oil
  • Salt as per taste
  • 1/2 Cup water
Method:
  1. In a Pan add a Tbsp of oil. Once the oil is hot crackle the mustard seeds, add in curry leaves, hing, moong dal & fry for a minute.
  2. Now turn off the heat & set this aside. In a Pan dry roast the oats & semolina separately for few minutes until fragrant.
  3. In a bowl mix all the ingredients (1 & 2) together with curd, grated carrots, Eno salt & sufficient water to get the idli batter consistency. Its ok if its a little thin.
  4. Now grease the Idli making vessel & steam them for 10 mins. Oats Idlis are ready:)

Note:
  • You can add any vegetables to this batter
  • I am planning to try these again with some green peas & carrots.
  • Eno is the main agent in this recipe to make the idli smooth & get the right texture.


Wednesday, 9 January 2013

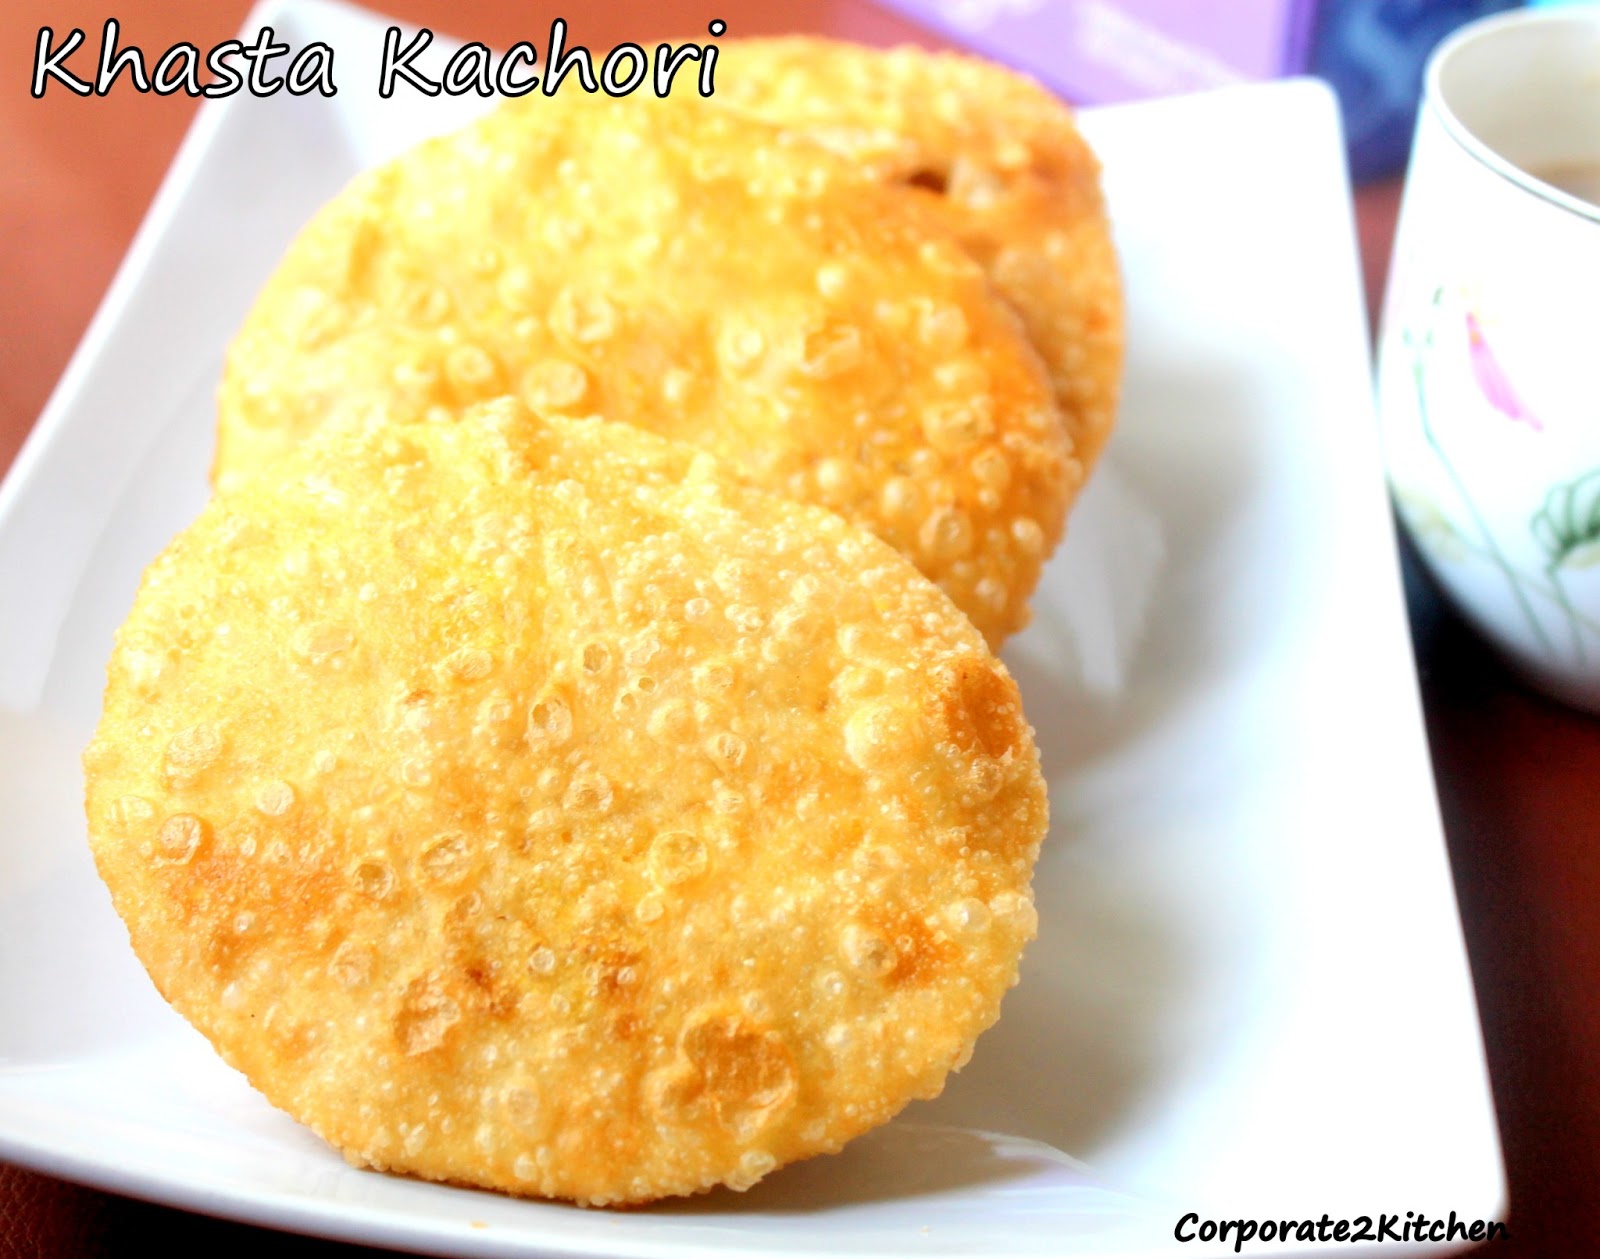
Khasta Kachori


I had kachoris recently at my friends place here. She made it for the first time & it tasted really good. I decided to google on some good kachori recipes online. Finally I tried Sanjeev Kapoor's recipe & it turned out super good. This is the first time I made it & we had it as breakfast on new years day:) . BTW Khasta means flaky. Its some out like puff pastry. I must say its a Indian puff pastry:) Its very simple to make & you need to make sure that the stuffing is totally dry. This is how I made it....


Ingredients
2 Cups All purpose flour
1/2 tspn baking soda
salt as per taste
Oil 3 tablespoon
For Filling
1/2 cup Split Yellow Urad Dal
1 inch ginger chopped
1 green chilli chopped
6- 8 cashew nut chopped
Pinch of Asafoetidaa powder
1/2 tspn coriander powder
1/2 tspn Cumin powder
1/4 tspn amchur powder
1/4 tspn fennel powder (saunf)
Salt as per taste
Oil for deep frying


Method:
Sift the flour, salt and soda bicarbonate together. Add oil and mix well. Knead into a soft dough using sufficient water.(Like Chappati dough) Cover with a moist cloth and set aside. Soak the urad dal in two cups of water for an hour. Drain and coarsely grind using a little water. Peel, wash and finely chop ginger. Remove stem, wash and chop green chilli. Roughly chop cashewnuts. Wash raisins and pat them dry. Heat ghee in a kadai and add the ground dal, ginger, green chilli, asafoetida, coriander powder, cumin powder, fennel powder, cashewnuts. Cook till all the moisture has dried up. Add salt and lemon juice. Mix well and remove off the heat, let the mixture cool. Divide into sixteen portions. Divide the flour dough into sixteen equal balls. Roll out into small puris so that they are thinner around the edges and thicker in the centre. Place a portion of stuffing in the centre and bring the edges together to form a ball. Flatten slightly. Heat sufficient oil in a kadai and deep fry kachoris on low heat for three to five minutes or until golden brown and crisp. Serve with tamarind chutney.


Thursday, 4 October 2012

Pork Mince Idlis

I am not a big fan of plain Idlis. I love Sannas which looks like Idli but tastes very different  & nice. I always try to add in some toppings to my Idlis to make them taste better. I made these this morning for breakfast & they were delicious. This is a must try recipe & something very different from the regular breakfast dishes. You can add any topping of your choice,


Pork Mince Masala

Ingredients
300 gms Pork Mince
1 Tbso Ginger Garlic paste
1 chopped tomatoes
1 medium onion chopped
1 Tbsp Chili Powder
1/4 Tsp Turmeric powder
1/2 Tsp Garam Masala
1 Tbsp Oil
1 Tbsp Lemon juice
Salt as per taste

Method:
Pressure cook pork mince (2 whistle is fine). In a Pan add oil fry ginger garlic, onion, tomatoes until they are well cooked. Add in all the masalas & cook for 1 min. Finally add in the cooked pork mince (Drain water)  & cook for about 2 to 3 mins untill well mixed.

Idli Recipe

Ingredients
3 Cups Idli Rice
1/2 cup Urad dal
1/2 Tsp Fenugreek seeds
water as needed
Salt per taste

Method:
Wash and soak rice separately and urad dal + fenugreek seeds for 4 hrs at least. Grind rice seperately untill its smooth. Now grind the Uraddal & fenugreek seeds to a smooth paste. Mix both the batter & set it aside for atleast 6 to 8 hours. If you are living in a cold region than leave it for 10 hrs or until its well risen. Now Por 2 tbsp of batter into the mould or idli plate. Garnish some of the mince meat on top. steam them in a steamer or idli steam vessel for 5 to 8 mins. You can also microwave them.

Note:
  • I always add salt just before making the Idlis.
  • You can add any garnish on top of idlis.
  • You can use chicken mince or even Paneer mince instead of Pork. Or infact anything that you like.
 

Sunday, 30 September 2012

Bullseye Appam

Appams are a very common breakfast dish in Kerala. There are different types of Appam & this one in the pic above is PaalAppam. Bullseye Appams are mainly maid in Northern Kerala. Since Coorg is very closer to northen Kerala, there are a lot of Kerala recipes that are quite common in Coorg. My mom adds Toddy to Appam as its easily available in my hometown. But I generally add yeast & its very easiely available. This dish goes very well with Stew, Egg Curry, Korma & Kadala Curry (Black Peas) I mostly make eggcurry with Appams. But the Bullseye ones can be eaten just like that without the curry.
      
Ingredients:
2 Cups Idli/Dosa Rice (1/2 Kg)
3 Tbsp of Cooked Rice
1 Can Thick Coconut Milk (200 gms)
1/4 Tsp Yeast (Dissolve this in 1/4 cup luke warm water & 1 tbsp sugar)
Eggs
Salt as per taste

Serves: 6- 7 people & can make around 20- 25 Appams

Method:

Soak Rice for about 5 to 6 hours. Grind this to a thick batter along with coconut milk. Add in the yeast mixture to the batter & mix well. Cover this a let it rise for about 8 to 10 hours. Mix salt & water if required. Use a Appam Pan, Pour a laddle of batter in the pan & rotate the pan around so the batter spreads evenly around. Crack an egg in the center of the pan close lid & cook this for a minute on very low heat. Slowly remove the Appams out from the Pan. Serve Hot, season the egg with salt & pepper.

Note:
  • You can replace coconut milk to grated coconut. Since we get very good quality coconut milk in Singapore, I prefer milk. If you are using grated coconut than add 1.2 cup
  • When you make a yeast mixture, use lukewarm water, If the water temperature is not right the yeast can die. Your yeast micture should become frothy & bubbley. That when your Appams will turn out soft & good.
  • You can add in more sugar if you want your Appams sweet.
  • You can also make your Appams without eggs.
  • I soak my Rice in the afternoon around 1pm & grind them at 8pm & make Appams ithe next day morning around 9am. This works perfect for me.
  • Always keep the batter in a big vessel, as this can overflow when its kept to rise.