Showing posts with label Curry. Show all posts

Tuesday, 13 January 2015

Stuffed Gobhi Mussallam


(Please note that the Olive oil in the picture was added to make the picture look more presentable. In real, you will not have so much oil. I have also presented only a small portion of the dish in the picture with just 3 florets)

 I have now decided that I will at least post 2 or more recipes in a week in my blog. This morning I have been thinking of making something new & different. I had heard about this dish "Gobhi Mussallam" for the first time a month ago, when my friend mentioned about it. She said it was made during Diwali & other occasions at her home. That is when I started my research for this recipe. Finally I found one which I felt could be good. Well traditionally the whole Cauliflower is baked/tandoored & added into the masala. I decided to cut mine into big florets & add them. Somehow I am not very comfortable to have a big vegetable:) Upon checking the Mussalam recipe, I felt it was very similar to the regular masala recipe. That is why I tweaked in the recipe to make it more tastier. This turned out super delicious & a must must try recipe. My hubby kept licking his fingers... This is how I made it.


Serves: 3 - 4 people
Making time: 1 hour
Preparation time: 10 mins

Ingredients
  • 1 Medium Cauliflower cut into big flowers
  • 3/4th cup Chenna (Soft cottage cheese)
  • 2 tbspn of olive oil for baking cauliflower
  • 1 Tspn Chili Powder
  • 1 cup organic Tomato puree
  • 1 Tspn Coriander powder
  • 1/4 Tspn Turmeric power
  • 1 Tspn Cumin powder
  • 1/4 Tspn Cumin seeds
  • 1 Tspn Ginger Garlic paste
  • 1 medium Onion (Around 2 cups roughly chopped)
  • 2 Tsp Kasoori Methi
  • 3 Tbspn Greek Yogurt
  • 1/2 tspn cardamom powder
  • 4 Tbsp olive Oil
  • Curdled milk (Chenna) from 1 Ltr whole Milk
  • Salt as per taste
Direction:
  1. Make a marinade with cottage cheese, cardamom powder, kasoori methi & salt. Stuff the washed Cauliflower florets with this marinade. Make sure it is well coated.
  2. Pre heat the oven to 380 degrees & bake the stuffed cauliflower for about 15- 20 mins. Make sure you sprinkle some olive oil on top of the cauliflower. Once they are cooked set it aside.
For the Mussalam gravy
  1. Grind onions along with ginger & garlic to a fine paste.
  2. In a heavy bottom deep pan add oil. Once its hot add cumin seeds & ground onion paste. Cook this for about 6 to 8 minutes until it starts to stick & fat separates . Make sure you keep sautéing in between.
  3. Now add in the tomato puree, cumin, coriander, turmeric, chili powder, salt & cook it on medium flame for about 5 to 7 minutes. Keep stirring in between.
  4. Now add in 2 cups of water, cover the lid & cook this on medium flame for about 10 - 15 mins or until fat separation & all the raw smell goes off. Make sure you sauté in between.
  5. Now add in 3 tbspn of greek yogurt & mix well. Now the Mussalam gravy is ready.
  6. Add in the baked cauliflower in the gravy. Either mix it with gravy or just place it on top of the gravy.
  7. If you feel the gravy is very thick add in some more water. I made mine thick, as I was having them with Rotis.


How to make Chenna:
  • 1 Ltr whole Milk
  • 1 juice of a lemon
  • 1/4 cup of water
Direction: Bring the milk to rolling boil. Into the 1/4 cup of water squeeze in the lemon juice & add this to the milk. Let the milk keep boiling for another minute on low flame. This process will curdle the milk better. Now turn off the flame & drain off the water on a muslin/ cheese cloth. keep this under running water for few seconds so that the tanginess from lemon goes off. Once the water is drained off , which takes about 10 mins, the Chenna will be ready to use. Since its fresh it tastes really creamy & tasty. You can also make this ahead of time & store it in the refrigerator


Here is the step by step picture to show how to bake the Cauliflower & make the gravy


Friday, 21 February 2014

Aloo Gobhi Tikki Masala


Aloo Gobhi (Cauliflower & Potatoes stir fry) is a very common Indian Vegetarian dish. Most of you must be making this dish at least once a week. Some times we become so bored with the same old recipe. Although I like the regular Aloo Gobhi, I decided to give it a twist by changing the process of making this dish. I must say that this new dish was absolutely yummy & very different. I will call this dish "Aloo Gobi Tikki", as the recipe is almost the same but method of making is different. This dish can be made for daily meals or even on a special occasion. Since most of my friends keep asking for new vegetarian dishes, I thought will experiment something new. This is how I made this...


Serves: 4
Making time: 30- 45 mins
Cooking time: 20 mins


Ingredients:
  • 1 medium size Onion chopped
  • 2 riped large tomatoes pureed
  • 1 tbsp ginger garlic paste
  • 1 Large potatoes (1.5 Cup of chopped potatoes)
  • 1.5 cups chopped cauliflower (Almost 1/2 of medium size cauliflower)
  • 2 Tbspn chopped Cashew nuts
  • 1 Tspn Cumin seeds
  • 1.5 tbspn Kashmiri chili powder
  • 1/4 Tspn Turmeric powder
  • 1/2 Tspn Garam Masala
  • 3 Tbsp Plain flour
  • 2 Tbsp of Cheddar cheese (Optional)
  • 4 Tbsp Oil
  • salt as per taste
  • 5 Tbsp Coriander leaves for garnish
Directions:

  1. In a microwave safe bowl add in chopped cauliflower, potatoes with 2 cups of water & cook it for about 10-12 minutes. (Either set baked potato option or boil vegetables option in your microwave) If you don't have a microwave just boil it on the stove top until its cooked.
  2. Once the Aloo Gobhi are cooked, drain water (stock) & set aside the Aloo Gobhi to drain completely. Save the drained water (stock) for the gravy.
  3. Make a paste of plain flour with few tbsp of stock & set aside.
  4. In a bowl slightly mash the Aloo Gobhi with a fork. Let the Aloo Gobhi  be a little coarse.
  5. Add in to the mash Aloo Gobhi   1/2 Tbsp of chili powder, pinch of turmeric powder, 1/2 tspn garam Masala powder, salt , 3 Tbsp coriander leaves, cashew nuts, Plain flour paste, cheese & mix well.
  6. In a Paniyaram Kadai add few drops of oil into each section. With a spoon pour this Aloo Gobhi mixture into each section & cook this on low flame for about 3 minutes on each sides. Keep rotating to make sure its cooked evenly. (You will need help of 2 spoons to rotate the mixture) Once this is cooked remove & set aside.
  7. For the Gravy: In a Pan add 2 tbsp of oil, fry cumin seeds,  ginger garlic paste for a minute, add in onions & fry them until they are translucent.
  8. Now add in the tomato puree, Kashmiri chili powder 1 Tbsp, 1/3 Tspn Turmeric powder, 1/2 Tspn Garam Masala Powder & salt as per taste.  Close lid & cook until fat separation on low flame. This process should take about 8 to 10 minutes.
  9. Once the gravy is done add in some stock as required. I added 1/2 cup & bring this to a boil. Now add the fried Aloo Gobhi Tikki & give it a gentle mix. Do not over mix as the Tikki's might break off. Finally garnish the dish with coriander leaves.

Note:
  1. If you dont have a Paniyaram Pan you can make the tikkis on a Tava.
  2. You need not add cheese, I simply added as I had a good stock of grated cheese. 
  3. This dish goes well with both rice & Rotis.
  4. I have taken step by step picture for the Tikkis.
Check out more Cauliflower recipes:
Gobhi Manchurian gravy
cauliflower-cherry-tomato-stir-fry
gobhi-badal
Gobhi Manchurian


Friday, 2 August 2013

Squid Curry

 
Finally Zion is out of fever zone & is all charged up. These days he is so attached to me & walks along with me like my tail. I cant tell you that he even doesn't let me go for a bath or toilet:) At last I decided yesterday to have some "me" time while he was asleep. My hubby gave me a reward card & told me shop whatever you want:) Now that is like a super gift for a wife right? I reached the MRT & called one of my friends to say that I am shopping today. She & I have had so many good times shopping together in the past. Now she too is a new mommy so she hardly gets time to go out & have "me" time. Finally it worked for both of us:) We met at Raffels place had lunch together, did some window shopping, chit chatting & then shopped till evening in the malls. It was a great outing. More than shopping we enjoyed each others company. Its so much important to have this "me" time once in a while. Before having Zion I used to meet this friend almost every week & now its like once a month or once in 2 months kinds.


These days I am so lazy to blog but definitely not lazy to cook. I have been making so many new dishes but haven't had the time to upload any of those. Now today's post is a curry that I made some time ago. This is a simple style Mangalorean curry made with coconut milk. This is how my Mom makes most of the fish curry. A very tasty & easy curry to go well with everything be it rice or roti's. This is how I made it:
 
Ingredients:
  • 1 Kg cleaned & cut Squid
  • 2 Onions chopped
  • 2 Tomatoes Chopped
  • 1 Tbspn ginger garlic paste
  • 1.5 Tspn Cumin powder
  • 1.5 Tspn coriander powder
  • 1 Tspn chili powder
  • 1/4 Tspn turmeric powder
  • 1 Tbspn lemon juice
  • 1 cup coconut milk
  • 1/4 tspn fenugreek seeds
  • curry leaves to garnish
  • 1/2  cup hot water
  • salt as per taste
  • 1/2 tspn sugar
  • 2 Tbspn coconut Oil
  • Coriander leaves to garnish
Directions:

  1. In a heavy bottom Pan, add oil fry fenugreek seeds, onions, ginger garlic paste until translucent
  2. Add curry leaves tomatoes & cook this until fat separation.
  3. Now add in all the Masala's mentioned above & saute for a minute.
  4. Add the cleaned squid into this & saute for 3 to 4 minutes.
  5. Now add in hot water, coconut milk , salt, sugar, lemon juice & bring this to a boil in low flame around 2 mins. Keep stirring or else the coconut milk will split
  6. Turn off the flame & garnish the dish with coriander leaves.

Note:
  1. I used coconut oil coz I use it for most of my seafood recipe to bring out the unauthentic Mangalorean flavour. You can use any other cooking oil if you want.
  2. I cut my squid in round shape & they look like small onion rings, Well you can cut it any shape you want. Make sure you have cleaned it well


Tuesday, 30 July 2013

Sambal Belacan Prawns

In the last 4 months my son has gone on a school picnic for the 2nd time. This time it was to the Bollywood veggie farm. I hardly remember me having any kind of picnic while I was his age:) This time I dint accompany him but asked my maid to go along with him. I have noticed that he is very well behaved & friendly with my maid. If I am around he simply tries to throw tantrums & I find it very difficult to handle him outside. Last time I had a crazy time when I went along with him to the chicken farm picnic. This time My maid was saying that he was so good & quite that the teachers were surprised to see him that way. He is the naughty & loud one in the class:)


I was just talking to my other Mommy friends & they too had similar things to share. The kids generally throw tantrums at their mom's & I think they love doing it. After all that enjoyment at the picnic, there was slight drizzle which has made my boy sick. He has been having high fever since saturday & is recovering now.


Since zion  was unwell we did not do much over the weekend. We just took him out in the evening for a walk to the nearby mall. We suddenly happened to taste Dulce le leche ice cream at Baskin Robbins & loved the taste. Since I had all the ingredients to make this, I tried this one & It turned out amazing! I will be posting this recipe soon.


Coming back to today's post, Ramadan being around the corner, I wanted to post as many non veg dishes as possible . You wont believe that I have more than 50 pending posts sitting in my laptop. I create most of my recipes, I have even forgotten how I made some of them:) This is a recipe that I tried from one of my fav chef's book "Best of Wan" I love his recipes & this chef is very entertaining. He is a very famous celebrity chef in Malaysia & Singapore. I rarely try his recipes, coz they are very rich & addictive:) If you love rich Malay food, then you must try out recipes from his books. This is Prawns sambal Belacan which is very similar to rendang curry. This is how I made it & I would have slightly modified to suit our taste.


Making time: 45 mins
cooking time: 25- 30 mins
Serves: 4 people

Ingredients:
  • ½ kg / 1 pound of medium-sized Prawns cleaned
  • 4 Tbspn oil
  • Salt to taste
  • 1/2 cup fry roasted decisated coconut
  • 3 Tbsnp Thick coconut cream
  • 2 tbspn Turmeric leaves finely chopped to garnish
  • 2 Kafir lime leaf finely chopped to garnish
  • 1 Tbspn Lemon juice
 
Paste Ingredients: (to be finely ground)
  • 10 Shallots (Red Onions), peeled
  • 15 dried Chilis soaked in hot water to soften and drain
  • 2 Tbspn chopped lemon grass
  • 1 Tbspn chopped galangal
  • 3 Tbsp roasted dry Shrimps
  • 3 Kaffir lime leaf chopped
  • 1 Tbspn minced ginger & garlic
  • 2 Tbspn chopped Turmeric leaf
  • 1/4 cup water
  • 1/4 Tspn Tamarind Paste
  • 1/4 tspn Palm sugar (Jaggery)
Directions:
  1. Heat Oil and sauté the Paste until fragrant. Lower the heat in order to not burn the spices. Cook slowly till oil surface or separates.
  2. Add around 1/4 cup of hot water & bring this gravy to boil. Immediately bring down the heat & add thick coconut cream
  3. Add in Turmeric leave, White Sugar (or Palm Sugar), and salt. Simmer until the gravy thickens.
  4. Add in the Prawns and continue to simmer until the water from the prawns releases & cook until the gravy is slightly dry. This should take not more than 5 mins.
  5. Turn off the fire and add in Kaffir Lime Leaves, turmeric leaves and roasted desiccated Coconut Paste. Stir them well.
 
Note:
  1. Prawns cook really fast so do not over cook them. If you cook longer they will turn out chewy/rubbery.
  2. Sometimes depending on the type of kadai you use, you might require more oil for frying the masala paste. So add it according to your preference
  3. If you life the dish more spicy add more chili's if you want.
  4. Try & serve this dish fresh to enjoy the juiciness of the prawns
  5. I would advice you to use fresh Prawns or shrimps.
  6. Since I dont like & stand the smell on ready Belacan paste, I skipped adding that & replaced it with dry roasted shrimps.


Tuesday, 16 July 2013

Butter chicken Masala

 
Yesterday I was feeling so lazy that I dint feel like posting any recipes or being active on my blog. I was also feeling lazy to dress up & go out shopping. So I decided to watch some movie which is very unlikely of me. I love to watch horror movies but at the same time I am very scared to watch alone sometimes. I found this movie "Naina" on you tube so thought will watch it. The movie is very slow & a OK movie for time pass. Not a very scary movie but can watch once types.


coming back to today's post "Butter chicken" This is one preparation I make more often but always at night for dinner. Since i make it at night, I never was able to take a decent click of this dish. Although this one also was made for dinner but I prepared it in the evening so I got some evening light to click some ok ok shots. I somehow find it very difficult to take curry shots. I always try to give a very close up shot for my food coz I really want people to see the real texture & colour of food. I don't spend much time in plating it but concentrate more on getting the right texture of food. BTW food photography is not my cup of tea but since i love cooking, I am slowing learning to take better pictures. I feel very good when someone complements my food pictures & blush:) This is the best Butter chicken, very creamy tasty & yummy.


Cooking time: 30 minutes
servings: 4 people

Ingredients:

  • 1 large onions chopped
  • 2 large tomatoes chopped
  • 1 Tbspn ginger garlic paste
  • 500 gms boneless chicken cubes
  • 1/4 cup cashew nuts
  • 1/2 Tbspn coriander powder
  • 1/2 tbspn cumin powder
  • 1/2 tbspn chili powder
  • 1/2 Tspn garam masala powder
  • 1/2 Tbspn kasoori methi
  • 1 Tspn cumin seeds
  • 2 Tbspn thick curd
  • 1/4 tspn chili powder
  • 1 Tspn lemon juice
  • 1 cup hot water or more if required
  • salt as per taste
  • 1 tspn sugar
  • coriander leaves & green chili's to garnish
  • 1/4 cup cream or milk
  • 2 Tbsp oil
  • 1 Tbsp butter
Directions:
  1. Marinate the chicken in curd. salt & 1/4 tspn of chili powder for at least 2 hours.
  2. In a pan add a tbspn of oil & fry the chicken cubes until all water is drained off or 80 % cooked. Once cooked set the chicken aside.
  3. Soak cashew nuts in hot water for at least 20 mins & then make a paste of it.
  4. Boil chopped onions in 1 cup of water until they are translucent & make a paste of this.
  5. Soak the tomatoes in the hot water, peel the skin & puree the tomatoes in the blender or mixer.
  6. In a heavy bottom pan, add oil fry cumin seeds for few seconds. Now add in ginger garlic paste, onion paste & tomato puree.
  7. Cover the lid of the pan & cook this on low flame for about 5 to 6 minutes. Add a little water if required.
  8. Now add in all the masala's except kasoori methi & saute well. Throw in 1 tbspn of butter & sugar now in to the pan. Mix this well & keep sauteing for around 3 to 6 mins
  9. When the raw smell goes off & when you see fat separation, you can add in cashew paste & 1/2 cup of hot water. Saute this for a minute until its well combined.
  10. Finally add in the cream, chicken, Kasoori methi, lemon juice & mix well. Cook on low flame for about 5 mins.
  11. Close lid & allow it to rest for at least 10 minutes before you dig in:) Add more water if you want.
  12. Garnish the dish with coriander leaves, chopped green chili's & some fresh cream.
Note:
  • Make sure you keep the pan closed or else you will have a messy kitchen.
  • You can add in some red colour if you want. This will make the chicken look like the restaurant style.
  • Always cook the chicken seperately in a pan or you can even bake them at 250 degree for 20 mins

Wednesday, 10 July 2013

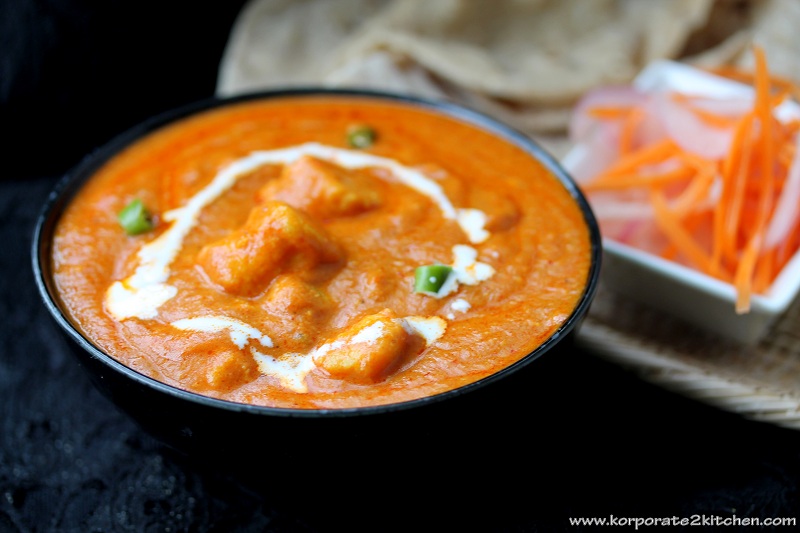
Paneer Butter Masala


I haven't slept well in the last 1 month properly. I am looking for a soundless 8 hour sleep & I don't know when that dream will come true. I had picked up some roast chicken from Fair price the other day & had fed Zion also some. After eating that he had a bad stomach pain & lose motion. Last night he was getting up every 3 hours with stomach pain & lose motion:(. My poor boy couldn't sleep well nor we could. Later got to know even hubby had a bad stomach. I rarely give outside food to Zion. Since he had mutton cutlets in the afternoon, I thought will give him some chicken for dinner. From now on I am not buying those roast chicken anymore. These roast chicken looks really nice & they are very cheap like 6 or $7 dollars for the whole chicken. Since I was out the whole afternoon shopping, thought will pick this up for dinner. Now I regret badly feeding my boy:(


Coming back to today's post, I was surprised to see No Paneer Butter Masala recipe in my blog. This is one dish I make so often at home. You know the most common dishes that we make are the missed out ones in the blog:) I figured it out that I also haven't updated recipe for Chicken Butter Masala. My Paneer Butter Masala recipe is always a hit at home & also among my friends. I find this recipe very simple & easy. No one can go wrong with this recipe. Depending on your diet you can add more cashews or cream. I mostly skip adding the cream part in my recipe when I make it for us. Some times I also replace cashew with Almonds & that too tastes very good but different. Never fry your Paneer while making butter masala. Frying it will kill the natural Paneer flavour & it will make the paneer hard. I have used fresh home made paneer in this recipe. I find home made paneer more softer & creamier. This is how I made it.

Cooking time: 30  minutes
servings: 4 people

Ingredients:
  • 1 large onions chopped
  • 2 large tomatoes chopped
  • 1 Tbspn ginger garlic paste
  • 1.5 cup Paneer cubes
  • 1/4 cup cashew nuts
  • 1/2 Tbspn coriander powder
  • 1/2 tbspn cumin powder
  • 1/2 tbspn chili powder
  • 1/2 Tspn garam masala powder
  • 1/2 Tbspn kasoori methi
  • 1 Tspn cumin seeds
  • 1 cup hot water or more if required
  • salt as per taste
  • 1 tspn sugar
  • coriander leaves  & green chilis to garnish
  • 1/4 cup cream or milk
  • 1 Tbsp oil
  • 1 Tbsp butter
Directions:
  1. Soak cashew nuts in hot water for at least 20 mins & then make a paste of it.
  2. Boil chopped onions in 1 cup of water until they are translucent & make a paste of this.
  3. Soak the tomatoes in the hot water, peel the skin & puree the tomatoes in the blender or mixer.
  4. In a heavy bottom pan, add oil fry cumin seeds for few seconds. Now add in ginger garlic paste, onion paste & tomato puree.
  5. Cover the lid of the pan & cook this on low flame for about 5 to 6 minutes. Add a little water if required.
  6. Now add in all the masala's except kasoori methi & saute well. Throw in 1 tbspn of butter  & sugar now in to the pan. Mix this well & keep sauteing for around 3 to 6 mins
  7. When the raw smell goes off  & when you see fat separation, you can add in cashew paste & 1/2 cup of hot water. Saute this for a minute until its well combined.
  8. Finally add in the cream, Paneer, Kasoori methi & mix well. Turn of the heat after one boil. Close lid & allow it to rest for at least 10 minutes before you dig in:) Add more water if you want.
  9. Garnish the dish with coriander leaves, chopped green chilis  & some fresh cream.

Note:
  • Make sure you keep the pan closed or else you will have a messy kitchen.
  • You can add in some red colour if you want. This will make the paneer look like the restaurant style.
  • Use fresh Paneer for the best taste. If you are using frozen Paneer, then soak them in hot water for atleast 1/2 hour so that they come back to room temperature.
  • I havent added coriander leaves in this presentation but have added it just before serving this dish for dinner.


Friday, 28 June 2013

Pepper Chicken Masala


Tomorrow a friend of mine is visiting Singapore for a Dental Conference. Its gonna be fun because she is going to stay with us for a week. Now that she is around, I will also get introduced to a good Dental surgeon who can do my wisdom tooth surgery. Well Dental stuff is very very expensive here. I have enquired in couple of good places & they are charges are not less than $2000:(.  Hoping she will get me some discount too:) Well although our family is filled with Dentists, I never get the time back in India to get this done. Th last 2 visits Zion was little & I really dint have the time for this. Coz once the surgery is done I will be on bed for a week. So finally I am left with one option to do here in Singapore, as my Maid can take care of Zion while I rest.

So coming back to today's post, This is a Coorgi way of making Pepper chicken. This is my mother's recipe & I love this pepper fry. My mom would mostly pair this up with Akki Rotti & Kadambittu. I can still remember eating it almost every weekend while its raining outside. I made it Yesterday for dinner & my hubby couldn't stop eating:) Curry, spices, masala is all that he needs for food. He is game for any tasty Indian food. I kind of get bored with too much Indian. So, I am planning for Prawn Burgers for dinner tonight:) Well I have also taken a video recipe for this one. I will be publishing it as soon as I do the editing. This is how I made the Chicken Pepper Masala.


Ingredients:
  • 1 kG Chicken cleaned & medium cut
  • 2 Onions sliced thinly
  • 2 Medium Tomatoes chopped small
  • 1 Tbsp Minced Garlic
  • 2 Tbsp Minced Ginger
  • 2 Tbsp Lemon Juice
  • 1 Tspn Chili powder
  • 1/4 Tspn Turmeric powder
  • 1 Inch Cinnamon Stick
  • 4 Cloves
  • 4 Cardamom pods
  • 2 Bay leaves
  • 1/2 Tspn Grated Nutmeg
  • Garam Masala (Recipe below)
  • 2 Tbsp Oil
  • Salt as per taste
  • Coriander leaves to garnish
  • 1/4 tspn Sugar
Garm Masala
  • 2 Tbsp Black pepper corns
  • 1 inch Cinnamon
  • 4 Cloves
  • 5 Cardamom pods
  • 1 Petal Star Aniz
  • 2 Tbsp Coriander seeds
  • 1 Tbsp Poppy seeds
Direction:
  1. Wash the chicken well, drain water & set aside
  2. Dry roast all the ingredients mentioned in the Garam masala & make a fine powder by grinding it in mixer.
  3. In a heavy bottom Pan add oil, tip in minced ginger, garlic, cinnamon sticks, cardamom, cloves, bay leaves, grated nutmeg, Fry this for a minute. Now add in the onions & let it fry until pink.
  4. Combine the tomatoes, Garam masala, turmeric powder, Chili powder & give it a good mix. Add 4 Tbsp of water so that the spices gets well combined. Fry this for 2 minutes.
  5. Add in the chicken to this & give it a good mix. Season it with salt & lemon juice. Close lid & cook this on low flame for 15 to 20 minutes. In between saute once or twice. You needn't add water as the chicken will leave a lot of water while cooking. In case you want more gravy then add 1/4 cup of hot water. We never add water as its tasty this way.
  6. After 20 mins of cooking check if the chicken is done. If done garnish it with sugar, coriander leaves & its ready to serve.
I could some how manage to take some pics of the making of Chicken pepper.


Friday, 21 June 2013

Chicken Kosha


The Singapore Haze has become bad to worse now. Its been 4 days now & my poor little fella is in house arrest. My cutie pie is very understanding & is self entertaining himself with all the toys around. In spite of keeping all the doors & windows closed our home has a burnt smell. The air is totally contaminated & we just hope that it reduces soon. Our only worry is our child's health. Hubby says lets go back to India for a week & come. We are still deciding on that & hope things get better here soon.


Yesterday Hubby was working from home. Since he was home, I thought of making some curry as he LOVES curry. I have been thinking of making this famous Bengali Kosha from a long time. Finally that day was yesterday:) I made it & it was finger licking good. Kosha means slow cooked in Bengali. Traditional no liquid is added in this recipe & also no tomatoes. While doing some research on the net, I saw a lot of people have different version of Kosha. I finally went a ahead with making one that I liked on You tube by Kalyan in India food Network. His was made with Mutton & I altered my recipe according to chicken. I have not used any water other than some yogurt. The flavours in it was amazing & it definitely tasted yumm. This is a must try for all curry lovers. Since I have a very demanding taste bud, I try & venture out on making different curries. This is how I made it

Ingredients:
  • 1 Kg Chicken cleanes & cut into medium pieces
  • 3 Onions chopped & pureed (Paste)
  • 3 Tbsp thick yogurt
  • 1 Inch cinnamon stick
  • 4 cardamoms
  • 4 cloves
  • 2 Bay leaves
  • 1 Tbsp Minced Garlic paste
  • 2 Tbsp Minced Ginger paste
  • 1.5 Tbsp chili powder
  • 1 Tbspn coriander powder
  • 1 Tbspn Cumin powder
  • 1/4 Tspn turmeric powder
  • Salt as per taste
  • 3 Tbsp Oil
  • 2 large Potatoes sliced &  Pan fried
  • 1 tspn Sugar
  • Coriander leaves to garnish
Directions:
  1. Make a paste of yogurt, Chili powder, turmeric powder, cumin powder & marinate the chicken with this paste. Let it sit in the fridge for at least 2 to 4 hours. The longer the better.
  2. In a Pan add 3 Tbsp of oil, 1 tspn sugar & keep sitting it until the sugar has browned (caramelised)
  3. Add in the Cinnamon stick, bay leaves, cloves, cardamom, Onion paste to this & keep sauteing for about 3 to 5 mins.
  4. When the Onions turns pink, add the marinated chicken, salt & give it a good mix.
  5. Now cook this on low flame for about 20- 25 mins. Keep sauteing in between & do not add any water.
  6. When the chicken is almost done, combine the Pan fried Potatoes & give it a good mix. Close lid & cook for another 2 mins. Turn off the flame & garnish the dish with coriander leaves. The dish is ready.

Note:
  • The sugar is caramelised to give a nice golden colour to the curry.
  • If you want more gravy then you can add tomatoes.
  • Traditionally mustard oil is used. Since we don't consume Mustard oil, I used the regular sunflower oil.


Friday, 12 April 2013

Chicken Indad


This is my 4th post for BM#27. Chicken indad is a traditional Mangalorean Christain recipe. This is a thick gravy recipe & we add potatoes, Dates in this dish. This dish is mainly made for weddings & during festival celebration. Although there is dates in this recipe, this is not very sweet. There is a very good balance of flavours. This recipe goes well with Rice, Neer Dosa, Sannas & Akki Rotti. This is how I made this...
 
 
Ingredients:
  • 1 kg chicken (Medium pieces)
  • 2 medium onions roughly chopped (for grinding)
  • 1 small onion finely sliced (for seasoning)
  • 1/4 tsp tamarind paste
  • 4 dates 
  • 2 Tbsp Bafat powder (1 tspn Chili powder+1 tspn cumin powder+2 tspn Corinder powder+1/4 tspn Turmeric powder+1/4 tspn black pepper powder)
  • 1 Tbsp ginger & garlic mince
  • 2 tbsp coriander leaves
  • salt to taste
  • 2 tbsp oil
  • 2 medium size potatoes
  • Coriander leaves to garnish
Method:
  1. Cut the chicken into medium size pieces, wash & allow to drain.
  2. Peel the potatoes and cut them into round shape 2 inch thickness.
  3. Grind the 2 onions, tamarind paste, dates, bafat powder, ginger & garlic to a fine paste.
  4. In a large wok heat some Coconut oil and fry the finely sliced onion till it turns translucent
  5. Add the ground masala and fry on low flame till the raw onion smell disappears (this can take about 4-5 minutes)
  6. Add in the potatoes and salt to taste and allow to cook for about 3-4 minutes
  7. Now add the chiken pieces into this close lid & cook for about 8 to 10 mins. Add more water if required
  8. Garnish with Coriander leaves.
  9.