I am back again after a gap & I cant tell you how much I missed cooking, blogging & going through some of my best blogs. Monday was the 1st day at work after a 2 years of gap. My boss was here for 3 days to train the trainers & I was so excited to sit through & also do some part of the trainings. Training is something that I have enjoyed a lot in my career. This profession really gave me so much joy & learning. Now I am so happy that I work as a independent contractor with couple of great training companies. This is the best thing that could happen living in the foreign country. Now I will have a perfect balance of work-family-passion-life.
My training starts at 9am, so I had to leave home by 8:30am. It was tough for me to be away from Zion for full day. The first day I fooled him by sending him down to the play area with my maid & I slowly sneaked out from the front gate. It seems once he was back home, he was looking for me in all the rooms & was a bit sad for a while. The second day he refused to go down to play & was glued to me where ever I went. He knew that I was going out & kept saying Mamma office mamma office... I was feeling very bad, but some how had to pacify him & send him down. Coz I really don't want to get out of house in front of him. He cried a lot to go down & once he met his friends downstairs he was fine. Yesterday also was the same scene:( On day 2 my training got over by 4:30, so I decided to go to Zion's school to pick him up. My maid was already there waiting at his school. I was peeping through the window inside the classroom & saw my lill boy restless & running around. He spotted my maid & was very happy to see her. Once he came out of the class he saw me & I cant express how happy he was. He started climbing on top of my stomach, shoulder & head.. he hugged me tight & was smiling through out. The mother child relationship is the best in the world. I love being a mother & enjoying every precious moment with my Son.

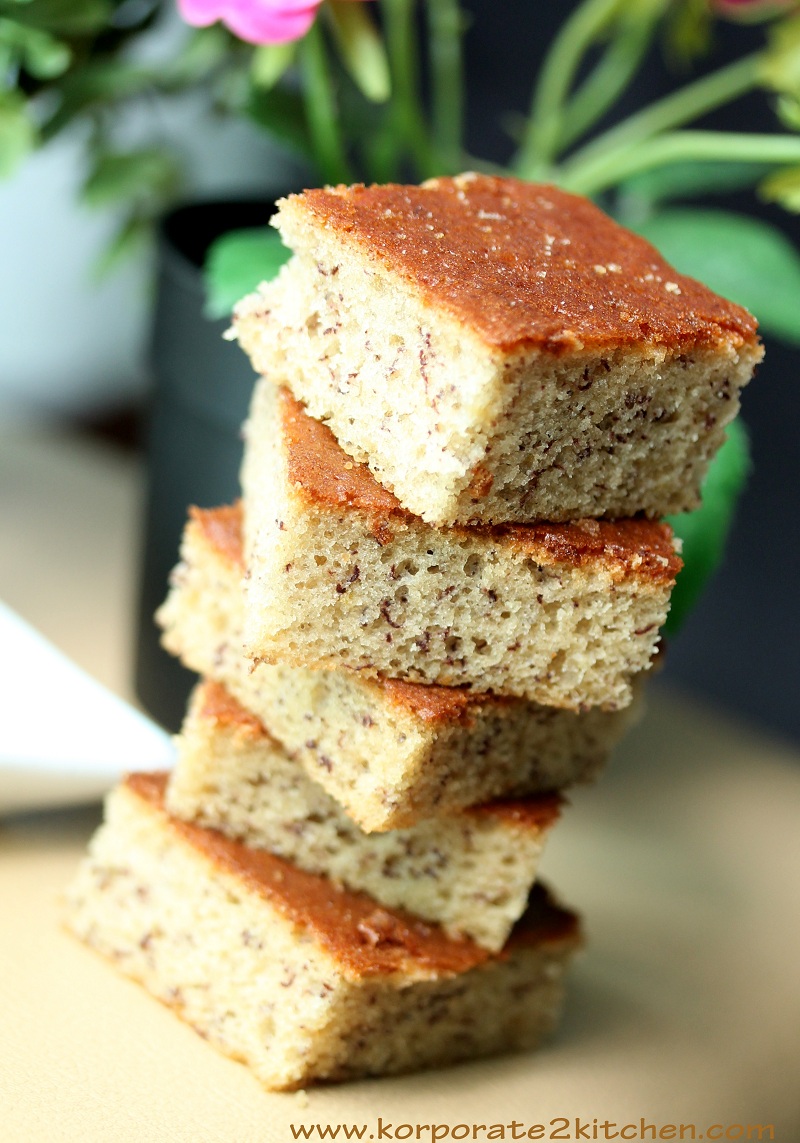
Now coming back to today's post. This is a simple Banana cake & I have used oil in this recipe. In the past I have always baked my Banana cakes with butter but never knew that oil also tastes very good. This is a healthy recipe & great for kids snacks too. My lill one loved this & it stays moist & soft even after refregerating them. This is how I made them
Serves: 8 - 12 people
making time: 45 mins
Ingredients:
- 1 cup flour
- 1/3 cup cooking oil
- 3/4 cup sugar powdered
- 2 Eggs
- 1 tspn Baking powder
- 1/2 Tspn Baking soda
- 1/4 tspn salt
- 1 Tbsp Vanilla essence
- 2 Large riped Bananas
Directions:
- Mash the Banana's with a fork & set this aside
- In a bowl add sugar, mashed Bananas, eggs & mix well with a spoon or a whisk.
- Now add in the oil, Vanilla essence, salt, flour, Baking powder, soda & mix well with a spoon or a whisk.
- Pour the mixture in the Baking pan 6 inch round or square, 9 inch round or square Pan.
- Bake this in a preheated oven for 40 - 45 mins at 180 degree if your are using 6 inch Pan or for about 25- 30 mins if you are using bigger pan.
Note:
- I used a bigger pan 9/9 square pan, coz I wanted small square pieces. If you want a good height for your cake then use the regular 6 or 8 inch round pan.
- I sometimes use bigger pans so that the cakes bake every fast.
You already know that my Son, Zion doesn't like to eat fruits & I try my best to add fruits in dishes that I cook for Zion. How much ever my son eats he never puts on weight & he is just vertically growing faster. He is very tall for his age & people ask me if he is 3 whereas he is just 2.1:) Banana's are high in calories & are an ideal fruit for weight gain. I am trying and making a lot of banana snacks for him. He loves Banana cakes & I have been making these more often. This time I made Eggless Banana oats cookies & it turned out super yummy. Zion loved it & everyday the snack box came back home empty. This is a very happy moment for me & I know many Mom's out there can understand me better.

I have made cookies dough & refrigerated them. I will be baking as & when needed. The first batch I made were around 9 cookies & all got over in 2 days. Since I am on my own diet, I had only 1 although was very tempted to eat more. When my hubby got back from work, I offered him a cookie after dinner. He took a bite & just closed his eyes went on hmmmmm.... this taste reminds me of something that I had in my childhood days in Nigeria. I was so happy that he loved the cookie & also was able to bring back some good old memories. Now I don't know who had the maximum share? the lill one or big one :) Next time I am going to add eggs in my cookie dough, simply because it will make the cookies even more rich & its good for my little one. Since I have a lot of vegetarian fans & they requests for egg less ones, I thought will make these egg less. This is a must try & can be done under half hour.
Making time: 30 mins
Makes around 20 - 22 cookies.
Ingredients:
- 2.5 cup all purpose flour
- 1 cup sugar
- 1/2 Tspn baking soda
- 150 gms Butter
- 1 large Banana mashed with a fork
- 1/4 Tspn salt
- 1 Tbspn Vanilla essence
- 1/4 cup rolled oats
- 2 -4 Tbspn milk if required
Directions:
- Cream the butter & sugar in a mixing bowl with a hand whisk or spatula.
- Add the mashed Bananas, Vanilla essence into the mixture & saute well until the sugar is well incorporated.
- Add in all the dry ingredients into the wet & mix well to form a soft dough.
- Freeze this dough for 10 - 20 mins.
- Use a ice cream scoop or 1 Tbspn cookies dough, place them on Parchment paper & bake them in a pre -heated oven at 180 for about 18 to 10 mins.
- The cookie after 20 mins will still be soft, remove them & let them sit outside until they are cooled. Once they are cooled they become crispier.
Note:
- If you want you can add nuts or chocolate chips into the cookie dough.
- You can also skip oats if you dont like them in there.
- The sweetsness was just perfect for us, but if you like it very sweet then add in more sugar.
Now check out my lill one during the photoshoot. He was pulling the table setting & was all over.
Zion says Hi to all my readers:)
This is my food photo studio at home:)
Some how was able to click his pic without him shaking
It is very difficult to take his pic as he doesnt pose nor sit in one place:)
No Bake cheese cakes are the easiest to make & its definitely a crowd pleazer recipe. By being a little creative you can make the cheese cake look very stunning. The main thing is in setting the cheese cake & making it look appealing. The basic no bake cheese cake recipe is very simple & no one can go wrong. 2 weeks ago when my friend was around, I asked her if she has had cheese cakes before? She said no & since i made some cream cheese lying in the fridge for weeks, i thought will make some cheese cake. I have always made just one flavour cheese cakes, so thought this time will mix caramel & chocolate. Since my friend is a die hard fan of chocolate, I decided to go with this flavour.My hubby hates Chocolate cheese cake & he just had a small piece. The cake turned out perfect & it was really a rich cake. The most enjoyed people were my friend & my son:) When I served my friend with a piece, she was like "Waw!" you are totally a professional & this looks like a international standard. As usual I just blushed:)

I made a small quantity of caramel sauce as I had only 1/2 cup of whipped cream left in the fridge. The cake was well balanced & tasted yumm. This is a must try for all chocolate lovers. This is how I made it.
Ingredients:
- 250gms Cream Cheese (I used local Cream Cheese )
- 1 cup powdered sugar
- 1 cup melted semi sweet chocolate
- 1 cup Milk
- 100 gms Agar agar powder or 1.5 Tbsp gelatine
- 1/2 cup warm water
- 10- 15 digestive biscuits
- 50 gms Butter
Method:
- Crush the Digestive Biscuits in the Mixer. Add 50 gms of butter to this powdered biscuits & make a base in a cake tin 8 0r 9 inch (square/round mold or spring form pan). I made a high base till it reaches half way of the tin. You can choose to make a short base.
- In an electric beater beat the cream cheese, sugar, melted chocolate & milk to a smooth mixture.
- Add 100 gms of agar agar to 1/2 cup hot water & stir continuously so no lumps are formed. Now microwave this mixture for 30 seconds & mix it well to remove any lumps from them. Set this aside to cool down.
- Once cooled, Pour in this mixture to the cream cheese mixture & mix well. Pour this into the mold & chill this in the freezer for an hour or in the fridge to set for 5 to 8 hours.
- After an hour remove the cheese cake mixture & pour the caramel sauce on top of the cake evenly. Now put this back in the freezer for about 15 to 20 mins to set.
- After its set a little, remove the cake out & top it up with the thick rich chocolate ganache. Now put it back in the fridge & not freezer this time. Cover the cake with a silver foil or cling wrap & refrigerate it for at least 2 hours to set well.
- Now the cheese cake is ready to serve.

(My cake piece did not come out clean coz I cut it immediately once it was out from freezer. Please wait for the cake to stay in room temperature for some time & only then cut it to get clean pieces.)![]()
Caramel Sauce:
- 1 cups granulated sugar
- 2 Tbspn unsalted butter
- 1/2 cup heavy whipping cream
- 1/4 tspn salt
Directions:
- First, make sure you have all of the ingredients ready. Once you start the caramel sauce you have to pay close attention so you don't burn it.
- Heat the sugar over medium high-heat in the saucepan. When the sugar starts to melt, start whisking the sugar. The sugar will clump up, but keep whisking. It will continue to melt. When the sugar is melted, stop whisking. You can swirl the pan to move the sugar around.Continue cooking the sugar until it reaches a deep amber colour. Make sure you watch the pan very closely. This is where it is easy to burn the caramel.
- As soon as the sugar reaches the dark amber colour, carefully add the butter & salt. Whisk until butter is melted.
- Remove the pan from the heat and slowly pour in the heavy cream. Whisk until cream is incorporated and caramel is smooth.
- Let the caramel sauce cool &once cooled, Pour the caramel into a air tight box and refrigerate it. You can store the salted caramel sauce in the refrigerator for about a month.

Thick Chocolate ganache
- 1 cup dark chocolate chips
- 1/4 cup heavy cream
- 3 Tbspn of sugar
- Pinch of salt.
Directions:
- Bring the cream to a boil along with sugar & salt. Now add in the chocolate chips into the hot cream & wait until all the chocolate is melted. Once it is cooled a little, use it on the cake immediately. If you allow it to cool down completely the chocolate will become hard & crumbly.

Weekends are kept totally for family time & that's why you will rarely see any blog activities. When it comes to making friends, I am very choosy. I take some time, make friends only with people who are genuine & trustworthy. That's why I have very few friends & in Singapore its just a handful. We had a great time yesterday at one of my friends place who has recently moved into a new house. My friend's daughter & Zion are best friends. They both had the best times yesterday & it was so much fun watching them care for each other. Both of them were little crawling babies a year ago & never used to play with each other then. But now they both hold each others hands, run around & cant stay without each other. The only way I get Zion's attention or make him eat is by saying "Avni" will come now eat fast:) The moment I take her name Zion will start looking for her LOL:) Its the same at my friend's place, she takes Zion's name & feed her daughter. We Mom's find all possible ways to feed our kiddos.

Well coming back to today's post, This cutlet was made for Zion & that is why you will see that I have not added any green chilli's or more spices. We rarely eat red meat at home & I buy them only for Zion. My Mom makes the best Mutton cutlets & I can finish them in no time. Well in Singapore the Mutton doesn't taste good at all. I love the Mutton that we get in India. Best part of cutlets is that you can make it ahead of time & freeze them. Late you can fry them as & when you want. Well this cutlet can be used for burgers as well. This is how I made these.
This was the platter I prepared for Zion
Cooking time: 45 mins
Makes around 10 - 12 cutlets
Ingredients:
- 500 gms Mutton Mince
- 2 Boiled Potatoes
- 1 Tbspn ginger garlic paste
- 1 onion chopped
- 4 Tbsp chopped coriander leaves
- 1/4 Tspn Coriander Powder
- 1/4 Tspn cumin powder
- Pinch of turmeric powder
- 1/4 Tspn Cardamom powder
- 1/4 Tspn Garam Masala powder
- 1 Tbsp Lemon juice
- 1 Tspn sugar
- 1 egg slightly beaten
- 1 cup bread crumbs
- 1 Tbspn oil
- Some oil for shallow frying
- Salt as per taste
Directions:
- Mash the boiled potatoes & set aside.
- In a heavy bottom Pan , add oil fry Mutton Mince until the water is drained off. Now pour a cup of water & cook it on low flame for about 15 to 20 mins or until the mutton is done. If the meat is not tender, then pressure cook until 2 whistles.
- Once its cooked drain off any excess water & set aside to cool down
- In a pan add oil, fry ginger garlic paste for a 30 seconds, add in onions & fry them until they are translucent.
- Now add all the spices mentioned in the list give it a good mix. Combine the cooked Mutton mince, potatoes & season them with salt.
- Finally add the lemon juice, sugar & give them a good mix. Once the dish is well mixed garnish the dish with coriander leaves. Allow this to cool down for some time
- Now take a ball size mince mixture in your hand, dip them in the egg mixture & then coat them with bread crumbs around on all sides. Press the patty a little to get a flat round shape & set this aside.
- Heat a flat pan, add around 3 to 4 Tbspn of oil & pan fry these cutlets on both sides until they are golden brown or crispy. This should take around 3 to 4 minutes.

Note:
- Since I made this for Zion, I dint add more spices. If yo are planning to make this for adults then add 1/2 tspn instead of 1/4 tspn of coriander, cumin & garam masala. Also add in 1/2 tspn of chili powder.
- You need to make sure that no extra moisture is there in the mutton mince after cooking & same goes for Potatoes too.
- If you feel that the Mutton mince after cooking with spices is still runny, add in some bread crumbs or corn flour into it. This will help the mince thicken.
- Some people like to deep fry, if you want you can deep fry the cutlets too.
- After coating the cutlets with bread crumbs, you can freeze this in a airtight container for weeks & use it whenever you need.

Cakes cookies are my weakness. I can eat them any time & can go on. Last week I did a lot of baking while my friend was around. She was so happy to have freshly baked cakes at home & loved them. She also said that this is one of the best cakes I have ever had for every cake I made. The praises motivated me to bake more. I made rich chocolate cake, Banana chocolate chips muffins, No bake chocolate caramel cheese cake. After eating all that last week & also Mcd burgers most of the time while shopping outside, I had decided that from now on I will stop baking for sometime, coz all that eating has really shown up on my waist line:( Now getting that rid off is a big task. I can put on weight by just eating heavy food for 2 days, but losing takes months together. For the last few days Zion has been taking Digestives, marie & oreo biscuits for snack to school. I thought will bake some cookies for him & I will not have them. Unfortunately I have eaten almost 4 so far:) They were so yummy & irresistible. Since this was made specifically for zion, I added extra butter which I don't when I make for all of us. These cookies were really rich, buttery. crunchy & melt in your mouth. If you dont like chocolate chips just skip adding them & you will have some nice butter cookies.

Making time: 1 hour
Makes around 25 cookies
Ingredients:
- 3 cups all purpose flour
- 1.5 cups sugar
- 1 egg
- 1/2 tspn baking soda
- 200 gms butter
- 1/4 tspn salt
- 1 tbsp vanilla essence
- 1 cups chocolate chips
Directions:
- Powder the sugar a little in the mixie or blender.
- Cream the butter & sugar until creamy with a hand whisk or spoon
- add in one egg & mix until its well combined
- Now mix in the flour, baking soda, vanilla essence & mix well until everything is well combined.
- Finally add in the chocolate chips into the batter & give it a good mix.
- Cover this soft dough with a cling wrap & freeze it for 20- 30 minutes.
- With a 1 Tbspn measure spoon scoop out heapful of 1 Tbsp cookie dough & line it on the baking paper.
- Now bake this in a preheated oven at 180 degree for 25 mins. Remove them out after 25 mins & allow them to rest until its cooled. The cookie at this stage will still be cakey or soft. Once they cool down they become crispy.
I am sure every Manglorean loves this dish "Mangalore Buns" These are available in almost all restaurants, canteens in Mangalore region. My mom used to make them at least 1 once a week during our school days in coorg. We used to eat them almost every other day in our Agnes college canteen.. I love them a little sweeter & mostly this is made semi sweet. Its served with chutney or Sambar in the hotels. I love to eat them as it is. This recipe is already posted in my blog & then I dint have a canon, so most of my old post pictures are taken from my phone camera. I thought of clicking some pictures & revisting this post.
For the recipe click here

My lill Zeeyu got up at 4 am in the morning & started singing twinkle twinkle little star. I thought may be he will sing once & go back to sleep. Coz he does that sometimes in his sleep. But later started wheels on the bus goes round & round, I love you, twinkle twinkle... Now he was over me scratching my face, putting his finger in my mouth, nose, pulling my eyelashes. I was so sleepy that I ignored his behaviour & now the boy became louder & louder. He was trying his best to wake me up & he succeeded. And now what?? he holds my hand & takes me to the drawing room, he picks his fav car & gives me a naughty smile like he has achieved something. Gosh! I was like a zombie & just fell on the sofa trying to sleep. Now my lill fighter has a never give up attitude, every time I closed my eyes, he would wake me up. After few minutes he pulled me out from the sofa & took me to the kitchen. Mamma give... give... dhee ...dhee... (In konkani Dhee means give) I knew he was asking for vessels. I pulled out some vessels spoons & gave him. Now he was all smiles & went back to the drawing room & started cooking. I cant tell you how much he is inspired by what I am doing:) He loves to enact what I do in the kitchen. Once it was 6 am I woke up my maid & I went back to sleep.

I know many Mom's can relate to me. Since I have a broken sleep everyday, I feel so tired & lazy. I have now become regular in swimming, coz that is the only exercise I enjoy. I hope this swimming will help me in reducing some inches soon:) One big disadvantage of swimming is I have got tanned badly. Now coming back to todays post, Gajjar Halwa/ Carrot halwa is my hubby's favourite. This is a simple delicious Indian sweet. Goes well just like that or even with a scoop of ice cream. My lill boy also loves carrot halwa, so I trt & make it more often these days. This is how I made it.
Making time: 30 mins
Serves: 5
Ingredients:
- 3 cups grated carrots
- 1 cup milk
- 1/4 cup fried cahew nuts
- 2- 3 Tbsp ghee
- 1/4 tspn salt
- 1 cup sugar
- 1/4 tspn cardamom powder
- 1 cup water
Directions:
- combine grated carrots, water, milk & boil this on low flame with closed lid for about 5 to 8 minutes or until the carrots are soft.If the water gets drained off in between add some more
- Now add in sugar, salt, cardamom powder & mix well into the carrots. Once the sugar mixes well it will thicken.
- While adding the ghee the consistancy of carrots should be a little sticky. When you achive this consistancy, add in ghee, fried nuts & mix well. Saute this for 2 mins on low flame until everthing is well combined. Now the Halwa is ready.
Note:
- There are various versions of Carrot Halwa & this is one version that I have shared.
- You can also add color if required
- You can be generous with ghee & nuts too.
- Serve is warm or chilled.
- You can add condensed milk too & it tastes great.
Every kid loves to munch on chips & so is my little one. Zion just loves chips & can finish off the entire packet. We all know that the store brought chips is not a healthy one. The seasoning used in them is definitely not good for kids & also adults. Since zion loves something crispy tasty, I made this buttery bread sticks. These were really crisp, lightly sweet & also very tasty. He loved having these & asked for more. These are very easy to make & the recipe is very similar to the pie crust. This is how I made these cute little yummy sticks.
Ingredients:
- 2 cups all purpose flour
- 1 Tspn baking powder
- 80 gms cold salted butter
- 1/2 cup of powdered sugar
- 1/4 cup of cold milk
- Pinch of salt
Directions:
- In a bowl mix in the dry ingredients & rub the cold butter to the dry ingredients. Make this mixture like a bread crumb consistency. Just your finger tips are enough to get to a right consistency,
- Now add in a little milk to bring this mixture together to form a soft dough.
- Use a rolling pin & roll the dough on a flat surface & cut them into long sticks or any shape for that matter.
- Pre heat the oven to 250 degrees & bake them for about 15-20 mins or until they are crisp & done.
Note:
- These can be had with some dips like mayonnaise, cheese sauce, ketchup of just like that.
- Store them in a air tight container so that they remain fresh & crispy.
Now the Haze situation seems to be getting better. I am just praying hope it doesn't come again due to wind flow direction. Last week when the Haze was really bad we decided to fly off somewhere & take a break for a week. My hubby is from Kerala & his house is just near the river. During Monsoon there will be bad floods & the water will come up to the living room. This time around there was floods & we dint want to travel to Kerala. Along with Floods comes all kinds of illness too. Heavy rains at my home town coorg too:(. To go there we have to take a flight to Bangalore & than drive all the way. To avoid all this hassel, we decided to go to Chennai. Can you believe, out of all the places we booked tickets to Chennai:) My sister lives in chennai & she has a 7 years old girl who is crazy about Zion. So thought it will be fun for the kids.
Now why Beach resort at Chennai? simply because while I was working at CSC, I used to do a lot of training programs for the campus grads at a off site location. Mostly we used to do it in Fishermans-Cove-Chennai & ideal beach resort. These 2 places were amazing & I use to love the 3 days training program. I was unmarried then & I always dreamt that I have to come to this place after marriage. This place is very romantic, the food is amazing & the property is really huge. Since we had one team building activity where in participants need to cook food, i used to get access to the kitchen . For this activity, I had to brief the chef's on what we need & I also wanted the chef to be our judge. Oh I really miss those days! I used to do like 3 to 4 workshops in a week & used to travel so frequently to Chennai from Bangalore. I cant tell you how much I love facilitating Training programs & I am so glad that I am back to facilitating job. The respect you get in this field is so good & Unexplainable. Its like how we still respect our teachers & look up to them. Its the same way here & the only difference is that I train adults in corporates:)
So now coming back to today's post, My son likes anything that looks like custard. He calls it yummy. Most of the time I make either egg custard or Vanilla Panna cota for him. There are times when I pick up ready custard from the supermarket. I had picked up some silken Tofu & thought of making pudding out of it. It came out very well & Zion Loved it. Tofu has a wired smell & its totally bland. Its very important to flavour it well. I made Chocolate Tofu Pudding & its very very easy to make. This is how I made it.
Ingredients:
- 1 cup silken Tofu
- 1/2 Cup sugar
- 1 Tspn Vanilla essence
- 4 Tbsp melted Milk chocolate
- 1 Tspn Gelatin
- 1/4 cup hot water
Direction:
- Mix the 1 tspn gelatin in 1/4 cup of water & let it rest for 2 to 5 mins. Now with a fork mix it well.
- In a mixer tip in silken tofu, sugar, Vanilla essence, melted chocolate & gelatin mixture. Blend it for 2 minutes until everything is well combined.
- Now pour it in a mould & let it set in the fridge for 4 to 6 hours, or in the freezer for 1-2 hour.
- Since I had some cherries, I garnished this dish with cherries.
- Note this pudding is very delicate so be careful when you cut it or serve it.
Note:
- If you dont like Tofu you just replace it with heavy cream/ whipping cream.
- Eat it fresh & try to finish it off by a day or 2.
- Tofu is very healthy & rich in protien.
Rice is a staple food for we Indians & especially south Indians. We make Rice for Lunch & dinner almost every day. Well these days people are more health conscious & try to have Rotis instead of rice. In my place its mostly Rotis for dinner with vegetables & one non veg dish.
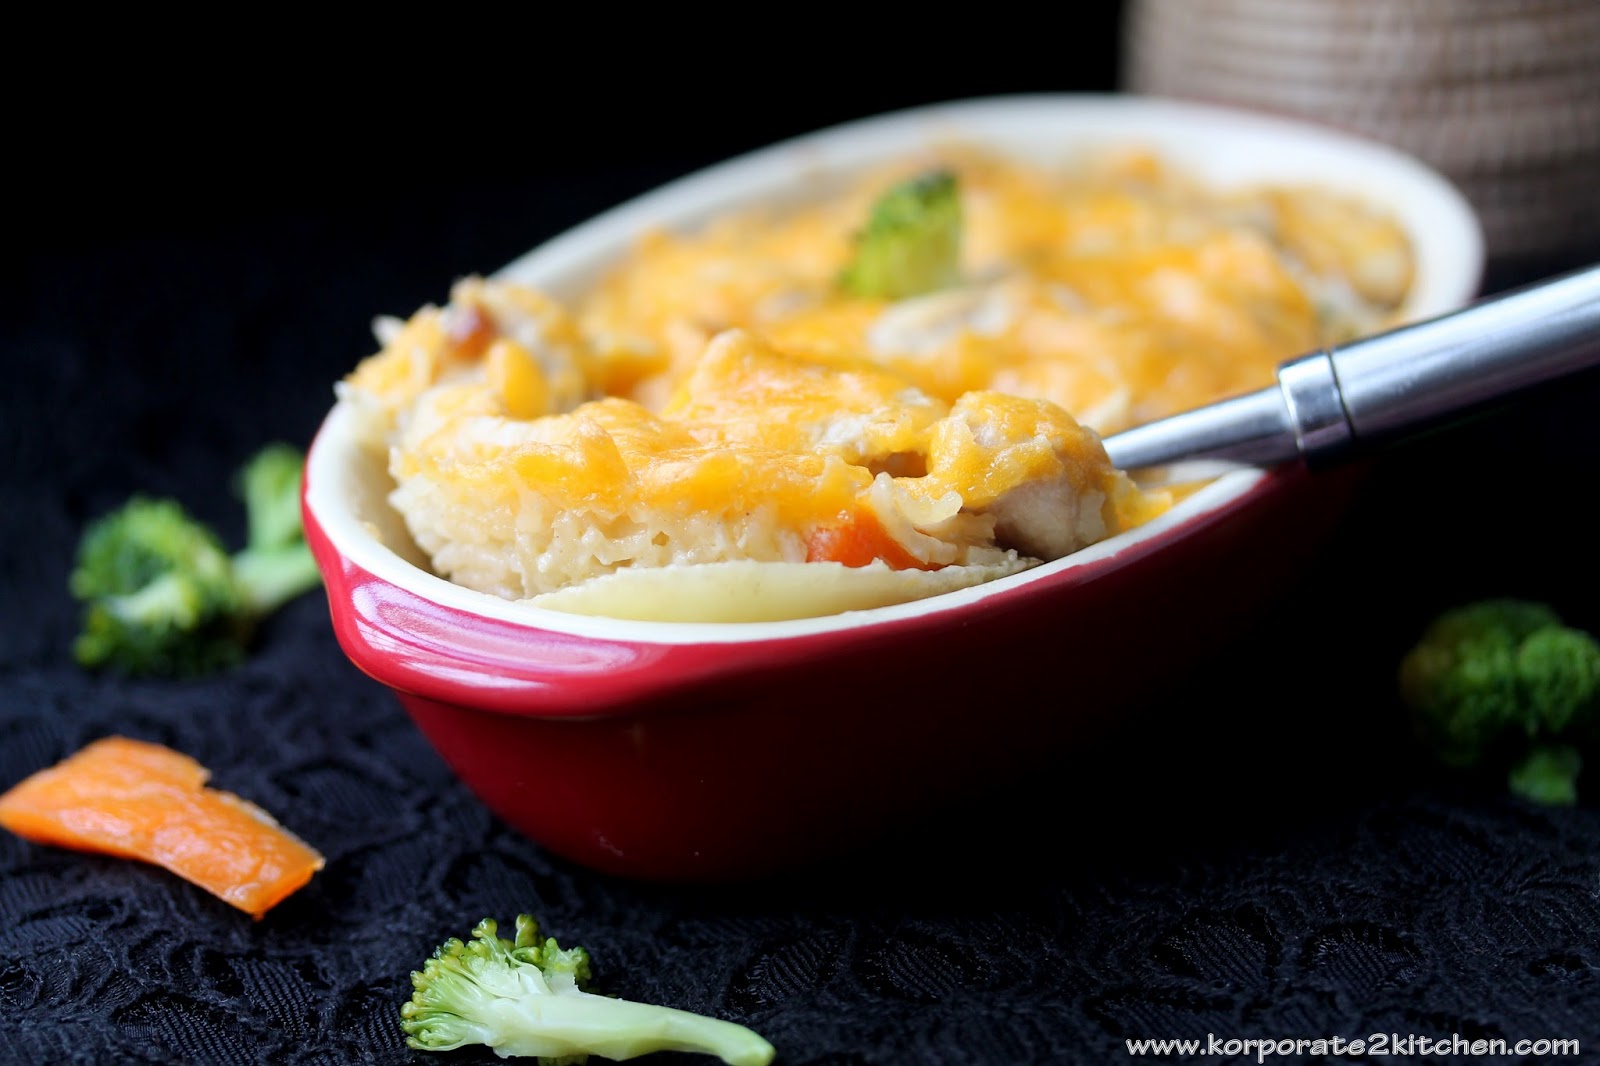
Indian moms mostly try & feed Rice based food to their little ones. Zion hates to eat from spoon these days & is interested in bite size food that can be fed with hands. Most of the days we make ghee Paratas or stuffed vegetable Paratas with chicken for him. Paratas are easir to feed as we don't necessarily need him to sit on his high chair. But feeding him rice is a big task:( . I try a make different style of dish in which I add rice & at the same time can be fed with hands like bite size food. I made Gratin for him with mixed vegetables , chicken & little rice. This is the first time I am feeding gratin & it was really yummy. It was a full balanced meal for him & definitely rich. For kids this is an amazing dish but for adults....hehehehehe watch out the calories:) This is how I made it.
Ingredients:
- 1 Potatoes cut into roundels
- 5 broccoli florets
- 1 carrot cut into long flat slices
- 1/4 tspn garlic
- Pinch of Nutemeg powder
- 1/4 cup cooked chicken cubes
- 5 Tbsp cooked rice
- 1/2 cup heavy cream
- 1 Tbsp butter
- handful of orange cheddar cheese
- 1/4 cup of milk
- 1 Tbspn corn flour mixed with little water
- half pot boiling water
- salt as per taste
Method:
- Put the sliced Potatoes in boiling water & boil it for 5 mins. Now throw in carrots, broccoli & cook them for another 2 mins. Now drain water & set the vegetables aside
- In a pan add in 1 tbsp of butter fry garlic until fragrant. Keep the gas on low flame & add in heavy cream. Keep stirring this.
- Combine milk, corn flour paste, nutmeg powder & wait until it thickens like a sauce. Keep stirring whole you make this. Now the sauce is ready
- You need to assemble all the prepared ingredients in a baking safe dish.
- First line some boiled vegetables in the bottom, layer some chicken on top & then rice.
- Pour in the ceamy sauce evenly on top of the rice.
- Finally garnish this dish with cheese. Cover this dish with silver foil & bake it in a preheated oven at 200 degree for about 10 - 15 mins.
- Once its a little cooled you can serve your kids this Delicious creamy, nutritious dish.
Here is the step by step pictures:
I have seen & tasted this delicious light fluffy Japanese cheese cake many times. I never thought I could make this at home. After doing a good amount of research & I was convinced that I can make this at home. I made this almost a month ago 7 totally forgot to post it. This is not a easy cake, there are few techniques to follow. I think this is the only recipe where I strictly followed the weights & directions. I actually measured each & every items to make sure it turns out perfect. Only reason I delayed making this coz its very rich & the amount of eggs you use in it is many. Best part of this cake is its not very sweet & its very light. I followed Catherine's recipe & my cake turned out pretty good. I was very satisfied with the results. Best part was that my lill Zion also loved it. The only changes I will do next time is that I will make a smaller cheese cake as this one I made was really big.
Serves around 15 people
Source: Christine Ho
Here
cooking time 1.3 hours
Ingredients:
- 250 gm cream cheese (Cut into cubes & softened at room temperature )
- 250 ml Milk
- 60 gm butter, softened at room temperature
- 6 egg yolks
- 55 gm cake flour
- 20 gm corn flour
- 1 lemon zest
- 6 egg whites
- 1/4 tsp cream of tartar
- 130 gm caster sugar
Method:
- Preheat oven to 150C (302F).
- Place a large bowl over simmering water & don’t
let the bottom of the bowl touch the water.
- Add in milk, cream cheese, stir occasionally,
until the cream cheese is completely dissolved and the mixture turns smooth.
- Stir in butter till its well blended. Remove from heat.
- Once the mixture is cooled add the egg yolks and
combine well.
- Sift in the flours(Cake flour+corn flour) into the cream cheese
mixture, a small amount at a time. Mix well between every addition, and make
sure there aren’t any flour lumps. Stir in freshly grated zest. Set aside.
- Use an electric mixer & beat the egg whites for 3
minutes, then add cream of tartar and blend again. Pour sugar in the egg whites
and beat until stiff peaks form.
- Fold-in the egg whites into the cream cheese mixture gently with a
spatula just until all ingredients are incorporated. Do not stir, over mix or beat.If not just fold in egg whites with a small amount at a time, at least for 3
times.
- Pour the mixture into a 9 inch round or square baking pans.
- Place the pans in another
larger baking tray. Add hot water in the tray up to half way. Bake for about 50
to 60 minutes or until the tooth pick insert comes out clean.
- Turn off the oven. Leave the oven door ajar for 10 minutes.
- Remove from the
oven and pans. Let cool completely, you can have this as it is or chill in a
fridge for about 3 hours.

Note:
- Make sure the cream cheese mixture is not too hot, as you don’t want to cook the egg yolks.
- If you are doing this for the first time, please watch some videos so that you are well prepared. http://www.youtube.com/watch?v=_aI3eai-Re8