Friday 12 July 2013

Goli Baje/ Mangalore Bajji


Mangalooru Bajji or Goli Baje is another fried snack that is very famous in the Mangalore region. These are also available in most of the udupi restaurants in Bangalore.  This was also one of the snacks my mom used to make for us. The best Goli baje's I have had is in coorg. There used to be a small canteen by name Kumar Vilas & my Pappa used to parcel some from there & get it. These were so delicious that my sister & I used to fight for major share. Back in Mangalore during our college days along with Buns, we used to order this one too. Hot baje's were served with coconut chutney & these were like KFC burgers to us.  These are easy simple to make & a very good evening snack with some filter coffee. This is how I made them:


Ingredients:
  • 1 Cup All Purpose Flour/Maida
  • 1/4 cup Chickpea Flour
  • 1/2 cup yogurt
  • 1.5 Tbspn Coconut (chopped)
  • 1 Tspn Cumin/Jeera Seeds
  • 1 Tbsp Ginger (finely chopped)
  • 1 Tbspn Green Chili (finely chopped)
  • 6 to 8 curry leaves chopped
  • Sugar - 1 tsp
  • Baking Soda - 1/4 tsp
  • Oil for frying

Directions:
  1. Make a batter with all the above ingredients. The batter consistency should be as thick as cake batter.
  2. Let the batter rest for at least 20 minutes
  3. Now take 1 Tbspn of batter & drop them in the medium hot oil. Fry these for 2 to 3 minutes until they are golden brown. These Baje's will increase in size while frying. Goli Baje has a crisp crust outside and a soft spongy interior. 
Note:
  • You can wet your hands & drop a small portion of batter in the oil to get those perfect round shapes.
  • Zion was in my hand while I was making these, so could use my hands.
 

Thursday 11 July 2013

Chocolate chips cookies


Cakes cookies are my weakness. I can eat them any time & can go on. Last week I did a lot of baking while my friend was around. She was so happy to have freshly baked cakes at home & loved them. She also said that this is one of the best cakes I have ever had for every cake I made. The praises motivated me to bake more. I made rich chocolate cake, Banana chocolate chips muffins, No bake chocolate caramel cheese cake. After eating all that last week & also Mcd burgers most of the time while shopping outside, I had decided that from now on I will stop baking for sometime, coz all that eating has really shown up on my waist line:( Now getting that rid off is a big task. I can put on weight by just eating heavy food for 2 days, but losing takes months together. For the last few days Zion has been taking Digestives, marie & oreo biscuits for snack to school. I thought will bake some cookies for him & I will not have them. Unfortunately I have eaten almost 4 so far:) They were so yummy & irresistible. Since this was made specifically for zion, I added extra butter which I don't when I make for all of us. These cookies were really rich, buttery. crunchy & melt in your mouth. If you dont like chocolate chips just skip adding them & you will have some nice butter cookies.


Making time: 1 hour
Makes around 25 cookies

Ingredients:
  • 3 cups all purpose flour
  • 1.5 cups sugar
  • 1 egg
  • 1/2 tspn baking soda
  • 200 gms butter
  • 1/4 tspn salt
  • 1 tbsp vanilla essence
  • 1 cups chocolate chips
Directions:
  1. Powder the sugar a little in the mixie or blender.
  2. Cream the butter & sugar until creamy with a hand whisk or spoon
  3. add in one egg & mix until its well combined
  4. Now mix in the flour, baking soda, vanilla essence & mix well until everything is well combined.
  5. Finally add in the chocolate chips into the batter & give it a good mix.
  6. Cover this soft dough with a cling wrap & freeze it for 20- 30 minutes.
  7. With a 1 Tbspn measure spoon scoop out heapful of 1 Tbsp cookie dough & line it on the baking paper.
  8. Now bake this in a preheated oven at 180 degree for 25 mins. Remove them out after 25 mins & allow them to rest until its cooled. The cookie at this stage will still be cakey or soft. Once they cool down they become crispy.


Lemon grass Roast Chicken

 
In chicken, thighs are my fav & I love to cook with this tender meat. Yesterday I was craving for something new in chicken. I had a picture in mind of the colour & texture I wanted. I had no clue what to make & what to add. I opened the fridge & I saw some lemon grass lying in there. So I instantly decided to make use of this for my new experiment. BTW not all my experiment turns out good & I don't upload all the recipes in my blog. Only the best goes in here.


Last evening I met my below house Indian Neighbour in the swimming pool & this is how our conversations went on:
N: What were you cooking today? My god! the smell was so good & I just couldn't resist. 
Me: Today I made some chicken cutlets.  (I dint mention about this chicken because it was not yet rated by my hubby.)
N: I think you were baking also?
Me: Yes, I made some chocolate chips cookies for my son. 
N: Even my house was smelling of good food. My son's friend is around & he came up to me & asked if I was baking cookies? HEHEHEHE....
Me: hahahaha.. why don't you come over to have some cookies?
N: I am on a diet now orelse I would have loved to....


My hubby loves my food & however late he is, he will come home & have dinner. Last night he came home at 1am & I was very excited to serve him this new dish. The moment he came home he said hmmmm.... what have you cooked? The house smells so good! When he had it he was all thumbs up & praises about this dish. He had many questions like what dish is this? where did u get the recipe? what flavour is this?  & so on.. I simple smiled & said this was an experiment & was waiting for your feedback. My hubby is a big food critic & only when he says ultimate is when I upload the recipe in my blog. This recipe is simple & I have used very minimal ingredients. The flavours were exotic & the taste was ultimate. This is going to be one of my signature recipes & I loved the outcome of this.


Cooking time: 30 - 45 mins
Serves: 4 chicken lovers

Ingredients:
  • 8 piece Chicken thighs
  • 5 shallots chopped (Sambar Onions)
  • 5 red dried chilli's
  • 1 Tbspn minced garlic
  • 1 Tbspn minced ginger
  • 2 Tbspn chopped lemon grass
  • 1 Tbsp fish sauce
  • 1 Tbspn sesame oil
  • 2 Tbsp light soya sauce
  • 1 Tspn honey
  • 3 Tbsp lemon juice
  • 1 Tspn kashmiri red chili powder
  • 1/4 Tspn black pepper powder
  • 1 cup water or more if required.
  • 3 Tbsp Oil
  • salt as per taste
  • coriander leaves to garnish
Directions:
  1. wash the chicken thighs, drain water completely. Make some cut marks on the thighs & set aside.
  2. Now combine shallots, lemon grass, red chili, ginger, garlic, fish sauce, sesame oil, soya sauce in a blender/ Mixer & make a course paste out of it.
  3. Marinate the chicken well with this paste & set aside for at least 2 to 4 hours. I just set aside for 2 hours.
  4. In a large flat pan, add 3 tbsp of oil & fry the chicken thighs on low flame, turning them over after every 2 minutes.
  5. Once you see roast  marks on both sides of the chicken, add in a cup of water close lid & cook this on low flame for about 3 to 6 minutes. Keep sauteing in between.
  6. The chicken also will start leaving some water & the sauce will get thicker as its cooking.
  7. Now mix in lemon juice, salt, honey, pepper powder, chili powder to the chicken. Give it a good mix & keep frying in the sauce. Add extra water if required.
  8. When you see fat separation & chicken is well cooked, turn off the flame & keep the pan covered.
  9. After 10 minutes garnish the dish with fresh coriander leaves.

Note:
  • I dint add coconut milk here but later added some coconut milk to half the portion of chicken, as my hubby likes some curry. The coconut milk gave a totally different taste to the dish.
  • The dish tastes good as it is but if you like a little extra curry then only ad din the coconut milk.
  • Slow cooking this is a key so make sure you cook this on low flame & keep the pan covered.


Wednesday 10 July 2013

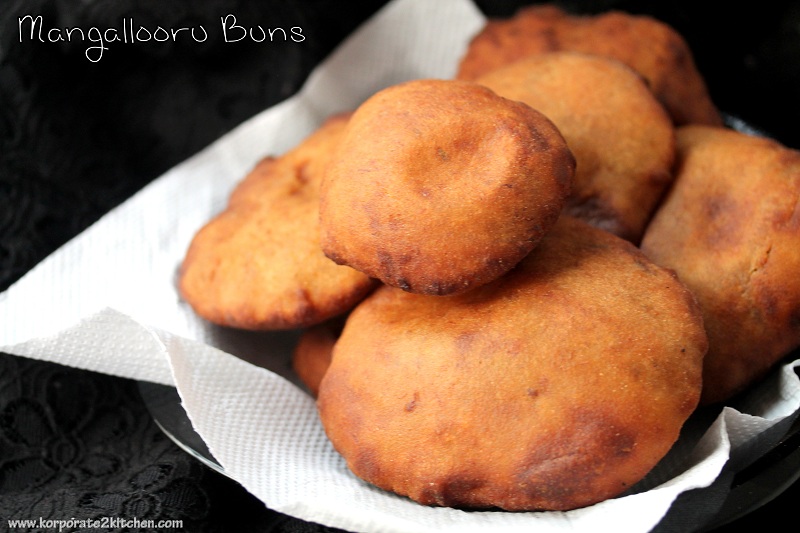
Mangalore Buns

I am sure every Manglorean loves this dish "Mangalore Buns" These are available in almost all restaurants, canteens in Mangalore region. My mom used to make them at least 1 once a week during our school days in coorg. We used to eat them almost every other day in our Agnes college canteen.. I love them a little sweeter & mostly this is made semi sweet. Its served with chutney or Sambar in the hotels. I love to eat them as it is. This recipe is already posted in my blog & then I dint have a canon, so most of my old post pictures are taken from my phone camera. I thought of clicking some pictures & revisting this post.

For the recipe click here


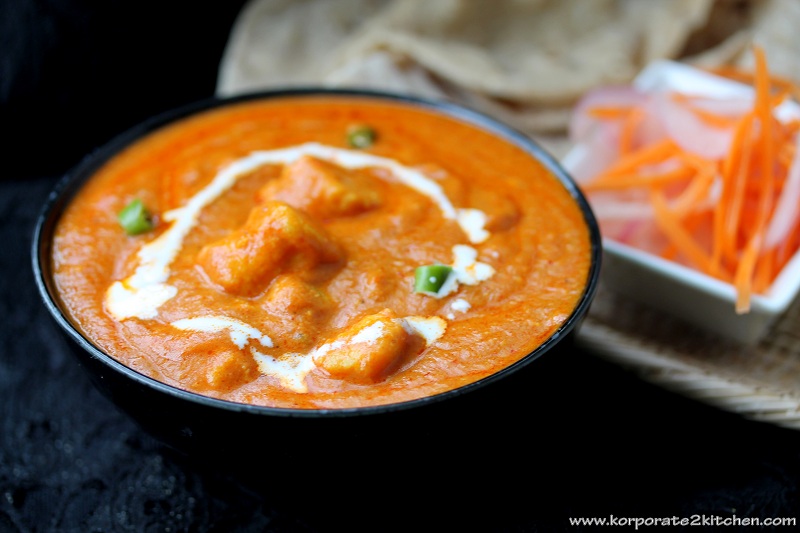
Paneer Butter Masala


I haven't slept well in the last 1 month properly. I am looking for a soundless 8 hour sleep & I don't know when that dream will come true. I had picked up some roast chicken from Fair price the other day & had fed Zion also some. After eating that he had a bad stomach pain & lose motion. Last night he was getting up every 3 hours with stomach pain & lose motion:(. My poor boy couldn't sleep well nor we could. Later got to know even hubby had a bad stomach. I rarely give outside food to Zion. Since he had mutton cutlets in the afternoon, I thought will give him some chicken for dinner. From now on I am not buying those roast chicken anymore. These roast chicken looks really nice & they are very cheap like 6 or $7 dollars for the whole chicken. Since I was out the whole afternoon shopping, thought will pick this up for dinner. Now I regret badly feeding my boy:(


Coming back to today's post, I was surprised to see No Paneer Butter Masala recipe in my blog. This is one dish I make so often at home. You know the most common dishes that we make are the missed out ones in the blog:) I figured it out that I also haven't updated recipe for Chicken Butter Masala. My Paneer Butter Masala recipe is always a hit at home & also among my friends. I find this recipe very simple & easy. No one can go wrong with this recipe. Depending on your diet you can add more cashews or cream. I mostly skip adding the cream part in my recipe when I make it for us. Some times I also replace cashew with Almonds & that too tastes very good but different. Never fry your Paneer while making butter masala. Frying it will kill the natural Paneer flavour & it will make the paneer hard. I have used fresh home made paneer in this recipe. I find home made paneer more softer & creamier. This is how I made it.

Cooking time: 30  minutes
servings: 4 people

Ingredients:
  • 1 large onions chopped
  • 2 large tomatoes chopped
  • 1 Tbspn ginger garlic paste
  • 1.5 cup Paneer cubes
  • 1/4 cup cashew nuts
  • 1/2 Tbspn coriander powder
  • 1/2 tbspn cumin powder
  • 1/2 tbspn chili powder
  • 1/2 Tspn garam masala powder
  • 1/2 Tbspn kasoori methi
  • 1 Tspn cumin seeds
  • 1 cup hot water or more if required
  • salt as per taste
  • 1 tspn sugar
  • coriander leaves  & green chilis to garnish
  • 1/4 cup cream or milk
  • 1 Tbsp oil
  • 1 Tbsp butter
Directions:
  1. Soak cashew nuts in hot water for at least 20 mins & then make a paste of it.
  2. Boil chopped onions in 1 cup of water until they are translucent & make a paste of this.
  3. Soak the tomatoes in the hot water, peel the skin & puree the tomatoes in the blender or mixer.
  4. In a heavy bottom pan, add oil fry cumin seeds for few seconds. Now add in ginger garlic paste, onion paste & tomato puree.
  5. Cover the lid of the pan & cook this on low flame for about 5 to 6 minutes. Add a little water if required.
  6. Now add in all the masala's except kasoori methi & saute well. Throw in 1 tbspn of butter  & sugar now in to the pan. Mix this well & keep sauteing for around 3 to 6 mins
  7. When the raw smell goes off  & when you see fat separation, you can add in cashew paste & 1/2 cup of hot water. Saute this for a minute until its well combined.
  8. Finally add in the cream, Paneer, Kasoori methi & mix well. Turn of the heat after one boil. Close lid & allow it to rest for at least 10 minutes before you dig in:) Add more water if you want.
  9. Garnish the dish with coriander leaves, chopped green chilis  & some fresh cream.

Note:
  • Make sure you keep the pan closed or else you will have a messy kitchen.
  • You can add in some red colour if you want. This will make the paneer look like the restaurant style.
  • Use fresh Paneer for the best taste. If you are using frozen Paneer, then soak them in hot water for atleast 1/2 hour so that they come back to room temperature.
  • I havent added coriander leaves in this presentation but have added it just before serving this dish for dinner.


Tuesday 9 July 2013

Gajar Halwa


My lill Zeeyu got up at 4 am in the morning & started singing twinkle twinkle little star. I thought may be he will sing once & go back to sleep. Coz he does that sometimes in his sleep. But later started wheels on the bus goes round & round, I love you, twinkle twinkle... Now he was over me scratching my face, putting his finger in my mouth, nose, pulling my eyelashes. I was so sleepy that I ignored his behaviour & now the boy became louder & louder. He was trying his best to wake me up & he succeeded. And now what?? he holds my hand & takes me to the drawing room, he picks his fav car & gives me a naughty smile like he has achieved something. Gosh! I was like a zombie & just fell on the sofa trying to sleep. Now my lill fighter has a never give up attitude, every time I closed my eyes, he would wake me up. After few minutes he pulled me out from the sofa & took me to the kitchen. Mamma give... give... dhee ...dhee... (In konkani Dhee means give) I knew he was asking for vessels. I pulled out some vessels spoons & gave him. Now he was all smiles & went back to the drawing room & started cooking. I cant tell you how much he is inspired by what I am doing:) He loves to enact what I do in the kitchen. Once it was 6 am I woke up my maid & I went back to sleep.


I know many Mom's can relate to me. Since I have a broken sleep everyday, I feel so tired & lazy. I have now become regular in swimming, coz that is the only exercise I enjoy. I hope this swimming will help me in reducing some inches soon:) One big disadvantage of swimming is I have got tanned badly. Now coming back to todays post, Gajjar Halwa/ Carrot halwa is my hubby's favourite. This is a simple delicious Indian sweet. Goes well just like that or even with a scoop of ice cream. My lill boy also loves carrot halwa, so I trt & make it more often these days. This is how I made it.

Making time: 30 mins
Serves: 5

Ingredients:
  • 3 cups grated carrots
  • 1 cup milk
  • 1/4 cup fried cahew nuts
  • 2- 3 Tbsp ghee
  • 1/4 tspn salt
  • 1 cup sugar
  • 1/4 tspn cardamom powder
  • 1 cup water
Directions:
  1. combine grated carrots, water, milk & boil this on low flame with closed lid for about 5 to 8 minutes or until the carrots are soft.If the water gets drained off in between add some more
  2. Now add in sugar, salt, cardamom powder & mix well into the carrots. Once the sugar mixes well it will thicken.
  3. While adding the ghee the consistancy of carrots should be a little sticky. When you achive this consistancy, add in ghee, fried nuts & mix well. Saute this for 2 mins on low flame until everthing is well combined. Now the Halwa is ready.

Note:
  1. There are various versions of Carrot Halwa & this is one version that I have shared.
  2. You can also add color if required
  3. You can be generous with ghee & nuts too.
  4. Serve is warm or chilled.
  5. You can add condensed milk too & it tastes great.


Sunday 7 July 2013

Steamed Chocolate cake


It was totally a fun filled week with my friend being around here. I was enjoying taking her around the city for shopping & sight seeing. It was so much fun clicking pictures & also posing for. Currently all my friends here in Singapore have small babies & it becomes difficult to hang out like we used to do earlier. So this friends visit really brought back all those memories back.

While I was working with RBS Singapore my office was at Raffles place & my very good friend was working at P&G Novena. Our office used to be 5 mrt stops away & we used to make sure that we catch up for lunch at least once or twice a week. Since I was pretty new to Singapore then, she used to take me around the food court & suggest me to try some local food. After our lunch we used to  love to do some window shopping & then get back to work. Those were real good times & I miss them a lot:) Girls & window shopping are like best friends hehehehe..

Now coming back to today's post, I made this cake 2 weeks ago & this time I tried using this new brand of coco powder "van houten " Since Most readers had requested for no baked cakes, I thought will steam it for a change, which I don't do it often. The cake turned out perfect & since I had made steamed cake long time ago, I was just keeping my fingers crossed. Fortunately the cake was very delicious & the texture was so soft that it was just melting in the mouth. Since my hubby & I were so tempted to eat it fast, we dint wait for it to cool down. I over turned the cake while it was still warm & that's why the cake dint come out very clean from the pan. So please don't be impatient like us & repeat this mistake. wait for the cake to cool down completely before cutting.

Ingredients
  • 1 cup sugar
  • 1 cup all-purpose flour
  • 1/2 cup Cocoa powder
  • 1.5 Tspn baking powder
  • 2  eggs
  • 100 gms Butter
  • 2 teaspoons vanilla extract
  • 1/4 Tsp salt
  • 1/4 cup hot water
  • Some silver foil
 Method:
  1. Grease 6-inch round baking pan.
  2. Stir together  flour, cocoa, baking powder in large bowl.
  3. Cream the butter &  sugar with a electric beater or hand whisk for 2 to 3 minutes.
  4. Add eggs, vanilla & mix well for 2 minutes or until its creamy.
  5. Add in the dry ingredients, Mix the hot water & beat for another 1 minute, until everything is well mixed.
  6.  Pour batter into prepared pan, cover the top with silver foil & steam for 45 to 55 minutes or until wooden pick inserted in centre comes out clean.
  7. Remove the Pan outside & let it cool completely before you cut & serve.


Note:
  1. Steamed chocolate cakes are very soft & moist so you need to cut them with really sharp knife. Be gentle & patient.
  2. They taste great & its good to eat them as it is.
  3. I have always steamed Banana cakes & had never tried steaming other cakes. But now I feel all cakes can be steamed & they will turn out good.