Monday, 2 September 2013

Cranberry Orange Mini Bundt Cakes with Orange Glaze


Its been almost a month since I posted anything in my blog nor visited any other blogs. 2 reasons why I haven't been very active in blogging (1. laptop crash, 2. On a diet )If you are my face book page follower, then you already know that I am on a diet & have been cooking just the diet food. Well I will be posting more about this diet in my next post. I am posting this from my hubbys laptop & I hope to get my laptop fixed soon.

Today I would like to introduce you to my blogger friend Shema from "Life Scoops" I am sure most of you already know her & her amazing cooking/baking skills. I got to know her through a common friend & I cant tell you how much I admire her cooking/ baking & photography skills. She is my first guest to post in my blog & I am so glad to have her in my virtual space.  To know more about her visit here. She has made some delicious lovely looking "Cranberry Orange Mini Bundt Cakes with Orange Glaze" Now lets go on to her post...


From Shema author of  "Life Scoops"

I got introduced to Sheela, through Renu, a common friend of ours, who wanted to get us seemingly like-minded people together. This is one another reason why I love blogging as it’s a great medium to bring together people who share common passion and interests across the world, exchange ideas and notes and just get to know each other on a personal level. Sheela resides in Singapore, with her husband and a terrific toddler, Zion.
These mini bundt cakes burst with a nice citrusy orange flavor and the tart Cranberries and crunchy Pecans add a wonderful texture and taste. You can use the same batter to make mini bundt cakes, muffins or even bake it as a normal sized cake.
Ingredients
  • 2 cups - All purpose flour
  • 2 Tsp - Baking Powder
  • 1 Tsp - Baking Soda
  • 1/2 Tsp - Salt
  • 2 - Egg
  • 3/4 cup - Sugar (*Refer Notes)
  • 2 Tsp - Finely grated orange zest
  • 1/4 cup (56gms or 1/2 stick) - Unsalted butter, at room temperature
  • 1 Cup - Plain Yogurt
  • 1/2 Cup - Orange juice fresh
  • 3/4 Cup - Dried cranberries
  • 1/2 Cup - Pecans or Walnuts, chopped
Glaze Ingredients(optional)
  • 3/4 Cup - Orange Juice, freshly squeezed
  • 4 Tablespoon - Powdered Sugar
  • 2 Tablespoon - Butter
Directions
  1. Preheat the oven 350 degrees.
  2. Grease the mini bundt cake pan or line the muffin pan with cupcake liners and set aside.
  3. Sift the dry ingredients: flour, baking powder, baking soda and salt into a bowl and set aside.
  4. In a large bowl, whisk the butter and sugar
  5. Add eggs and whisk until combined
  6. Stir in the orange zest, orange juice and yogurt and mix until combined
  7. Add the flour in 3 batches and whisk until the batter comes together.
  8. Mix in cranberries and pecan/walnuts and whisk until they are evenly distributed. Do not overmix.
  9. Evenly divide the batter in between the mini bundt cakes or the muffin pan
  10. Bake for 15-18 minutes, or until a toothpick inserted in the center comes out clean.
  11. Transfer the Mini bundt cakes/muffins to a cooling rack and allow them to cool completely before glazing.

To Make The Glaze:
  1. Add 3/4 cup of freshly squeezed orange juice and butter to a non-stick sauce pan
  2. Heat until the mixture reduces it to 1/2 Cup.
  3. Let it cool.
  4. Add 4 tablespoons of powdered sugar and whisk until combined
  5. Pour the glaze over the bundt cakes with a teaspoon or use a brush to apply the glaze.
Notes and Tips
  • If you are not making the glaze, increase the sugar to 1 cup for the muffins
  • Make sure not to include the white part of the orange skin while zesting the orange
  • Use freshly squeezed orange juice


Monday, 5 August 2013

Dulce De leche Ice cream


I have mentioned this earlier too that I am not a Ice cream fan. However I have 2 die hard ice creams fans at home:) My hubby & my lill one. I recently figured it out that Zion loves ice cream a lot. I microwave ice cream for 10 seconds & serve Zion. So that way its kind of room temperature & not very cold for him. Well ever since I tasted Dulce De leche ice cream at Baskin Robbins, I had decided to make this at home. The taste is very similar to Honey niut crunch ice cream which is our home fav.  Since I have already made dulce de leche previously for for Banofee Pie recipe, it was easier for me to transit this to ice cream. Now most of you must have already seen my Vanilla ice cream video recipe & you all know how easy it is to make home made ice cream without a machine. For this particular recipe I have not used eggs nor custard, Instead I used Corn flour. The ice cream turned out too too good. Even though I don't like ice creams, I had a large scoop on the "cheat "on Saturday. Since I am on my own protein diet, I had decided to have 1 cheat day in a week. So last Saturday was last week's "cheat day":). Its very easy to make this recipe & you can make the Dulce de leche the previous day & keep. This is how I made it.

 
Making time: 30 mins
Total set time: 6 to 10 hours
Serves: 10 people around 10- 12 medium scoops 
 
Ingredients:
  • 1 Tin Condensed milk
  • 3 cups heavy whipping cream
  • 1/2 cup milk
  • 1 Tbspn corn flour
  • 4 tbspn water
  • 1/4 cup icing sugar
  • 1/4 tspn salt
  • 1 Tbspn Vanilla essence
  • 1/4 cup chopped toasted almonds or any dry fruit of your choice

Method:
  1. Step 1:In pressure cooker place the condensed milk in a bowl with water covered till the neck of the tin. Cook this for about 30 - 45 mins without the whistle. Just cover the whistle hole with a small bowl. If you don't have a pressure cooker, you can use a heavy bottom pan.
  2. Once the cooker is cooled, remove it carefully & place it under the running water to cool.
  3. Once its cooled remove the tin cover & keep it in the fridge for it to cool for some more time. The consistency should be thick, when you scoop a spoon & place it up side down it should not fall off suddenly.
  4. Make a paste of corn flour & water. Set this aside
  5. Simmer a cup of milk on low flame & now add in the corn flour mixture to this & keep stirring until it thickens.
  6. Turn off the flame, add in Vanilla essence, salt & Dulce De leche to this mixture. Use a hand whisk or spoon & mix this well so that it is smooth & well blended. set this aside to cool down.
  7. In a large mixing bowl, add in whipping cream, icing sugar & whip this until soft peaks.
  8. Now add the Dulce DE leche mixture into the whipping cream mixture & whip it for a minute with a electric beater
  9. Transfer this mixture into a air tight container & freeze this for about 2 hours. After 2 hours whip this mixture for 2 minutes with an electric beater & refreeze it again. Continue this process for 2  times in total after every 2 hours interval.
  10. Add in the chopped nuts after the 2nd time whipping & freeze it for 4 to 6 hours to set completely.Now the ice cream is ready to serve.
  11.  


Friday, 2 August 2013

Squid Curry

 
Finally Zion is out of fever zone & is all charged up. These days he is so attached to me & walks along with me like my tail. I cant tell you that he even doesn't let me go for a bath or toilet:) At last I decided yesterday to have some "me" time while he was asleep. My hubby gave me a reward card & told me shop whatever you want:) Now that is like a super gift for a wife right? I reached the MRT & called one of my friends to say that I am shopping today. She & I have had so many good times shopping together in the past. Now she too is a new mommy so she hardly gets time to go out & have "me" time. Finally it worked for both of us:) We met at Raffels place had lunch together, did some window shopping, chit chatting & then shopped till evening in the malls. It was a great outing. More than shopping we enjoyed each others company. Its so much important to have this "me" time once in a while. Before having Zion I used to meet this friend almost every week & now its like once a month or once in 2 months kinds.


These days I am so lazy to blog but definitely not lazy to cook. I have been making so many new dishes but haven't had the time to upload any of those. Now today's post is a curry that I made some time ago. This is a simple style Mangalorean curry made with coconut milk. This is how my Mom makes most of the fish curry. A very tasty & easy curry to go well with everything be it rice or roti's. This is how I made it:
 
Ingredients:
  • 1 Kg cleaned & cut Squid
  • 2 Onions chopped
  • 2 Tomatoes Chopped
  • 1 Tbspn ginger garlic paste
  • 1.5 Tspn Cumin powder
  • 1.5 Tspn coriander powder
  • 1 Tspn chili powder
  • 1/4 Tspn turmeric powder
  • 1 Tbspn lemon juice
  • 1 cup coconut milk
  • 1/4 tspn fenugreek seeds
  • curry leaves to garnish
  • 1/2  cup hot water
  • salt as per taste
  • 1/2 tspn sugar
  • 2 Tbspn coconut Oil
  • Coriander leaves to garnish
Directions:

  1. In a heavy bottom Pan, add oil fry fenugreek seeds, onions, ginger garlic paste until translucent
  2. Add curry leaves tomatoes & cook this until fat separation.
  3. Now add in all the Masala's mentioned above & saute for a minute.
  4. Add the cleaned squid into this & saute for 3 to 4 minutes.
  5. Now add in hot water, coconut milk , salt, sugar, lemon juice & bring this to a boil in low flame around 2 mins. Keep stirring or else the coconut milk will split
  6. Turn off the flame & garnish the dish with coriander leaves.

Note:
  1. I used coconut oil coz I use it for most of my seafood recipe to bring out the unauthentic Mangalorean flavour. You can use any other cooking oil if you want.
  2. I cut my squid in round shape & they look like small onion rings, Well you can cut it any shape you want. Make sure you have cleaned it well


Tuesday, 30 July 2013

Sambal Belacan Prawns

In the last 4 months my son has gone on a school picnic for the 2nd time. This time it was to the Bollywood veggie farm. I hardly remember me having any kind of picnic while I was his age:) This time I dint accompany him but asked my maid to go along with him. I have noticed that he is very well behaved & friendly with my maid. If I am around he simply tries to throw tantrums & I find it very difficult to handle him outside. Last time I had a crazy time when I went along with him to the chicken farm picnic. This time My maid was saying that he was so good & quite that the teachers were surprised to see him that way. He is the naughty & loud one in the class:)


I was just talking to my other Mommy friends & they too had similar things to share. The kids generally throw tantrums at their mom's & I think they love doing it. After all that enjoyment at the picnic, there was slight drizzle which has made my boy sick. He has been having high fever since saturday & is recovering now.


Since zion  was unwell we did not do much over the weekend. We just took him out in the evening for a walk to the nearby mall. We suddenly happened to taste Dulce le leche ice cream at Baskin Robbins & loved the taste. Since I had all the ingredients to make this, I tried this one & It turned out amazing! I will be posting this recipe soon.


Coming back to today's post, Ramadan being around the corner, I wanted to post as many non veg dishes as possible . You wont believe that I have more than 50 pending posts sitting in my laptop. I create most of my recipes, I have even forgotten how I made some of them:) This is a recipe that I tried from one of my fav chef's book "Best of Wan" I love his recipes & this chef is very entertaining. He is a very famous celebrity chef in Malaysia & Singapore. I rarely try his recipes, coz they are very rich & addictive:) If you love rich Malay food, then you must try out recipes from his books. This is Prawns sambal Belacan which is very similar to rendang curry. This is how I made it & I would have slightly modified to suit our taste.


Making time: 45 mins
cooking time: 25- 30 mins
Serves: 4 people

Ingredients:
  • ½ kg / 1 pound of medium-sized Prawns cleaned
  • 4 Tbspn oil
  • Salt to taste
  • 1/2 cup fry roasted decisated coconut
  • 3 Tbsnp Thick coconut cream
  • 2 tbspn Turmeric leaves finely chopped to garnish
  • 2 Kafir lime leaf finely chopped to garnish
  • 1 Tbspn Lemon juice
 
Paste Ingredients: (to be finely ground)
  • 10 Shallots (Red Onions), peeled
  • 15 dried Chilis soaked in hot water to soften and drain
  • 2 Tbspn chopped lemon grass
  • 1 Tbspn chopped galangal
  • 3 Tbsp roasted dry Shrimps
  • 3 Kaffir lime leaf chopped
  • 1 Tbspn minced ginger & garlic
  • 2 Tbspn chopped Turmeric leaf
  • 1/4 cup water
  • 1/4 Tspn Tamarind Paste
  • 1/4 tspn Palm sugar (Jaggery)
Directions:
  1. Heat Oil and sauté the Paste until fragrant. Lower the heat in order to not burn the spices. Cook slowly till oil surface or separates.
  2. Add around 1/4 cup of hot water & bring this gravy to boil. Immediately bring down the heat & add thick coconut cream
  3. Add in Turmeric leave, White Sugar (or Palm Sugar), and salt. Simmer until the gravy thickens.
  4. Add in the Prawns and continue to simmer until the water from the prawns releases & cook until the gravy is slightly dry. This should take not more than 5 mins.
  5. Turn off the fire and add in Kaffir Lime Leaves, turmeric leaves and roasted desiccated Coconut Paste. Stir them well.
 
Note:
  1. Prawns cook really fast so do not over cook them. If you cook longer they will turn out chewy/rubbery.
  2. Sometimes depending on the type of kadai you use, you might require more oil for frying the masala paste. So add it according to your preference
  3. If you life the dish more spicy add more chili's if you want.
  4. Try & serve this dish fresh to enjoy the juiciness of the prawns
  5. I would advice you to use fresh Prawns or shrimps.
  6. Since I dont like & stand the smell on ready Belacan paste, I skipped adding that & replaced it with dry roasted shrimps.


Thursday, 25 July 2013

No Butter Banana Cake


I am back again after a gap & I cant tell you how much I missed cooking, blogging & going through some of my best blogs. Monday was the 1st day at work after a 2 years of gap. My boss was here for 3 days to train the trainers & I was so excited to sit through & also do some part of the trainings. Training is something that I have enjoyed a lot in my career. This profession really gave me so much joy & learning. Now I am so happy that I work as a independent contractor with couple of great training companies. This is the best thing that could happen living in the foreign country. Now I will have a perfect balance of work-family-passion-life.


My training starts at 9am, so I had to leave home by 8:30am. It was tough for me to be away from Zion for full day. The first day I fooled him by sending him down to the play area with my maid & I slowly sneaked out from the front gate. It seems once he was back home, he was looking for me in all the rooms & was a bit sad for a while. The second day he refused to go down to play & was glued to me where ever I went. He knew that I was going out & kept saying Mamma office mamma office... I was feeling very bad, but some how had to pacify him & send him down. Coz I really don't want to get out of house in front of him. He cried a lot to go down & once he met his friends downstairs he was fine. Yesterday also was the same scene:(  On day 2 my training got over by 4:30, so I decided to go to Zion's school to pick him up. My  maid was already there waiting at his school. I was peeping through the window inside the classroom & saw my lill boy restless & running around. He spotted my maid & was very happy to see her. Once he came out of the class he saw me & I cant express how happy he was. He started climbing on top of my stomach, shoulder & head.. he hugged me tight & was smiling through out. The mother child relationship is the best in the world. I love being a mother & enjoying every precious moment with my Son.


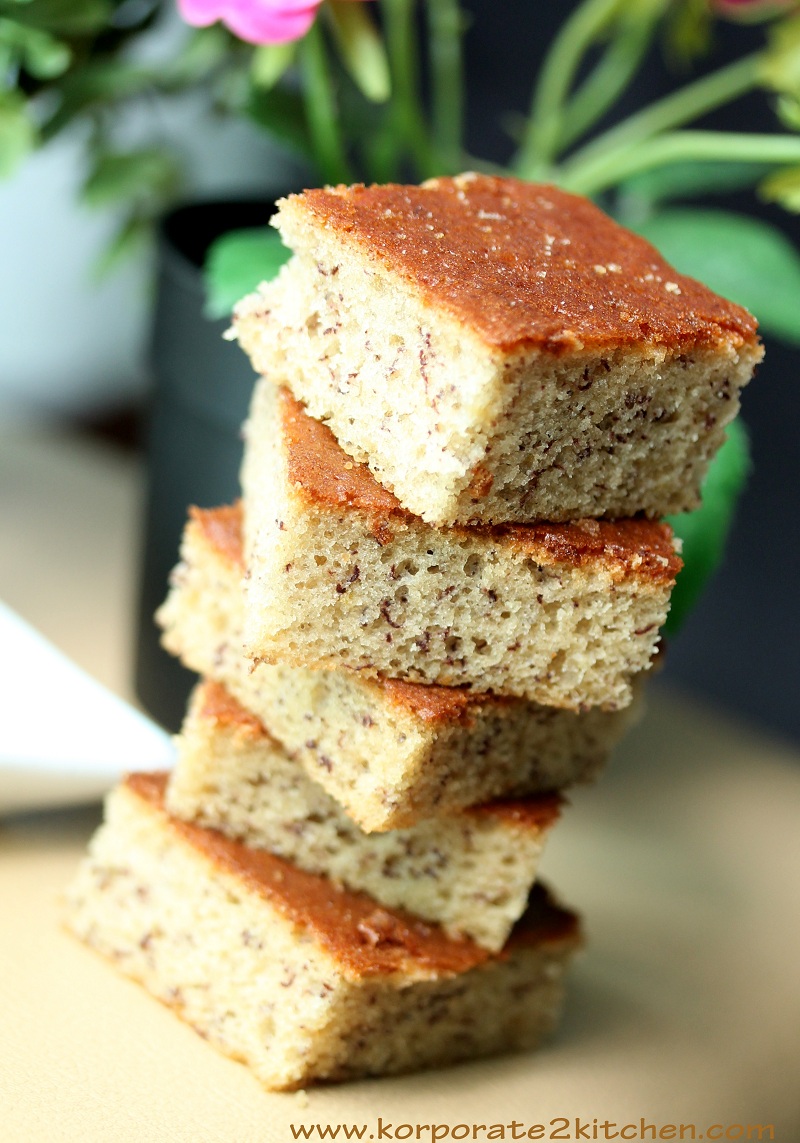
Now coming back to today's post. This is a simple Banana cake & I have used oil in this recipe. In the past I have always baked my Banana cakes with butter but never knew that oil also tastes very good. This is a healthy recipe & great for kids snacks too. My lill one loved this & it stays moist & soft even after refregerating them. This is how I made them

Serves: 8 - 12 people
making time: 45 mins

Ingredients:
  • 1 cup flour
  • 1/3 cup cooking oil
  • 3/4 cup sugar powdered
  • 2 Eggs
  • 1 tspn Baking powder
  • 1/2 Tspn Baking soda
  • 1/4 tspn salt
  • 1 Tbsp Vanilla essence
  • 2 Large riped Bananas

Directions:
  1. Mash the Banana's with a fork & set this aside
  2. In a bowl add sugar, mashed Bananas, eggs & mix well with a spoon or a whisk.
  3. Now add in the oil, Vanilla essence, salt, flour, Baking powder, soda & mix well with a spoon or a whisk.
  4. Pour the mixture in the Baking pan 6 inch round or square, 9 inch round or square Pan.
  5. Bake this in a preheated oven for 40 - 45 mins at 180 degree if your are using  6 inch Pan or for about 25- 30 mins if you are using bigger pan.

    Note:
  1. I used a bigger pan 9/9 square pan, coz I wanted small square pieces. If you want a good height for your cake then use the regular 6 or 8 inch round pan.
  2. I sometimes use bigger pans so that the cakes bake every fast.

Thursday, 18 July 2013

Banana Oats Cookies


You already know that my Son, Zion doesn't like to eat fruits & I try my best to add fruits in dishes that I cook for Zion. How much ever my son eats he never puts on weight & he is just vertically growing faster. He is very tall for his age & people ask me if he is 3 whereas he is just 2.1:) Banana's are high in calories & are an ideal fruit for weight gain. I am trying and making a lot of banana snacks for him. He loves Banana cakes & I have been making these more often. This time I made Eggless Banana oats cookies & it turned out super yummy. Zion loved it & everyday the snack box came back home empty. This is a very happy moment for me & I know many Mom's out there can understand me better.


I have made cookies dough & refrigerated them. I will be baking as & when needed. The first batch I made were around 9 cookies & all got over in 2 days. Since I am on my own diet, I had only 1 although was very tempted to eat more. When my hubby got back from work, I offered him a cookie after dinner. He took a bite & just closed his eyes went on hmmmmm.... this taste reminds me of something that I had in my childhood days in Nigeria. I was so happy that he loved the cookie & also was able to bring back some good old memories. Now I don't know who had the maximum share? the lill one or big one :) Next time I am going to add eggs in my cookie dough, simply because it will make the cookies even more rich & its good for my little one. Since I have a lot of vegetarian fans & they requests for egg less ones, I thought will make these egg less. This is a must try & can be done under half hour.

Making time: 30 mins
Makes around 20 - 22 cookies.

Ingredients:
  • 2.5 cup all purpose flour
  • 1 cup sugar
  • 1/2 Tspn baking soda
  • 150 gms Butter
  • 1 large Banana mashed with a fork
  • 1/4 Tspn salt
  • 1 Tbspn Vanilla essence
  • 1/4 cup rolled oats
  • 2 -4 Tbspn milk if required
Directions:
  1. Cream the butter & sugar in a mixing bowl with a hand whisk or spatula.
  2. Add the mashed Bananas, Vanilla essence into the mixture & saute well until the sugar is well incorporated.
  3. Add in all the dry ingredients into the wet & mix well to form a soft dough.
  4. Freeze this dough for 10 - 20 mins.
  5. Use a ice cream scoop or 1 Tbspn cookies dough, place them on Parchment paper & bake them in a pre -heated oven at 180 for about 18 to 10 mins.
  6. The cookie after 20 mins will still be soft, remove them & let them sit outside until they are cooled. Once they are cooled they become crispier.

Note:
  1. If you want you can add nuts or chocolate chips into the cookie dough.
  2. You can also skip oats if you dont like them in there.
  3. The sweetsness was just perfect for us, but if you like it very sweet then add in more sugar.
Now check out my lill one during the photoshoot. He was pulling the table setting & was all over.

Zion says Hi to all my readers:)

This is my food photo studio at home:)


Some how was able to click his pic without him shaking

It is very difficult to take his pic as he doesnt pose nor sit in one place:)

Fondant Banana Tutorials


Banana & Tomatoes are the topic of discussion in Zion's school for this quarter. There was a home project for parents & kids to do along. We had to familiarise the kids about these fruits & do a project with the use of these fruits or any thing creative.  It was the last day & we had to submit the project to the school. Since I had guest at home, I had totally forgotten about this. Upon checking the date suddenly realised that this was pending.  Since I love working with fondant, thought why not make these fruits out of fondant. I had some left over fondant from previous cakes in the fridge, so thought will utilise it for this project. My friend was around while I was making these & she was totally shocked to see me do it fast. She is the one your video graphed this:) Thx Annu for supporting me in this video.

Zion was very excited seeing me do this for him. He actually wanted to eat them:) He was saying mamma..Banana banana.. give give...:)  He some how manged to damage the tomatoes & thankfully it reached the school in good shape. I have taken a video tutorial on how to make Banana's. Hope you will enjoy this video tutorials.


Tuesday, 16 July 2013

Butter chicken Masala

 
Yesterday I was feeling so lazy that I dint feel like posting any recipes or being active on my blog. I was also feeling lazy to dress up & go out shopping. So I decided to watch some movie which is very unlikely of me. I love to watch horror movies but at the same time I am very scared to watch alone sometimes. I found this movie "Naina" on you tube so thought will watch it. The movie is very slow & a OK movie for time pass. Not a very scary movie but can watch once types.


coming back to today's post "Butter chicken" This is one preparation I make more often but always at night for dinner. Since i make it at night, I never was able to take a decent click of this dish. Although this one also was made for dinner but I prepared it in the evening so I got some evening light to click some ok ok shots. I somehow find it very difficult to take curry shots. I always try to give a very close up shot for my food coz I really want people to see the real texture & colour of food. I don't spend much time in plating it but concentrate more on getting the right texture of food. BTW food photography is not my cup of tea but since i love cooking, I am slowing learning to take better pictures. I feel very good when someone complements my food pictures & blush:) This is the best Butter chicken, very creamy tasty & yummy.


Cooking time: 30 minutes
servings: 4 people

Ingredients:

  • 1 large onions chopped
  • 2 large tomatoes chopped
  • 1 Tbspn ginger garlic paste
  • 500 gms boneless chicken cubes
  • 1/4 cup cashew nuts
  • 1/2 Tbspn coriander powder
  • 1/2 tbspn cumin powder
  • 1/2 tbspn chili powder
  • 1/2 Tspn garam masala powder
  • 1/2 Tbspn kasoori methi
  • 1 Tspn cumin seeds
  • 2 Tbspn thick curd
  • 1/4 tspn chili powder
  • 1 Tspn lemon juice
  • 1 cup hot water or more if required
  • salt as per taste
  • 1 tspn sugar
  • coriander leaves & green chili's to garnish
  • 1/4 cup cream or milk
  • 2 Tbsp oil
  • 1 Tbsp butter
Directions:
  1. Marinate the chicken in curd. salt & 1/4 tspn of chili powder for at least 2 hours.
  2. In a pan add a tbspn of oil & fry the chicken cubes until all water is drained off or 80 % cooked. Once cooked set the chicken aside.
  3. Soak cashew nuts in hot water for at least 20 mins & then make a paste of it.
  4. Boil chopped onions in 1 cup of water until they are translucent & make a paste of this.
  5. Soak the tomatoes in the hot water, peel the skin & puree the tomatoes in the blender or mixer.
  6. In a heavy bottom pan, add oil fry cumin seeds for few seconds. Now add in ginger garlic paste, onion paste & tomato puree.
  7. Cover the lid of the pan & cook this on low flame for about 5 to 6 minutes. Add a little water if required.
  8. Now add in all the masala's except kasoori methi & saute well. Throw in 1 tbspn of butter & sugar now in to the pan. Mix this well & keep sauteing for around 3 to 6 mins
  9. When the raw smell goes off & when you see fat separation, you can add in cashew paste & 1/2 cup of hot water. Saute this for a minute until its well combined.
  10. Finally add in the cream, chicken, Kasoori methi, lemon juice & mix well. Cook on low flame for about 5 mins.
  11. Close lid & allow it to rest for at least 10 minutes before you dig in:) Add more water if you want.
  12. Garnish the dish with coriander leaves, chopped green chili's & some fresh cream.
Note:
  • Make sure you keep the pan closed or else you will have a messy kitchen.
  • You can add in some red colour if you want. This will make the chicken look like the restaurant style.
  • Always cook the chicken seperately in a pan or you can even bake them at 250 degree for 20 mins

Monday, 15 July 2013

Salted Caramel chocolate cheese cake


No Bake cheese cakes are the easiest to make & its definitely a crowd pleazer recipe. By being a little creative you can make the cheese cake look very stunning. The main thing is in setting the cheese cake & making it look appealing. The basic no bake cheese cake recipe is very simple & no one can go wrong. 2 weeks ago when my friend was around, I asked her if she has had cheese cakes before? She said no & since i made some cream cheese lying in the fridge for weeks, i thought will make some cheese cake. I have always made just one flavour cheese cakes, so thought this time will mix caramel & chocolate. Since my friend is a die hard fan of chocolate, I decided to go with this flavour.My hubby hates Chocolate cheese cake & he just had a small piece. The cake turned out perfect & it was really a rich cake. The most enjoyed people were my friend & my son:) When I served my friend with a piece, she was like "Waw!" you are totally a professional & this looks like a international standard. As usual I just blushed:)


I made a small quantity of caramel sauce as I had only 1/2 cup of whipped cream left in the fridge. The cake was well balanced & tasted yumm. This is a must try for all chocolate lovers. This is how I made it.

Ingredients:
  • 250gms Cream Cheese (I used local Cream Cheese )
  • 1 cup powdered sugar
  • 1 cup melted semi sweet chocolate
  • 1 cup Milk
  • 100 gms Agar agar powder or 1.5 Tbsp gelatine
  • 1/2 cup warm water
  • 10- 15 digestive biscuits
  • 50 gms Butter
 
Method:
  1. Crush the Digestive Biscuits in the Mixer. Add 50 gms of butter to this powdered biscuits & make a base in a cake tin 8 0r 9 inch (square/round mold or spring form pan). I made a high base till it reaches half way of the tin. You can choose to make a short base.
  2. In an electric beater beat the cream cheese, sugar, melted chocolate & milk to a smooth mixture.
  3. Add 100 gms of agar agar to 1/2 cup hot water & stir continuously so no lumps are formed. Now microwave this mixture for 30 seconds & mix it well to remove any lumps from them. Set this aside to cool down.
  4. Once cooled, Pour in this mixture to the cream cheese mixture & mix well. Pour this into the mold & chill this in the freezer for an hour or in the fridge to set for 5 to 8 hours.
  5. After an hour remove the cheese cake mixture & pour the caramel sauce on top of the cake evenly. Now put this back in the freezer for about 15 to 20 mins to set.
  6. After its set a little, remove the cake out & top it up with the thick rich chocolate ganache. Now put it back in the fridge & not freezer this time. Cover the cake with a silver foil or cling wrap & refrigerate it for at least 2 hours to set well.
  7. Now the cheese cake is ready to serve.


(My cake piece did not come out clean coz I cut it immediately once it was out from freezer. Please wait for the cake to stay in room temperature for some time & only then cut it to get clean pieces.)


Caramel Sauce:
  • 1 cups granulated sugar
  • 2 Tbspn unsalted butter
  • 1/2 cup heavy whipping cream
  • 1/4 tspn salt
Directions:

  1. First, make sure you have all of the ingredients ready. Once you start the caramel sauce you have to pay close attention so you don't burn it.
  2. Heat the sugar over medium high-heat in the saucepan. When the sugar starts to melt, start whisking the sugar. The sugar will clump up, but keep whisking. It will continue to melt. When the sugar is melted, stop whisking. You can swirl the pan to move the sugar around.Continue cooking the sugar until it reaches a deep amber colour. Make sure you watch the pan very closely. This is where it is easy to burn the caramel.
  3. As soon as the sugar reaches the dark amber colour, carefully add the butter & salt. Whisk until butter is melted.
  4. Remove the pan from the heat and slowly pour in the heavy cream. Whisk until cream is incorporated and caramel is smooth.
  5.  Let the caramel sauce cool  &once cooled, Pour the caramel into a air tight box and refrigerate it. You can store the salted caramel sauce in the refrigerator for about a month.

Thick Chocolate ganache
  • 1 cup dark chocolate chips
  • 1/4 cup heavy cream
  • 3 Tbspn of sugar
  • Pinch of salt.
Directions:
  1. Bring the cream to a boil along with sugar & salt. Now add in the chocolate chips into the hot cream & wait until all the chocolate is melted. Once it is cooled a little, use it on the cake immediately. If you allow it to cool down completely the chocolate will become hard & crumbly.


Sunday, 14 July 2013

Mutton Cutlet


Weekends are kept totally for family time & that's why you will rarely see any blog activities. When it comes to making friends, I am very choosy. I take some time, make friends only with people who are genuine & trustworthy. That's why I have very few friends & in Singapore its just a handful. We had a great time yesterday at one of my friends place who has recently moved into a new house. My friend's daughter & Zion are best friends. They both had the best times yesterday & it was so much fun watching them care for each other. Both of them were little crawling babies a year ago & never used to play with each other then. But now they both hold each others hands, run around & cant stay without each other. The only way I get Zion's attention or make him eat is by saying "Avni" will come now eat fast:) The moment I take her name Zion will start looking for her LOL:) Its the same at my friend's place, she takes Zion's name & feed her daughter. We Mom's find all possible ways to feed our kiddos.


Well coming back to today's post, This cutlet was made for Zion & that is why you will see that I have not added any green chilli's or more spices. We rarely eat red meat at home & I buy them only for Zion. My Mom makes the best Mutton cutlets & I can finish them in no time. Well in Singapore the Mutton doesn't taste good at all. I love the Mutton that we get in India. Best part of cutlets is that you can make it ahead of time & freeze them. Late you can fry them as &  when you want. Well this cutlet can be used for burgers as well. This is how I made these.

This was the platter I prepared for Zion


Cooking time: 45 mins
Makes around 10 - 12 cutlets

Ingredients:
  • 500 gms Mutton Mince
  • 2 Boiled Potatoes
  • 1 Tbspn ginger garlic paste
  • 1 onion chopped
  • 4 Tbsp chopped coriander leaves
  • 1/4 Tspn Coriander Powder
  • 1/4 Tspn cumin powder
  • Pinch of turmeric powder
  • 1/4 Tspn Cardamom powder
  • 1/4 Tspn Garam Masala powder
  • 1 Tbsp Lemon juice
  • 1 Tspn sugar
  • 1 egg slightly beaten
  • 1 cup bread crumbs
  • 1 Tbspn oil
  • Some oil for shallow frying
  • Salt as per taste
Directions:
  1. Mash the boiled potatoes & set aside.
  2. In a heavy bottom Pan , add oil fry Mutton Mince until the water is drained off. Now pour a cup of water & cook it on low flame for about 15 to 20 mins or until the mutton is done. If the meat is not tender, then pressure cook until 2 whistles.
  3. Once its cooked drain off any excess water & set aside to cool down
  4. In a pan add oil, fry ginger garlic paste for a 30 seconds, add in onions & fry them until they are translucent.
  5. Now add all the spices mentioned in the list give it a good mix. Combine the cooked Mutton mince, potatoes & season them with salt.
  6. Finally add the lemon juice, sugar & give them a good mix. Once the dish is well mixed garnish the dish with coriander leaves. Allow this to cool down for some time
  7. Now take a ball size mince mixture in your hand, dip them in the egg mixture & then coat them with bread crumbs around on all sides. Press the patty a little to get a flat round shape & set this aside.
  8. Heat a flat pan, add around 3 to 4 Tbspn of oil & pan fry these cutlets on both sides until they are golden brown or crispy. This should take around 3 to 4 minutes.

Note:
  • Since I made this for Zion, I dint add more spices. If yo are planning to make this for adults then add 1/2 tspn instead of 1/4 tspn of coriander, cumin & garam masala. Also add in 1/2 tspn of chili powder.
  • You need to make sure that no extra moisture is there in the mutton mince after cooking & same goes for Potatoes too.
  • If you feel that the Mutton mince after cooking with spices is still runny, add in some bread crumbs or corn flour into it. This will help the mince thicken.
  • Some people like to deep fry, if you want you can deep fry the cutlets too.
  • After coating the cutlets with bread crumbs, you can freeze this in a airtight container for weeks & use it whenever you need.